
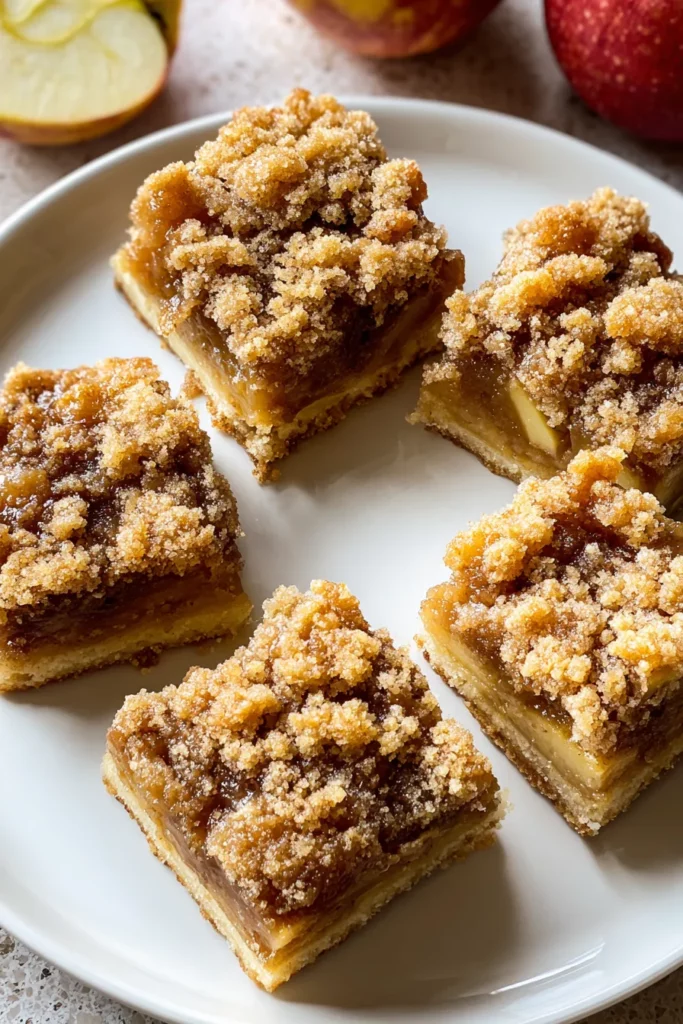
Every bite of these Apple Crisp Bars delivers a symphony of textures and flavors that feels like a cozy hug for your taste buds. With a buttery crust baked to golden perfection, tender cinnamon-kissed apple filling, and a crunchy crumb topping, these bars are the ultimate fall treat. They’re the kind of dessert bars that sit beautifully on a casual weekend gathering table, charming both kids and grandparents alike. Savor the perfect balance of sweet and tart with these irresistible Apple Crisp Bars! As a passionate home cook, I love how this recipe transforms simple pantry staples into a crowd-pleasing classic—no fancy equipment required, just a dash of enthusiasm and a willingness to get your hands a little buttery.
Beyond just a tasty indulgence, these bars are a breeze to make. This beginner-level recipe takes just 20 minutes of hands-on prep, then spends 40 to 45 minutes baking in the oven, followed by a 30-minute rest. You’ll end up with 12 generous servings, each one around 250 calories—a pretty fair trade for so much homemade goodness! Whether you’re looking for an easy apple dessert to impress at a potluck or a cozy snack to pair with your afternoon coffee, these bars hit every mark. The combination of sweet, soft apples and that satisfyingly crumbly topping is practically irresistible, and once you taste them warm from the oven (or even at room temperature), you’ll be planning your next batch before the last one disappears.
To make these apple crisp bars shine, choosing the right ingredients is key. Each component plays a special role in building the flavors and textures that make this dessert so comforting and crave-worthy. From the structure provided by the flour to the vibrant zing of lemon juice, here’s what you need and why each one matters:
Let’s walk through the process of turning these key ingredients into a batch of mouthwatering Apple Crisp Bars. This step-by-step guide will help you master each stage, from mixing the dough to cutting the bars into perfect squares.
1. Preheat your oven to 375°F (190°C) and line a 9x13 inch baking dish with parchment paper, leaving some overhang on the sides for easy removal later.
2. In a large mixing bowl, combine the flour, granulated sugar, brown sugar, baking powder, salt, ground cinnamon, and ground nutmeg. Stir well to blend all the dry ingredients evenly.
3. Using a pastry cutter or your clean fingertips, cut the cold butter into the flour mixture until it resembles coarse crumbs. The butter pieces should be pea-sized, ensuring a flaky texture.
4. Crack the egg into the bowl and mix gently until the dough starts to come together. It will still be crumbly—that’s exactly how it should look.
5. Press about two-thirds of the dough mixture firmly into the prepared baking dish to form an even crust layer. Reserve the remaining dough for the topping.
6. In another bowl, combine the sliced apples, lemon juice, vanilla extract, additional flour, granulated sugar, brown sugar, and ground cinnamon. Toss until the apples are evenly coated in the spiced mixture.
7. Spread the apple filling evenly over the crust, creating a level layer of fruit.
8. Sprinkle the reserved dough mixture evenly over the apple layer, taking care to cover most of the fruit for a crunchy top.
9. Bake in the preheated oven for about 40–45 minutes, or until the topping turns a deep golden brown and the apples are fork-tender.
10. Allow the bars to cool completely in the pan on a wire rack. Once cooled, lift them out using the parchment paper overhang and cut into bars.
When it comes to sharing these Apple Crisp Bars, a thoughtful presentation can take them from tasty to truly unforgettable. Whether you’re serving them at a casual family dinner or a festive gathering, pairing and garnishing ideas can highlight the warm spices and tender fruit in each square. Here are some favorite ways to serve them, each enhancing the experience in its own delightful way. Don’t shy away from experimenting with textures and flavors—these bars are a versatile canvas for sweet treats and seasonal accents.
Whether you’ve made a big batch for a party or simply want to enjoy these Apple Crisp Bars over several days, proper storage is key to keeping them as delicious as day one. The balance of moist apples and crunchy topping can be preserved with the right technique, ensuring you’ll enjoy consistent flavors and textures whenever you reach for a bar. Here are some tried-and-true methods to store them safely and maintain that irresistible crisp-meets-tender quality.
What began as a handful of simple, pantry-friendly ingredients has transformed into a show-stopping dessert that’s as versatile as it is delicious. From the careful choice of sweet and tart apples to the harmonious blend of spices in both the crust and filling, these Apple Crisp Bars are proof that beginner-level baking can produce professional-tasting results. You’ll love how the buttery base, tender fruit layer, and crumbly topping come together in each satisfying bite. Whether you’re baking for a casual afternoon snack, a festive holiday spread, or simply craving an easy apple dessert, this recipe delivers every time. Feel free to print this article and tuck it into your recipe binder or bookmark it online—you’ll want to make these bars again and again.
Remember, you can find a FAQ section below for common questions about ingredient swaps, troubleshooting, and variations to suit your tastes. If you give this recipe a try, I’d love to hear how it turns out: leave your comments, questions, or feedback about the process and the flavors. Did your family ask for seconds? Did you experiment with different apple varieties or toppings? Drop your thoughts and let’s keep the conversation going—baking is more fun when we share tips, tricks, and tasty experiences together!
These Apple Crisp Bars feature a buttery crust topped with tender, cinnamon-spiced apples and a crunchy crumb topping. Perfect for sharing and satisfying any sweet tooth!

I’m Sophia Montgomery, your guide and fellow food enthusiast on this delicious journey. As a home cook with a deep love for creating meals that bring people together, I started this blog to share my passion for simple, flavorful, and heartwarming dishes