
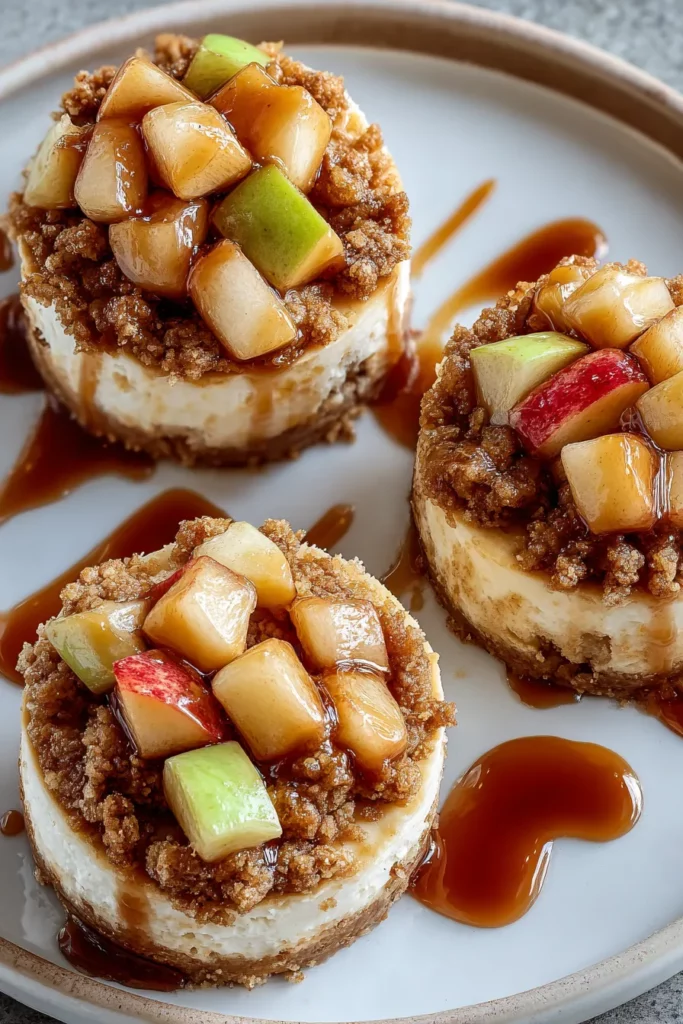
Creamy layers of cheesecake nestled atop a buttery, graham cracker crust meet tender, cinnamon-spiced apples and a golden, oat-studded crumble in these Apple Crisp Mini Cheesecakes. Each bite is a symphony of textures—silky smooth filling, slightly crunchy base, juicy fruit, and a crisp top that offers the perfect staccato to the luscious middle. Whether you’re winding down after a busy day or planning a festive fall gathering, these bite-sized desserts are bound to bring smiles and requests for seconds.
They’re perfectly portioned so you can serve a crowd without the fuss of slicing a large cheesecake, and they hold their shape beautifully for potlucks, holiday dinners, or cozy weekend treats. With every mouthful, you’ll notice a hint of vanilla in the cheesecake, the warmth of cinnamon on the apple bite, and the rich, buttery undertones that tie everything together. Best of all, these petite delights can be made ahead, letting you relax while they chill to creamy perfection in the fridge.
Before we roll up our sleeves and get baking, let’s spotlight the core components that make these mini cheesecakes shine. Each ingredient plays a unique role, from the crisp foundation to the sweet, fruity layer and crunchy topping.
Provide a sturdy yet tender base with a hint of honeyed flavor. These crumbs compact into a crust that holds up to the creamy filling without getting soggy.
Balances the tang of the cream cheese and complements the natural sweetness of the apples. It also helps bind the crust and topping together.
Enriches both the crust and crisp topping with a rich, golden flavor. Melted butter allows the crumbs and oats to clump together into a delightful textural contrast.
Forms the heart of the cheesecake layer. Softened to room temperature, it whips up into a smooth, tangy filling that’s the perfect foil for sweet apple bites.
Infuses the cheesecake filling with warm, aromatic notes. A little vanilla goes a long way toward enhancing the overall depth of flavor.
Act as the binding agents in the cheesecake, giving the filling structure and a silky mouthfeel. Beating them in one at a time ensures a uniform, lump-free creaminess.
Bring a tender, juicy element to the topping. Varieties like Granny Smith or Honeycrisp add a pleasant tartness or natural sweetness.
Adds that classic fall spice to both the apple layer and crisp topping, stirring memories of cozy kitchens and seasonal treats.
Helps the crisp topping hold its shape and develop that satisfyingly crunchy crumb. It lends just enough structure without weighing it down.
Contributes moisture and a subtle molasses note to the crumble, deepening the flavor profile and aiding in that golden color.
Give the crisp topping extra chew and a rustic appearance. Their hearty texture contrasts beautifully with the creamy filling.
Let’s walk through the steps to create these delightful mini masterpieces. From preheating the oven to chilling the finished bites, each phase is designed to ensure you end up with perfectly set, flavor-packed cheesecakes.
1. Preheat your oven to 325°F (163°C). Line a muffin pan with cupcake liners, pressing them into each well so they’re ready to cradle your crust and filling.
2. To make the crust, mix the graham cracker crumbs, sugar, and melted butter in a bowl until evenly moistened. Press about two tablespoons of the crumb mixture firmly into the bottom of each liner to form a compact base. Bake for five minutes, then remove and let the crusts cool slightly before adding the filling.
3. For the cheesecake filling, beat the softened cream cheese and sugar together in a mixing bowl until the mixture is smooth and free of lumps. Add the vanilla extract, then incorporate the eggs one at a time, mixing well after each addition to maintain a silky texture. Divide the cheesecake batter among the cooled crusts, filling each liner almost to the top.
4. In a skillet set over medium heat, melt the butter for the apple topping. Stir in the diced apples, sugar, and cinnamon. Cook until the apples soften and become fragrant, about five minutes. Spoon the apple mixture evenly over the cheesecake layer in each liner.
5. For the crisp topping, combine the flour, brown sugar, oats, melted butter, and cinnamon in a bowl. Mix with a fork or your fingers until coarse crumbs form. Sprinkle this crumble evenly over the apple layer on all the mini cheesecakes.
6. Bake the assembled mini cheesecakes for 20–25 minutes, or until the centers are just set and no longer jiggly. Remove from the oven and let them cool in the pan for ten minutes before handling.
7. Transfer the pan to the refrigerator and chill completely, about two hours. Serve these Apple Crisp Mini Cheesecakes chilled for the best texture and flavor.
When it’s time to serve these tasty treats, presentation and complementary flavors can elevate the experience even further. Whether you’re hosting a casual brunch or a formal dinner, these suggestions will help you showcase your mini cheesecakes in style.
Gently heat some store-bought or homemade caramel sauce until it’s pourable. Drizzle a thin ribbon of warm caramel over each cheesecake just before serving to accentuate the sweet and buttery notes.
Top each mini cheesecake with a small swirl of freshly whipped cream and a light sprinkle of ground cinnamon. The airy cream adds a soft contrast to the denser cheesecake body.
Chop a handful of pecans or walnuts and lightly toast them in a dry skillet. Scatter the nuts over the crisp topping for an extra layer of roasty flavor and crunch.
Serve alongside a cup of strong coffee or an espresso shot. The bitter notes of the coffee harmonize beautifully with the sweet, creamy layers and warm spices.
Proper storage is key to preserving the textures and flavors of these mini desserts. With the right techniques, you can keep them fresh, moist, and ready to enjoy for days—or even weeks if you decide to freeze them.
Refrigeration is the most straightforward method. Place cooled cheesecakes in an airtight container or cover the muffin pan tightly with plastic wrap. Store in the fridge for up to 4 days, ensuring they stay chilled and maintain their firm, creamy filling.
If you’d like to keep them longer, you can freeze the cheesecakes. Arrange them on a baking sheet and flash-freeze for a couple of hours. Once solid, transfer to a freezer-safe bag or container. They’ll keep for up to 3 months. Thaw in the refrigerator overnight before serving.
For occasions when you need to transport them, pop them back into the muffin pan, tightly cover with plastic wrap, and carry in a sturdy container to prevent tipping. Keep them cool in an insulated bag if the event is far from home.
When you’re ready to enjoy, bring refrigerated or thawed cheesecakes to room temperature for about 15 minutes—this allows their flavors to open up fully without becoming too soft.
Thank you for joining me on this delicious journey through the world of Apple Crisp Mini Cheesecakes! From the buttery, crumbly crust to the luxuriously smooth cheesecake filling, tender cinnamon-kissed apples, and that golden, oat-studded crumble on top, every layer has been carefully designed to deliver a symphony of flavors and textures. These petite delights are as fun to make as they are to eat, and their adorable single-serve format makes them perfect for sharing—or keeping all to yourself. Whether you’re an experienced baker or a home cook looking to impress, this recipe invites you to celebrate the cozy flavors of fall in every bite.
Feel free to print this article and save it for later, tuck it into your recipe binder, or bookmark it on your device. You can also find a FAQ section below if you need quick answers or troubleshooting tips while you bake. I’d love to hear how your cheesecakes turn out, so please leave a comment with any questions, feedback, or personal twists you tried. Your experiences not only help fellow home cooks but also bring a sense of community to our virtual kitchen. Happy baking, and I can’t wait to read about your Apple Crisp Mini Cheesecake adventures!
These Apple Crisp Mini Cheesecakes are a delightful combo of creamy cheesecake, sweet apples, and a crunchy topping, making every bite a sensational treat. Perfectly portioned for sharing or enjoying solo!

I’m Sophia Montgomery, your guide and fellow food enthusiast on this delicious journey. As a home cook with a deep love for creating meals that bring people together, I started this blog to share my passion for simple, flavorful, and heartwarming dishes