
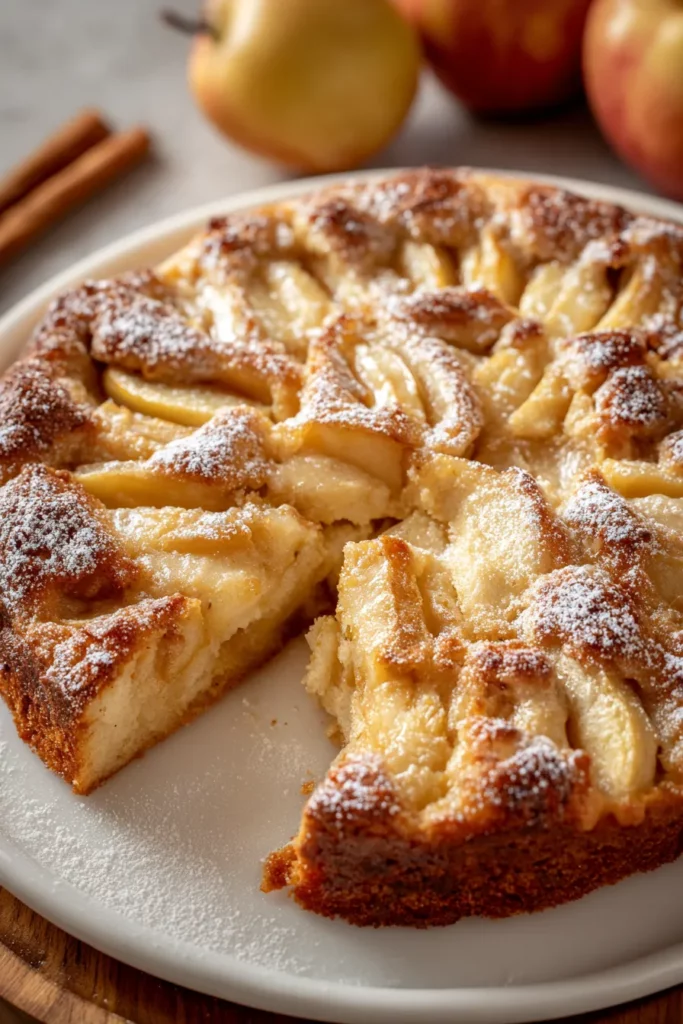
There’s nothing quite like pulling a slice of Apple Pie Cake out of the oven after it’s spent its time transforming into something golden and fragrant. This treat is a scrumptious blend of cake and classic apple pie, bursting with flavor and nostalgia! Each bite delivers tender ribbons of cinnamon-kissed apple nestled in a moist, buttery cake that practically melts on your tongue. Whether you’re looking for a heartwarming dessert to share with loved ones or a cozy afternoon snack with a cup of tea, this easy recipe has you covered from start to finish. With just a handful of pantry staples and simple kitchen tools, you’ll be on your way to creating a beginner-friendly masterpiece that tastes like it took hours of effort—but pleasantly surprises you with how straightforward it really is.
Over the years, I’ve seen this Apple Pie Cake become a fixture at potlucks, family gatherings, and impromptu weekend bakes. It’s truly the best of both worlds: the comforting familiarity of an apple pie with the soft, sliceable texture of a classic cake. If you’ve ever hesitated between baking a pie or a cake for fear of tricky crusts or intricate decorating, this recipe is your ticket to dessert bliss without the stress. From peeling and slicing crisp apples to swirling in hints of vanilla and warming cinnamon, every step feels like a mini celebration of fall flavors. With 20 minutes of prep, 45 minutes in the oven, and just a 10-minute rest before you can indulge, you’ll have a dessert that lives up to its 320-calorie-per-slice promise without skimping on taste or nostalgia.
Before diving into the baking adventure, let’s take a moment to appreciate the superstar ingredients that make this Apple Pie Cake so irresistible. Each component plays a crucial role in building layers of flavor, texture, and that signature tender crumb. From the apples that provide juicy pockets of sweetness to the flour and leavening agents that give structure, everything works in harmony to create a dessert you’ll want to make again and again.
Crisp, tart-sweet apple slices add moist pockets of fruit throughout the cake. They deliver natural juices and a slightly firm texture that contrasts beautifully with the soft crumb.
This versatile flour forms the structural backbone of the cake, ensuring it holds together while staying tender enough to highlight the fruit’s juiciness.
Sweetens the batter evenly and helps create a light, golden crust. It also balances the natural tartness of the apples.
Offers rich, creamy flavor and contributes to a soft, melt-in-your-mouth cake texture. Softened butter helps with aeration when creamed with sugar.
Act as binding agents, trapping air to help the cake rise and maintain its structure. They also add moisture and richness to the batter.
A leavening agent that provides lift, ensuring the cake is fluffy and evenly risen rather than dense.
Enhances overall flavor with warm, aromatic notes that complement the cinnamon and apples.
Introduces warm, spicy undertones that pair perfectly with the fruit, adding depth and a hint of autumn in every crumb.
Balances sweetness and intensifies other flavors, making the cake taste more vibrant and well-rounded.
Adds moisture to the batter, thinning it slightly for better mixing and a more tender crumb.
Keeps the apple slices from browning and adds a bright, subtle zing that lifts the sweetness.
Optional crunchy topping that provides texture contrast and a toasty, nutty flavor kick.
Let’s walk through the steps that transform these simple ingredients into a luscious dessert. From preheating your oven to slicing into that first warm piece, each step builds on the last to create a cake that’s equal parts tender and flavorful. Whether you’re a baking novice or a seasoned pro looking for an easy crowd-pleaser, these instructions will guide you to sweet success.
1. Preheat your oven to 350°F (175°C) and grease a 9-inch round cake pan. This ensures even baking and makes it easier to remove the cake once it’s done.
2. In a medium bowl, toss the sliced apples with the lemon juice and set aside. The citrus prevents browning and adds a refreshing, subtle tang.
3. In a large mixing bowl, cream together the butter and sugar until light and fluffy. This step incorporates air, which helps your cake rise beautifully.
4. Beat in the eggs one at a time, followed by the vanilla extract, mixing well after each addition. Taking your time here prevents the batter from curdling and ensures a smooth texture.
5. In a separate bowl, whisk together the flour, baking powder, cinnamon, and salt. This dry mix distributes the leavening agent and spices evenly throughout the batter.
6. Gradually add the dry ingredients to the wet mixture, alternating with the milk, beginning and ending with the flour mixture. Mix until just combined to avoid overworking the batter.
7. Gently fold in the apple slices, ensuring they are evenly distributed throughout the batter without breaking them apart.
8. Pour the batter into the prepared cake pan, smoothing out the top with a spatula for an even finish.
9. If desired, sprinkle chopped walnuts or pecans on top of the batter for a crunchy contrast.
10. Bake in the preheated oven for 40–45 minutes or until a toothpick inserted into the center comes out clean. The top should be golden brown and spring back slightly.
11. Allow the cake to cool in the pan for about 10 minutes before transferring it to a wire rack to cool completely. This resting time helps the cake set and makes slicing easier.
12. Serve warm or at room temperature for the best flavor and texture.
When it comes to enjoying Apple Pie Cake, there are so many delightful ways to elevate each slice. Whether you want to amplify the cozy fall vibes or add a contrasting chill to the warm cake, the following serving suggestions will take your dessert from delicious to downright unforgettable. Get ready to tempt taste buds and earn compliments from every guest, whether you’re hosting a brunch, an afternoon tea, or just indulging in a sweet moment on your own.
Serve a generous slice of cake straight from the oven alongside a scoop of creamy vanilla ice cream. The contrast between hot cake and cold ice cream creates a luscious flavor and temperature experience.
Elevate each bite by drizzling sticky, homemade or store-bought caramel sauce over the top. The rich, buttery sweetness pairs perfectly with cinnamon-spiced apples.
For a simple, elegant finish, lightly dust the cooled cake with powdered sugar. It adds a touch of visual appeal and a gentle sweetness without overwhelming the other flavors.
Top each slice with soft, freshly whipped cream, flavored lightly with a hint of vanilla or cinnamon. The airy cream complements the cake’s density and highlights its cozy spices.
Proper storage is key to keeping your Apple Pie Cake tasting fresh and flavorful, whether you plan to savor it over a couple of days or freeze extras for another time. A good storage strategy preserves moisture, prevents the apples from drying out, and maintains that soft crumb that makes this dessert so special. Here are a few proven methods to ensure every bite tastes just as heavenly as the first.
Once the cake has fully cooled, wrap it tightly in plastic wrap or place it in an airtight cake carrier. Store at room temperature for up to three days, ensuring the cake remains soft and the apples stay juicy.
If you need to keep the cake beyond three days, transfer it to the refrigerator in an airtight container. The cooler environment slows down moisture loss and prevents spoilage for up to five days.
For longer storage, cut the cake into individual slices, wrap each piece tightly in plastic wrap, then place them in a resealable freezer bag. Freeze for up to two months. Thaw at room temperature or in the fridge before serving.
When you’re ready to enjoy refrigerated or frozen cake, briefly warm slices in the oven at 300°F for 5–10 minutes or in the microwave for 15–20 seconds. This refreshes the texture and brings back that just-baked aroma.
Thank you for joining me on this delightful baking journey through the layers of tender apples and buttery cake that make up this beloved Apple Pie Cake. We’ve explored everything from selecting crisp apples and creamy butter to mastering the art of gentle folding and perfect baking times. With a modest 20-minute prep, 45 minutes in the oven, and a short rest, you’ll have a dessert that’s both comforting and impressive—ideal for beginners and seasoned bakers alike. Remember, this cake falls under the beginner difficulty level, making it an excellent first project for those new to baking. It’s the perfect course as a dessert, bringing warmth and nostalgia to any table.
Feel free to print this article and save it for your recipe collection, so you can revisit these instructions and tips whenever a craving strikes. You can also scroll down to find a FAQ section where I’ve answered common questions about substitutions, troubleshooting, and more. If you give this Apple Pie Cake a try, I’d love to hear your thoughts! Drop a comment below, share your feedback, or let me know if you have any questions as you bake your way to this irresistible creation. Happy baking and may every slice bring joy, comfort, and a taste of cozy memories!
This Apple Pie Cake features tender slices of apple enveloped in a moist, buttery cake, topped with a hint of cinnamon and optionally crunchy nuts. Perfect for any occasion!

I’m Sophia Montgomery, your guide and fellow food enthusiast on this delicious journey. As a home cook with a deep love for creating meals that bring people together, I started this blog to share my passion for simple, flavorful, and heartwarming dishes