
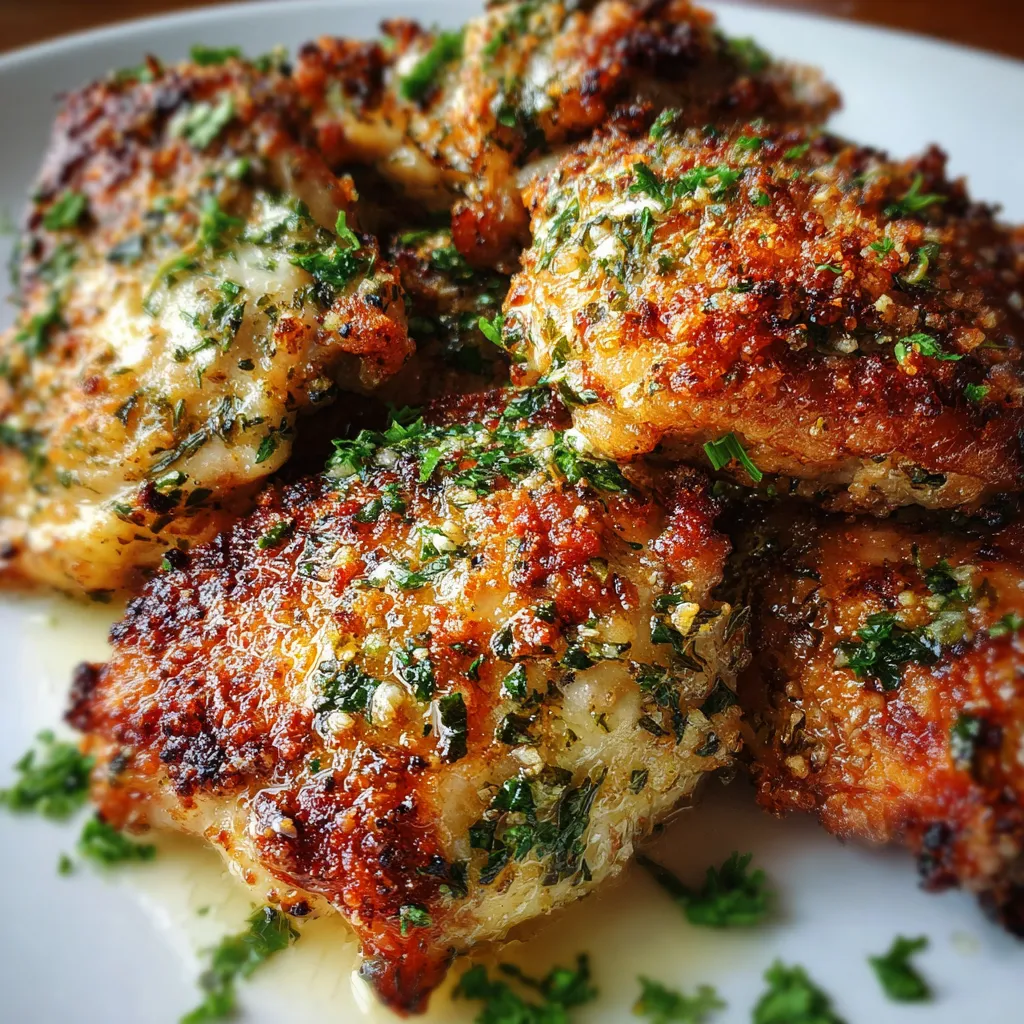
Crispy Parmesan Herb-Crusted Chicken Thighs Garlic Butter is the ultimate midweek delight that transforms simple chicken thighs into a golden, crunchy feast. With juicy meat cloaked in savory Parmesan, fragrant herbs, and a shimmering garlic butter sear, each bite crackles with flavor and texture. Whether you’re hosting a cozy dinner or craving comfort food, this fuss-free method and show-stopping crust will have you hooked. Dive in to master that perfect golden-brown finish and impress everyone at the table!
Let’s gather everything you need for that irresistible crust and succulent interior.
This recipe combines a quick stovetop sear in garlic-butter with an oven finish to lock in juiciness and crisp up the Parmesan-herb crust. You’ll season and coat the thighs, sear them skin-side down for that instant crunch, then bake until perfectly cooked. Let’s break it down step by step:
1. Preheat oven to 425°F (220°C).
2. Pat chicken dry with paper towels and season evenly with salt and black pepper to ensure maximum crisp.
3. In a shallow dish, combine Parmesan cheese, panko breadcrumbs, oregano, basil, thyme, and garlic powder to create your flavorful crust mix.
4. Drizzle olive oil over each thigh and rub to coat both sides—this helps the crumbs cling.
5. Press each piece of chicken into the breadcrumb mixture, ensuring an even crust on all surfaces.
6. In a large ovenproof skillet, melt butter over medium heat, add minced garlic, and cook until fragrant, about 30 seconds.
7. Place chicken skin side down in the skillet and cook until golden brown and crisp, about 4 to 5 minutes.
8. Flip chicken, transfer skillet to the oven, and bake until internal temperature reaches 165°F, about 15 to 20 minutes.
9. Remove chicken from oven and let rest for 5 minutes before serving topped with chopped parsley.
This chicken shines on its own, but pairing it thoughtfully elevates every bite. Consider these four perfect accompaniments:
Nailing that golden, crunchy coating takes just a few insider tricks. Follow these friendly pointers for an unbeatable crust and juicy interior:
Letting the coated chicken rest ensures the crumbs adhere before searing, while using the right pan and reheating method keeps everything crisp—even on day two.
Keeping that perfect crunch and buttery flavor doesn’t end at the table. Here’s how to preserve leftovers for days without losing any quality:
Here are answers to the most common queries to keep your cooking smooth and stress-free:
From start to finish, plan for about forty minutes. This includes ten minutes to pat the chicken dry, season, and press it into the breadcrumb mixture, five minutes of searing in garlic butter on the stovetop, up to twenty minutes in the oven until the internal temperature reaches 165°F, and a final five-minute resting period before serving.
Yes, you can substitute boneless, skinless thighs, but reduce the oven time by five to six minutes and watch that the internal temperature still reaches 165°F. Without the skin, the crust won’t have as much natural fat for searing, so you may want to add an extra teaspoon of olive oil or butter when coating and searing to help the crust adhere and develop a golden color.
If you don’t have panko, use an equal amount of finely crushed cornflakes or regular dried breadcrumbs combined with a teaspoon of melted butter or olive oil. Crushing cornflakes gives extra air pockets that mimic panko’s texture. Make sure to press the chicken firmly into your replacement to create an even coating before searing for maximum crispiness.
Ensure the chicken skin is dry and lightly oiled before pressing into the breadcrumb mixture. Let the coated chicken rest for about ten minutes at room temperature so the crumbs adhere. During searing, gently place each piece skin side down without sliding it around. Once it develops a golden crust, you can flip confidently without losing much of the coating.
Yes. Substitute one tablespoon of chopped fresh oregano, basil, and thyme in place of the dried herbs. Mix with the Parmesan and panko just before coating. Fresh herbs release more moisture, so pat them slightly dry or add a pinch of extra breadcrumbs if the mixture feels too wet.
Reheat in a preheated oven or toaster oven at 400°F for about eight to ten minutes on a wire rack set over a baking sheet. This method circulates hot air around the chicken, reviving the crust without steaming it and preventing sogginess.
Cool the chicken completely, then place it in an airtight container and refrigerate for up to three days. For longer storage, wrap each piece individually in foil or plastic wrap before placing them in a freezer bag and freeze for up to one month. Always thaw overnight in the refrigerator before reheating using the oven method above.
This recipe brings together the magic of a buttery garlic sear and a Parmesan-herb crust that holds onto every juicy drop of thigh meat. The cast iron skillet technique creates that restaurant-level crunch right at home, while the simple breadcrumb mix is endlessly adaptable. Feel free to print and save this article for dinner inspiration, and drop a comment if you give it a try or have any questions. Your feedback fuels the next delicious adventure!
Juicy chicken thighs get a savory coat of Parmesan, herbs, and garlic, then crisped in golden butter for a mouthwatering finish that crackles with each bite.

I’m Sophia Montgomery, your guide and fellow food enthusiast on this delicious journey. As a home cook with a deep love for creating meals that bring people together, I started this blog to share my passion for simple, flavorful, and heartwarming dishes