
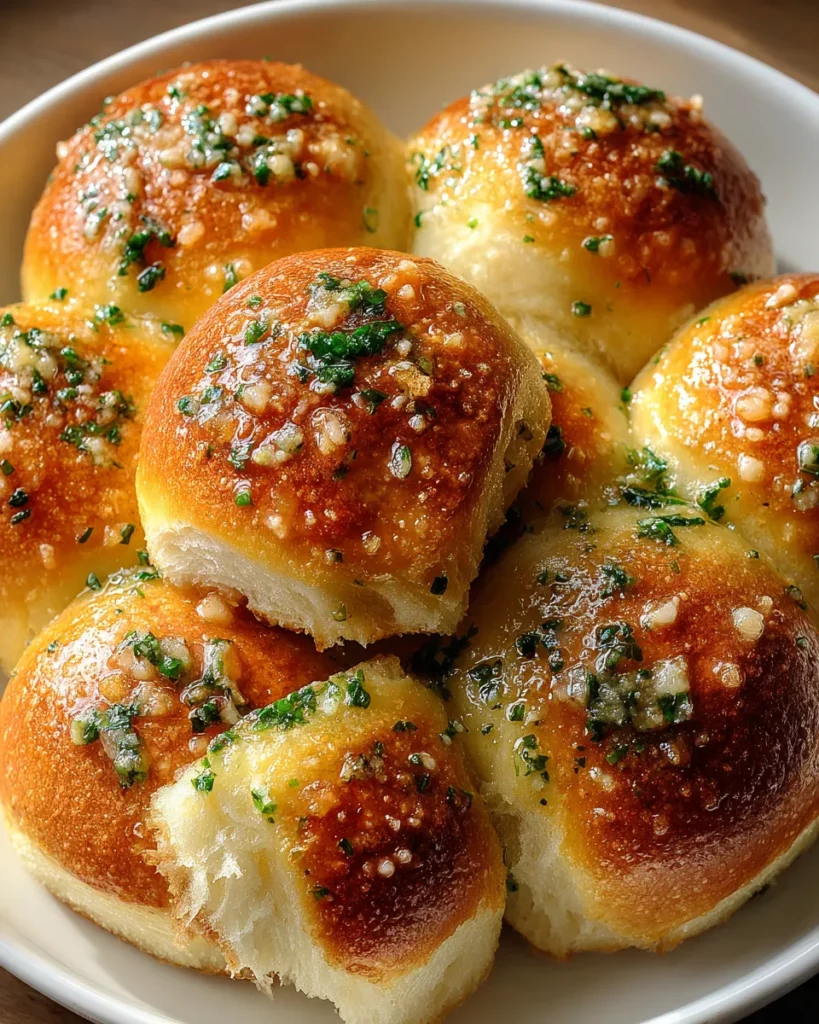
If there’s one thing that transforms a simple weeknight dinner into an irresistible experience, it’s a batch of homemade garlic butter bread rolls. Fluffy, golden dinner rolls infused with savory garlic butter create a perfect harmony of texture and taste, making every meal feel like a celebration. These rolls start with a soft dough that rises to double in size in just a couple of hours, creating delicate pockets that trap rich butter and fragrant garlic in each bite. The tops bake to a light crisp that gives way to a pillowy interior, ideal for sopping up hearty soups or adding a buttery finish to any savory dish. This easy bread recipe is beginner-friendly and a fantastic introduction to homemade bread making. Pull one apart soon after it emerges from the oven, and you’ll notice steam rising in gentle billows carrying hints of parsley and mellow garlic. Every household deserves this delightful loaf, and once you taste these garlic rolls fresh from your own kitchen, you’ll never look at store-bought butter rolls the same way again.
I still remember the first time I tackled these dinner rolls in my own kitchen. I had gathered all the ingredients—softened butter, minced garlic, fresh parsley, and warm milk—and felt a little daunted by the idea of kneading dough. But as my wooden spoon gave way to my hands dusted with flour, kneading quickly became therapeutic. In no time, the dough turned silky smooth, and I tucked it away to rest under a clean towel. When it doubled in size, I couldn’t resist pinching off a piece and tasting the raw dough (no judgment, it’s a baker’s right!). Once they emerged golden brown with a glossy sheen, I brushed on even more garlic butter, and the kitchen filled with an almost irresistible fragrance that drew everyone to the table. Now, whenever I welcome friends over for a cozy dinner party or simply unwind with a good book, these butter rolls make an appearance. Slathered with a little extra garlic butter and sprinkled with flaky sea salt, they taste even more indulgent. Their soft crumb and crisp golden crust deliver a texture contrast that pairs beautifully with everything from creamy pastas to vibrant green salads. So if you’re looking to level up your comfort food game, these garlic butter bread rolls are your ultimate go-to.
Every outstanding loaf starts with a handful of simple, high-quality ingredients. These staples work together to give you fluffy homemade bread that’s rich, buttery, and packed with garlic flavor. From the structure-building flour to the aromatic parsley, each element plays a vital role in creating irresistible dinner rolls that keep everyone coming back for seconds.
Now that we’ve covered the essentials, let’s roll up our sleeves and dive into the step-by-step process. These instructions will guide you through activating the yeast, developing a smooth dough, and transforming clumps of ingredients into irresistible dinner rolls. Follow along closely and embrace the simple joys of mixing, kneading, and watching your creations rise.
1. In a small bowl, combine the warm milk, sugar, and active dry yeast. Allow it to sit for about 5–10 minutes until it becomes frothy, indicating that the yeast is activated.
2. In a large mixing bowl, combine the all-purpose flour and salt. Create a well in the center and add the melted butter, egg, and the yeast mixture.
3. Mix the ingredients together until a dough starts to form. Transfer the dough onto a lightly floured surface and knead it for about 5–7 minutes or until it becomes smooth and elastic.
4. Place the dough into a greased bowl, cover it with a clean kitchen towel, and let it rise in a warm place for 1–2 hours, or until it has doubled in size.
5. While the dough is rising, prepare the garlic butter mixture. In a small bowl, combine the softened butter, minced garlic, chopped parsley, and a pinch of garlic powder if desired. Set aside.
6. Once the dough has risen, gently punch it down to release any air bubbles. On a floured surface, divide the dough into 12 equal portions and shape each portion into a ball.
7. Arrange the dough balls in a greased 9×13 inch baking dish, making sure to leave some space between each roll for expansion.
8. Cover the dish with a clean kitchen towel and let the rolls rise again in a warm place for about 30–45 minutes, or until puffy.
9. Preheat your oven to 350°F (175°C).
10. After the second rise, brush the garlic butter mixture generously over the tops of the rolls.
11. Bake in the preheated oven for 20–25 minutes or until the rolls are golden brown and cooked through.
12. Remove from the oven and brush any remaining garlic butter over the rolls before serving.
When you pull these golden beauties from the oven, it’s time to think about the perfect accompaniments. Whether you’re hosting a casual family dinner or elevating a special occasion meal, these rolls are supremely versatile. Their buttery crumb and garlicky finish pair beautifully with everything from creamy soups to rich pasta sauces. Serve them warm to highlight their soft texture and allow the garlic butter to glisten invitingly on top. Don’t be afraid to get creative—dinner rolls are your canvas. You can slice them for sandwiches, pull them apart for sharing, or even present them in a pull-apart style with layers of cheese tucked between each piece. No matter how you serve them, these garlic butter bread rolls are bound to steal the spotlight and bring smiles all around the table.
These rolls are ideal for dunking into rich tomato bisque, creamy potato leek, or chunky minestrone. Their soft interior soaks up every last drop, making each spoonful even more satisfying.
After arranging the rolls in the baking dish but before the second rise, insert small cubes of mozzarella or cheddar between the balls. Bake as directed for gooey, shareable fun.
Balance a fresh green salad tossed with vinaigrette by serving a warm roll on the side. The contrast between crisp greens and tender, buttery bread is divine.
Slice each roll horizontally and fill with roasted chicken, melted cheese, or grilled veggies. These mini sandwiches are perfect for parties and make snacking feel elevated.
Once you’ve enjoyed your first round fresh from the oven, you might wonder how to keep these garlic butter bread rolls tasting just as delightful later. The key is to maintain moisture while preventing the rolls from becoming stale or soggy. Depending on how quickly you plan to eat them, there are a few reliable storage methods. Each one helps preserve that soft crumb, buttery richness, and garlicky flavor so you can savor these homemade rolls for days—or even weeks—without losing any of their appeal.
Store cooled rolls in an airtight container or resealable bag for up to 2 days. Place a clean paper towel inside to absorb any excess moisture and keep the crust from becoming too soft.
For storage up to 5 days, wrap each roll tightly in plastic wrap or foil before placing them in the fridge. Gently reheat in a 300°F (150°C) oven for 5–7 minutes to restore that fresh-baked warmth.
After shaping the dough into balls, place them on a baking sheet lined with parchment, freeze until solid, then transfer to a freezer-safe bag. When you’re ready, thaw, let them complete the second rise, brush with garlic butter, and bake as directed.
Cool baked rolls completely, then wrap individually in plastic wrap and foil. Freeze for up to 1 month. Reheat in a 350°F (175°C) oven for 10–12 minutes straight from the freezer for a warm, fresh experience.
Cooking should be as joyful as it is rewarding, and these garlic butter bread rolls capture that spirit perfectly. We’ve walked through every detail—from assembling simple pantry staples and activating the yeast to kneading a smooth dough, letting it rise, and finishing with a generous coat of garlicky butter. You’ve learned how to create fluffy, golden rolls that make every meal feel special, whether you’re serving them alongside a bowl of soup or transforming them into pull-apart cheesy delights. You now have a complete, beginner-friendly guide to mastering these dinner rolls and treating your family or guests to a homemade bread experience that rivals any bakery.
Feel free to print this article and save it for later use—this recipe is destined to become a staple in your recipe collection. You can also find a FAQ below to help answer any lingering questions about technique, ingredients, or storage. I’d love to hear how your rolls turned out! Please leave a comment, share your own tips, or ask any questions if you need help. Happy baking, and here’s to countless cozy meals made all the better with warm, buttery garlic bread rolls straight from your oven.
Warm, soft, and aromatic, these garlic butter bread rolls melt in your mouth. Infused with rich flavors and perfect for sopping up sauces or enjoying on their own!

I’m Sophia Montgomery, your guide and fellow food enthusiast on this delicious journey. As a home cook with a deep love for creating meals that bring people together, I started this blog to share my passion for simple, flavorful, and heartwarming dishes