
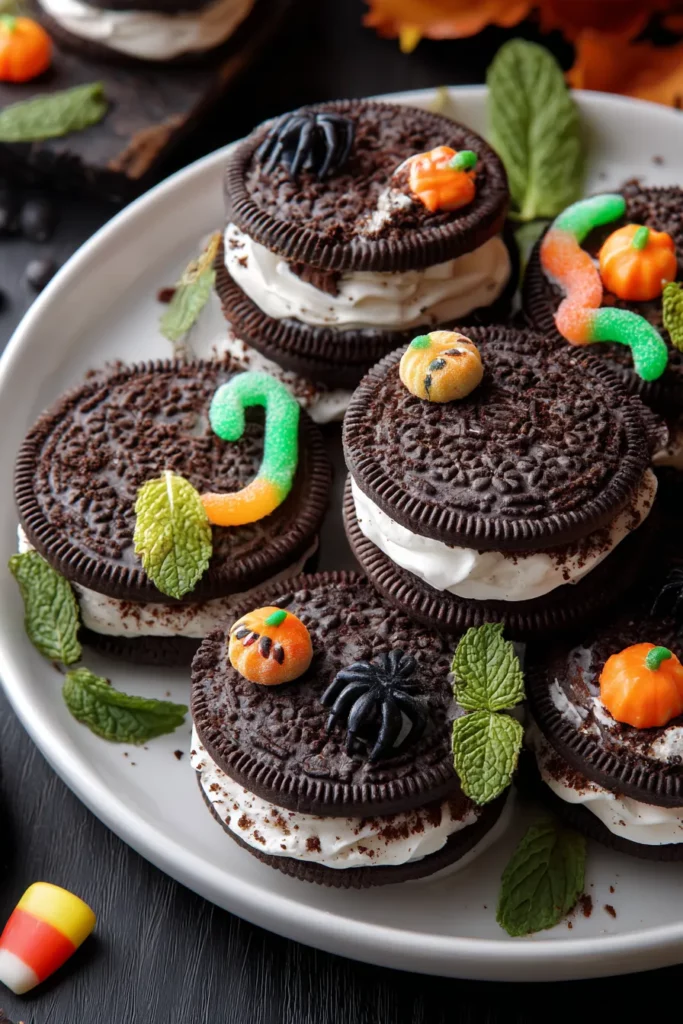
There’s something irresistibly playful about Halloween Dirt Dessert, a sweet creation that turns ordinary pudding into a wonderland of chocolatey mischief. Layers of crushed chocolate sandwich cookies give it that delightfully crumbly “dirt” texture, while rich instant pudding brings a silky, indulgent twist. Toss in a handful of gummy worms wriggling on top, and you’ve got a spooky treat that doubles as a conversation starter at any fall gathering. This dessert is perfect for busy hosts: it requires just a few pantry staples, a quick 15 minutes of assembly, and a little chill time in the fridge. By the time your guests arrive, the flavors have melded into a luscious, cohesive snack that’s both fun and satisfying.
I still giggle remembering my kids’ faces when they first dug their spoons into this dessert, uncovering gummy critters buried beneath the dark cookie “soil.” It’s beginner-friendly, with no baking required—ideal if you’re juggling costumes, decorations, and party playlists. Whether you’re treating trick-or-treaters or hosting a cozy family night, this dirt dessert hits the sweet spot between nostalgia and novelty. With just 350 calories per serving, eight eager mouths can dive in without a trace of guilt. And if you’re feeling adventurous, you can swap the chocolate pudding for pumpkin spice or vanilla for a festive twist.
Every memorable dish starts with quality components. For this Halloween Dirt Dessert, each ingredient plays a crucial role, joining forces to create that hauntingly delicious contrast of smooth pudding and crunchy cookie crumbs. Here’s what you’ll need:
These iconic cookies—think Oreos—are the backbone of our “dirt.” When crushed, they form the crumbly, cocoa-rich base and top layer, adding just the right amount of crunch.
A quick way to achieve deep chocolate flavor and creamy consistency. This mix thickens in minutes, giving us that luscious, smooth pudding layer.
Essential for whisking into the pudding mix. Using cold milk helps the pudding set to the perfect velvety texture, making it easy to layer.
Thawed whipped topping, like Cool Whip, lightens the pudding mixture, introducing a fluffy, airy quality that contrasts beautifully with the crunchy crumbs.
These colorful, chewy critters bring a playful horror vibe. They add texture and fun, making each bite a delightful surprise.
Think candy pumpkins, edible spiders, or orange-and-black sprinkles. These extras amp up the festive factor and personalize your dessert.
A pop of bright green adds a refreshing contrast and a hint of herbal freshness to the rich chocolate layers.
Let’s dive into how these components come together. Follow each step carefully to layer and assemble this spooky sensation:
1. Crush the Cookies: Place the chocolate sandwich cookies in a zip-lock bag and use a rolling pin to crush them into fine crumbs. Alternatively, pulse them in a food processor until they resemble dirt. Reserve a small portion for garnishing the top.
2. Whisk the Pudding: In a medium bowl, combine the instant chocolate pudding mix and cold milk. Use a whisk to beat for about 2 minutes until the mixture thickens noticeably. Let it rest for a few minutes to fully set.
3. Fold in Whipped Topping: Once the pudding is firm, gently fold in the whipped topping with a rubber spatula. Stir carefully until everything is smoothly combined and creamy.
4. Create the First Layer: In a clear serving dish or individual cups, add a layer of the chocolate cookie crumbs to form the base “dirt.”
5. Add Pudding Layer: Spoon a generous layer of the pudding mixture over the crumbs, smoothing it evenly with the spatula.
6. Repeat Layering: Alternate another layer of cookie crumbs and another layer of pudding until you fill the dish or run out of ingredients.
7. Top with Reserved Crumbs: After the final pudding layer, sprinkle the saved cookie crumbs on top to perfect that “freshly tilled” look.
8. Decorate with Gummy Worms: Arrange gummy worms so they appear to be crawling out of the dirt. Add any optional Halloween decorations for extra flair.
9. Chill Before Serving: Place the dessert in the refrigerator and chill for at least 1 hour. This resting time allows flavors to meld and the dessert to set firmly.
Serving this dirt dessert is half the fun, and with a little creativity, you can elevate its spooky charm even further. Whether you’re hosting a big bash or a small family get-together, presentation matters just as much as flavor. Before scooping out that first bite, consider the mood and setting—dim the lights, line up pumpkins, and perhaps spill a few gummy worms for a cheeky touch. To help you serve like a pro, here are a few spirited ideas:
Serve each guest their own clear plastic cup layered with dirt dessert. Garnish with a mini chocolate spoon stuck into the dessert—it’s elegant, mess-free, and perfect for mingling.
Assemble the dessert in one large shallow dish. Drizzle edible black gel icing over the top and scatter gummy spiders or worms—not just on top but crawling down the sides—for maximum spooky impact.
Right before serving, lightly dust the surface with edible Halloween-themed glitter or shimmer powder. The subtle sparkle catches the candlelight and looks enchanting on every slice.
Offer small mugs of spiced hot chocolate or pumpkin spice latte alongside the dirt dessert. The creamy warmth of the drink complements the cool, creamy layers, creating a cozy fall pairing.
Storing your Halloween Dirt Dessert properly ensures that every scoop remains as delightful as day one. Because this treat is a combination of creamy pudding and crunchy crumbs, you’ll need to protect its texture from moisture or freezer burn. Here’s how to keep it fresh, flavorful, and ready for any late-night cravings:
Cover the dessert dish tightly with plastic wrap or transfer portions into sealable containers. Store in the refrigerator for up to 2 days to maintain the creamy consistency and prevent the crumbs from getting soggy.
If you want to preserve maximum crunch and visual appeal, store gummy worms and edible decorations in a separate airtight bag. Add them just before serving to ensure they look bright and delicious.
For make-ahead convenience, spoon the layered dessert into freezer-safe cups. Seal each cup and freeze for up to 1 month. Thaw in the refrigerator for several hours before serving, then add fresh gummy worms on top.
Because the pudding contains dairy, leaving the dessert out at room temperature can compromise food safety and texture. Always keep it chilled until moments before serving.
Crafting this Halloween Dirt Dessert has been a whirlwind of sweet memories, from crushing cookies to scouting out the perfect gummy worms that peek mischievously from their chocolatey tomb. We’ve covered every step, ingredient, and technique, making this guide ideal whether you’re a seasoned home cook or someone trying their first no-bake recipe. With just 15 minutes of prep and an hour of chill time, you can surprise your guests (or little goblins) with a dessert that’s as fun to make as it is to eat. Feel free to print this article and save it for later—keep it in your Halloween recipe binder or tuck it into your party planning folder for foolproof holiday entertaining.
Remember, you can easily switch things up with different pudding flavors or decorative touches. Want a lighter crunch? Try crushed graham crackers. Craving a spiced note? Swap in pumpkin pudding or sprinkle a dash of cinnamon. The possibilities are endless. Check out the FAQ below for tips on ingredient substitutions and troubleshooting. If you try this recipe, I’d love to hear how it turned out! Share your thoughts, ask questions, or leave feedback on any part of the process. Your experiences and suggestions help make our kitchen adventures even more collaborative and delicious. Happy haunting—and happy baking (or chilling)!
The layers of chocolatey goodness and crunchy cookie crumbs create a delightful contrast. Adorned with gummy worms and festive decorations, it's sure to impress and satisfy all ages.

I’m Sophia Montgomery, your guide and fellow food enthusiast on this delicious journey. As a home cook with a deep love for creating meals that bring people together, I started this blog to share my passion for simple, flavorful, and heartwarming dishes