
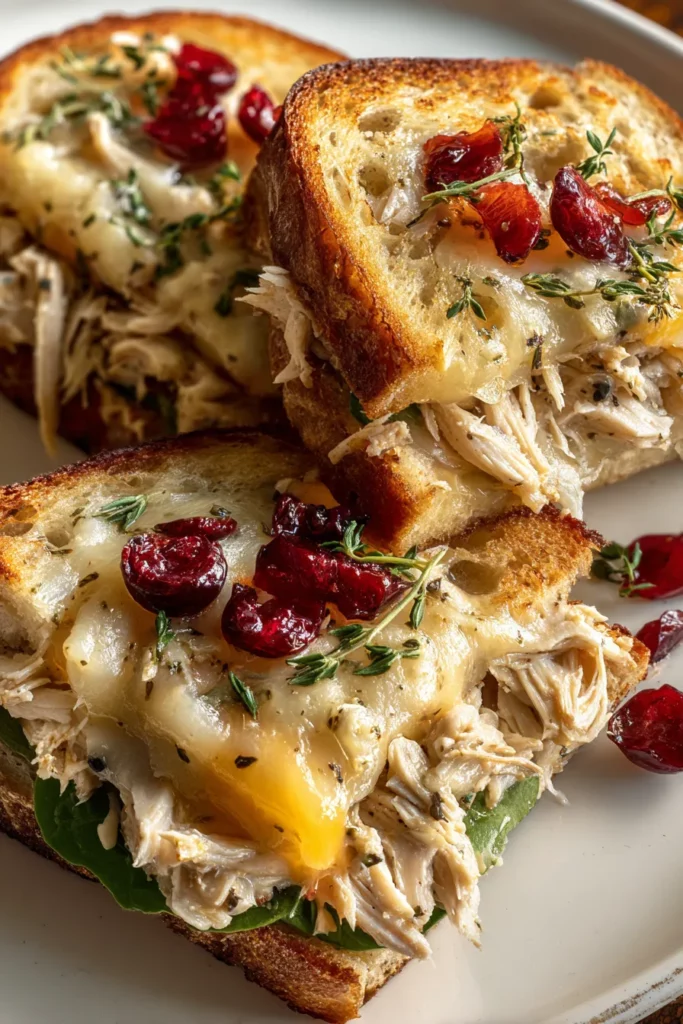
Leftover Turkey Melts are the ultimate comfort upgrade when you’re staring down at holiday remnants in the fridge. This friendly sandwich combines tender, shredded turkey with the gooey goodness of melted cheese, all snuggled between golden, butter-toasted bread. There’s something deeply satisfying about biting through a perfectly crisp crust and hitting that warm, juicy center. Whether you’ve just hosted a big family dinner or you snagged an extra turkey from a festive celebration, these melts make sure nothing goes to waste. They are as easy as they are delicious, letting you transform simple components into a lunch or dinner dish that feels like a cozy treat.
What makes these melts especially fantastic is how accessible they are for cooks at any skill level. Classified as a Beginner-friendly recipe, it demands just 10 minutes of prep, 8 minutes of cooking, and a short 5-minute rest before you indulge. Plus, at roughly 450 calories per sandwich, they’re hearty enough to satisfy a hungry crowd without leaving you overly stuffed. Packed with savory turkey, melted Swiss or cheddar cheese, and optional pops of fresh tomato or leafy greens, these sandwiches strike the perfect balance of cheesy, savory, and bright. And for that final flourish, you can serve them alongside tangy cranberry sauce or chutney, adding a zesty contrast that turns each bite into something truly memorable.
To bring these melts to life, you only need a handful of kitchen staples and a few holiday extras. Each ingredient plays its part in building layers of flavor, texture, and visual appeal that make this sandwich sing.
Tender, shredded turkey forms the hearty base of this sandwich. Its mild flavor soaks up the mayo-mustard spread and pairs beautifully with melty cheese, making every bite moist and satisfying.
Choose your favorite sturdy loaf—sourdough or ciabatta recommended—to hold up under cheese, turkey, and butter. A good-quality bread ensures a golden crust and prevents sogginess.
These cheeses melt effortlessly, creating a luscious, gooey layer that binds the turkey and bread together. Swiss offers a nutty tang, while cheddar adds a sharper bite.
This creamy binder adds moisture and richness, ensuring the sandwich doesn’t dry out. It also helps the Dijon mustard adhere evenly to the bread.
A touch of tangy kick balances the richness of the mayo and cheese. Dijon mustard cuts through the flavors, providing a subtle heat and depth.
Applied to the outside of the sandwich, butter deep-fries each side in the skillet, delivering a custardy, golden-brown crust that locks in all the fillings.
Juicy tomato rounds bring a fresh, acidic note that lightens the richness. They add color and a burst of garden-fresh flavor.
A handful of leafy greens introduces crispness and a hint of peppery bite, complementing the turkey’s mild profile.
Essential for seasoning the turkey and drawing out natural flavors, these staples ensure every element is perfectly balanced.
This sweet-tart condiment elevates the sandwich with its bright contrast, making each bite more dynamic and festive.
Before diving into the steps, gather all your ingredients and set up an assembly station. The process is straightforward: you’ll create a tangy spread, layer cheese and turkey, add any fresh veggies, then grill each sandwich to golden-brown perfection. The key is controlling your skillet heat and being generous with butter for that irresistible crust.
1. In a small bowl, mix the mayonnaise and Dijon mustard until fully combined. Use a rubber spatula to ensure a smooth, even consistency.
2. Spread the mayo-mustard mixture evenly on one side of all four slices of bread, coating the entire surface for balanced flavor.
3. On the unspread side of each slice, place a slice of Swiss or cheddar cheese. Press gently so the cheese adheres to the bread.
4. On two of the slices, layer the shredded turkey on top of the cheese. Sprinkle salt and pepper lightly over the turkey to enhance its natural taste.
5. If you like a fresh, vibrant crunch, add tomato slices and a handful of spinach or arugula directly over the turkey layer.
6. Cap each open-faced sandwich with the remaining bread slices, ensuring the cheese side faces down toward the turkey.
7. Place a skillet over medium heat and allow it to warm thoroughly. Meanwhile, spread butter on the top surface of each assembled sandwich.
8. Gently place the sandwiches butter-side down into the hot skillet. Listen for that satisfying sizzle—that’s the butter crisping the bread!
9. Cook for about 3–4 minutes without moving the sandwich, until the bottom turns a rich golden brown. While it cooks, spread more butter on the newly exposed top side.
10. Carefully flip each sandwich using a spatula, then cook for another 3–4 minutes until the second side is golden and the cheese has fully melted.
11. Remove the melts from the skillet and let them rest for a few minutes. Slice in half on the diagonal and serve warm. For an extra flourish, serve alongside a small bowl of cranberry sauce or chutney for dipping.
When you’re ready to share these gooey, toasty delights, presentation and pairings can take your meal to the next level. Whether you’re hosting friends for a casual lunch or enjoying a laid-back family dinner, these serving ideas will help you showcase your leftover turkey masterpieces in style. Aim for contrasting textures, complementary flavors, and a colorful plate that tempts the eyes before the first bite.
Place a small ramekin of chilled cranberry sauce or chutney alongside the sandwich halves. The cold, tangy sweetness contrasts beautifully with the warm, savory melt.
Season baked or fried potato wedges with paprika and garlic powder. Their crunchy exterior adds a satisfying bite alongside the soft sandwich interior.
Toss mixed greens, cherry tomatoes, and thinly sliced red onion in a light vinaigrette. The bright, acidic dressing cuts through the richness of the cheese and butter.
Arrange sandwich halves overlapping on a rustic board, garnished with extra lemon wedges or sprigs of herbs. This casual, communal setup invites everyone to dig in.
If you happen to have any leftovers—or if you want to make these melts in advance—you’ll appreciate proper storage tips to keep them tasting fresh. The key is preserving the crispness of the bread and the meltiness of the cheese without letting the sandwich turn soggy or dry. While it’s always best to enjoy them fresh off the skillet, these guidelines will help your melts survive a night in the fridge or even longer in the freezer.
Let the sandwiches cool completely, then wrap each half tightly in plastic wrap or parchment paper. Seal them in an airtight container and store in the fridge for up to 3 days.
After cooling, wrap each sandwich half in foil, then place them in a freezer-safe bag. Label with the date and freeze for up to 2 months. Thaw overnight in the fridge before reheating.
Avoid the microwave if you can. Reheat at 350°F in a toaster oven or on a skillet over medium heat, flipping halfway through. This restores the golden-crisp exterior and melty interior.
If you value crisp bread, keep the turkey and cheese in a sealed container, and store buttered bread slices on the side. Assemble and grill when you’re ready to eat to maintain perfect texture.
We’ve taken you through every step—from pulling tender turkey off the bone to savoring that final, gooey bite of cheese—and shown you just how easy it is to reinvent holiday leftovers into something extraordinary. With just a handful of pantry staples and a few minutes at the stovetop, you can treat yourself to a warm, comforting meal that feels both familiar and exciting. The allocation of 10 minutes prep, 8 minutes cooking, and 5 minutes to rest makes this dish a fantastic go-to for those busy weekdays or cozy weekend lunches. As a beginner-friendly recipe, it welcomes cooks of all skill levels to explore creative tweaks—swap cheeses, toss in your favorite roasted vegetables, or experiment with artisan breads. The versatility shines through every layer: tangy Dijon mustard, creamy mayo, melty cheese, crisp greens, and optional bright tomato or tart cranberry sauce.
Feel free to print this article and save it in your recipe binder or bookmark it for later reference. You’ll find a handy FAQ section below to answer common questions about substitutions, reheating, and more. If you try the recipe, I’d love to hear how it turned out! Do you have questions about timing, ingredient swaps, or storage tips? Maybe you’ve discovered a new twist—drop your comments, share your feedback, or ask for advice in the comments section. This is your cooking community, and I’m here to help you every step of the way. Enjoy those Leftover Turkey Melts and happy cooking!
Packed with savory turkey, melted cheese, and your choice of fresh veggies, these turkey melts are a delicious way to enjoy your holiday leftovers.

I’m Sophia Montgomery, your guide and fellow food enthusiast on this delicious journey. As a home cook with a deep love for creating meals that bring people together, I started this blog to share my passion for simple, flavorful, and heartwarming dishes