
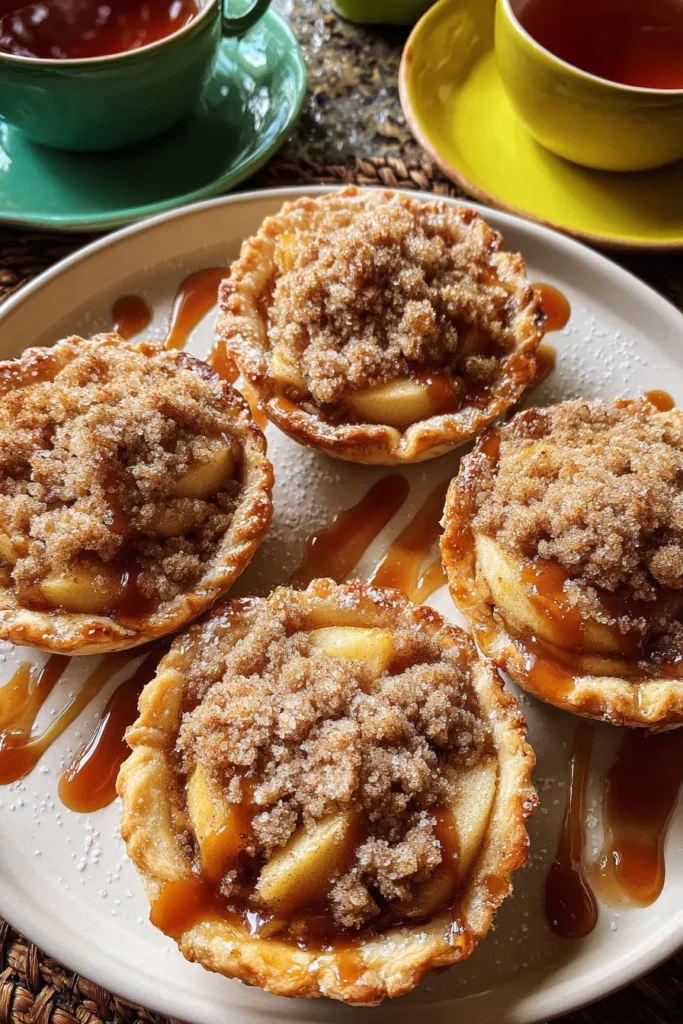
These Mini Dutch Apple Pies are the kind of treat that feels cozy and indulgent all at once. From the very first bite, you’ll experience a buttery, flaky crust giving way to tender, cinnamon-kissed apple slices. Each morsel brings forward the perfect balance of sweet and tart, with a delicate hint of nutmeg and vanilla dancing in the background. These little individual pies are ideal whether you’re hosting a gathering or simply craving a solo dessert that feels extra special. The process of making them is surprisingly straightforward, and that sense of accomplishment when you pull those golden gems from the oven...well, it’s simply unbeatable.
As you dive into the recipe, you’ll find that even beginner bakers can achieve bakery-worthy results. Gathering basic pantry staples and a handful of fresh ingredients, you’ll craft dough that chills into a tender, easy-to-handle disc before transforming it into perfect mini crusts. Meanwhile, the apple filling simmers with sugar, spices, and lemon juice until each slice is coated in a glossy, fragrant mixture. Topped off with a crispy oat-based crumb, these pies deliver a satisfying texture contrast that keeps you coming back for more. Whether you’re baking for family, friends, or treating yourself, these Mini Dutch Apple Pies are destined to become a beloved favorite in your recipe collection.
Every great recipe starts with quality ingredients that play specific roles in building flavor, texture, and structure. Here’s a breakdown of what you’ll need and why each element is essential for creating these irresistible mini pies:
The backbone of both the crust and the filling’s thickening agent. It provides structure, ensuring a tender yet sturdy pastry shell that holds up to juicy apple slices.
A small pinch highlights the flavors in the dough and balances the sweetness of the apple filling.
When chilled and diced, it’s cut into the flour to create flaky layers in the crust. When softened, it blends into the crumb topping for a rich, melt-in-your-mouth finish.
Helps bind the dough without melting the butter, preserving those flaky pockets that make the crust so delightful.
The star ingredient—firm, tart apples provide structure, while their natural juices infuse the filling with bright, fruity flavor.
Adds sweetness and encourages the apples to caramelize slightly as they bake.
Contributes a deeper, molasses-like sweetness and moisture to both the filling and the oat topping.
Warms up the flavor profile, pairing naturally with apples for that classic cozy taste.
Offers a subtle, aromatic depth that complements the cinnamon without overpowering it.
Balances sweetness with a bright pop of acidity and prevents the apple slices from browning.
Rounds out the flavors, adding a sweet, fragrant note that enhances both the fruit and the spice blend.
Creates a rustic, crunchy crumb topping that contrasts beautifully with the soft apple filling.
Used as an egg wash to achieve a golden-brown, glossy finish on the crust edges.
Before diving into each step, gather all your ingredients and tools so you can move seamlessly through the process. You’ll start by making a tender, flaky dough, then prepare the juicy, spiced apple filling and a crunch-tastic crumb topping. Finally, you’ll assemble and bake your pies, and enjoy the reward of warm, perfectly portioned apple desserts.
1. Preheat your oven to 375°F (190°C) and lightly grease a 12-cup muffin tin. Ensuring each cup is freshly greased will help the mini pies release effortlessly after baking.
2. In a large bowl, combine the flour and salt. Add the chilled, diced butter and cut in with a pastry cutter or two forks until the mixture resembles coarse crumbs with pea-sized pieces of butter still visible.
3. Gradually stir in the ice water, one tablespoon at a time, mixing just until the dough starts to come together. Avoid overworking to keep the crust tender.
4. Shape the dough into a smooth disc, wrap it tightly in plastic wrap, and refrigerate for at least 30 minutes. This rest time firms up the butter and hydrates the flour.
5. While the dough chills, prepare the apple filling by tossing the sliced apples with granulated sugar, brown sugar, cinnamon, nutmeg, lemon juice, flour, and vanilla extract until every slice is evenly coated.
6. In a separate bowl, mix the rolled oats, brown sugar, flour, and softened butter. Use your fingertips to combine until you achieve a coarse, crumbly topping.
7. On a lightly floured surface, roll out the chilled dough to about 1/8-inch thickness. Use a 4-inch round cutter or glass to cut circles, then gently press each piece into the muffin tin cups to form individual crusts.
8. Fill each crust with the prepared apple mixture, distributing it evenly among the cups.
9. Sprinkle the oat crumb topping over each filled crust, covering the apples generously.
10. Brush the crust edges with the lightly beaten egg for a beautiful golden finish. Bake for 20–25 minutes, or until the apples are tender and the topping is lightly browned. Let the mini pies cool in the tin for a few minutes before transferring to a wire rack. Serve warm or at room temperature.
When it comes to serving these Mini Dutch Apple Pies, the possibilities are endless. At first bite, the tender apples and crisp topping will steal the show, but pairing them with the right accompaniment can elevate the experience even further. Whether you’re hosting a cozy afternoon tea, a festive holiday gathering, or simply indulging on a quiet evening at home, presenting these pies with thoughtful garnishes and sides will make each serving feel like a celebration. Consider how contrasting textures—creamy, cold ice cream or smooth whipped cream—play off the warm, slightly tangy apple filling. A drizzle of sauce, a handful of nuts, or a sprinkle of spice can take a simple mini pie from delightful to downright unforgettable. Here are some of my favorite ways to serve these bites of autumnal bliss:
Proper storage ensures these mini delights stay as fresh and flavorful as the day you baked them. Whether you plan to enjoy them over the next few days or want to preserve them for a later treat, it’s all about controlling moisture and temperature. Make sure to let the pies cool completely before storing so that steam doesn’t create sogginess. From there, you can choose between room temperature storage, refrigeration, or even freezing to fit your needs. Replace any lids or covers after each serving to maintain that freshly baked taste. Here are a few tried-and-true methods for keeping your pies at their best:
These Mini Dutch Apple Pies bring together the best of fall flavors in a perfectly portioned, bite-sized package. From the moment you whisk together flour and chilled butter for that flaky crust, to the satisfying crunch of the oat-topped apples, every step is a journey worth savoring. You’ve learned how simple ingredients like tart apple slices, warm spices, and just the right amount of butter can transform into an unforgettable dessert. With detailed instructions on assembling, baking, serving, and storing, you now have a complete roadmap to bake these treats time and time again. Feel free to print this article or save it to your recipe box so it’s always on hand when you need a sweet pick-me-up or something special to share.
If you have any questions as you try out the recipe—whether it’s dough consistency, oven timing, or ingredient substitutions—please leave a comment below. I’d love to hear how your mini pies turned out, any twists you added, or tips you discovered along the way. Your feedback helps make this recipe even better and inspires others to bake along. Stay tuned for a FAQ section just below, where I’ll address common queries and troubleshooting tips to ensure your baking adventures are always a success. Happy baking!
Imagine biting into a warm, buttery crust filled with tender apples and a crispy crumb topping. These mini pies are easy to make and perfect for sharing—or not!

I’m Sophia Montgomery, your guide and fellow food enthusiast on this delicious journey. As a home cook with a deep love for creating meals that bring people together, I started this blog to share my passion for simple, flavorful, and heartwarming dishes