
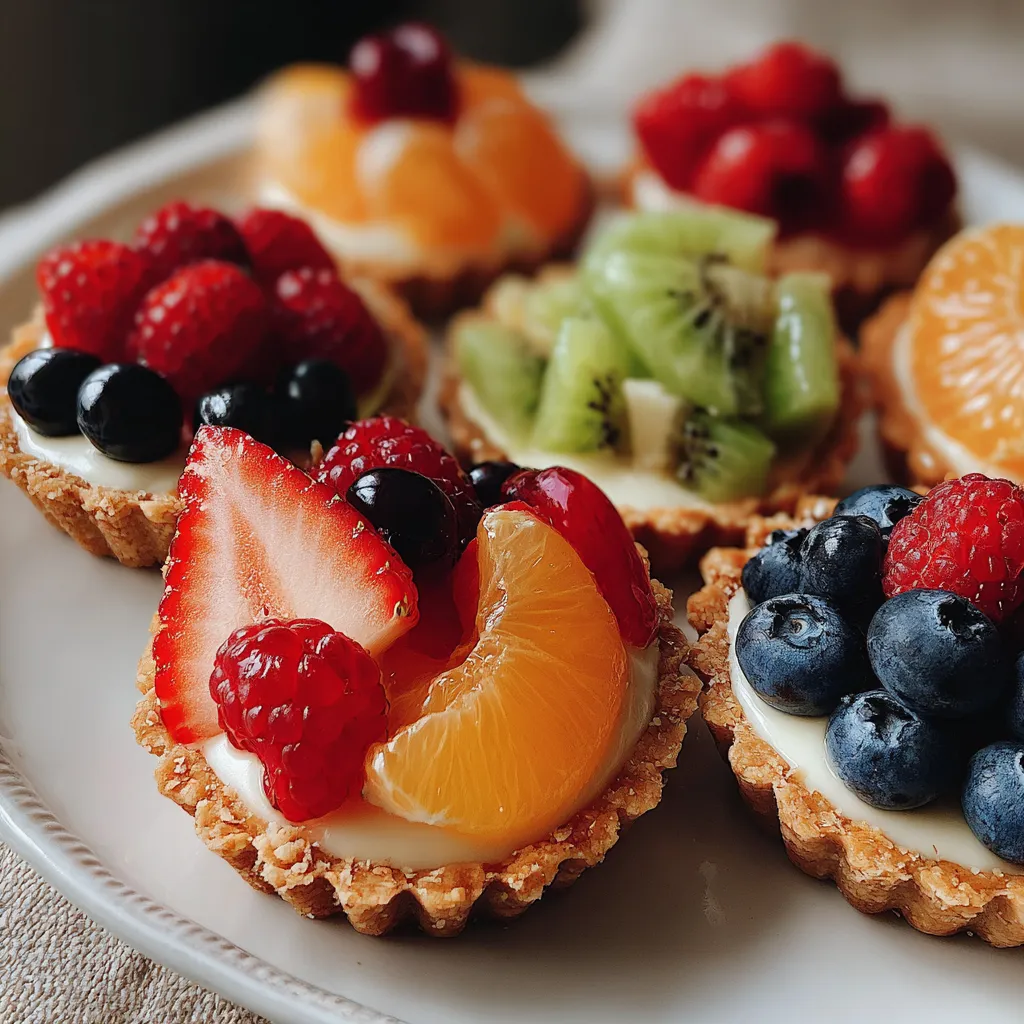
Crunchy mini shells cradle a velvety vanilla custard hiding beneath a vivid medley of berries and a shiny apricot glaze—Mini Fruit Tarts deliver big flavor in tiny bites. Whether you’re hosting a brunch, celebrating a special moment, or simply craving something sweet, these colorful jewels are sure to impress and satisfy anyone with a sweet tooth.
Before diving into the fun of assembly, let’s gather everything you need to create these bite-sized delights:
Crafting these adorable tarts is part science, part art—and totally rewarding. You’ll start by whisking and cooking a silky pastry cream, then chilling it until perfectly set. Once your cream is ready, piping it into crunchy shells and arranging fresh fruit on top becomes surprisingly meditative—and the final glossy glaze? Pure magic.
1. In a medium saucepan heat the milk over medium heat until it just begins to steam, then remove from heat to prevent scorching.
2. In a bowl whisk together the sugar, egg yolks, and cornstarch until completely smooth and pale, ensuring no lumps remain.
3. Gradually pour half of the hot milk into the egg mixture while whisking constantly to temper the yolks, preventing them from scrambling.
4. Return the tempered mixture to the saucepan and cook over medium-low heat, stirring constantly, until it thickens and comes to a gentle boil, about 2–3 minutes.
5. Remove from heat and stir in the vanilla extract and butter until fully incorporated and the custard is silky smooth.
6. Transfer the pastry cream to a bowl, cover the surface with plastic wrap to prevent a skin from forming, and chill in the refrigerator for at least 1 hour.
7. Once chilled, spoon or pipe the pastry cream into each mini tart shell until about three-quarters full, creating a neat base.
8. Arrange the sliced strawberries, kiwi, blueberries, and raspberries on top of the pastry cream in an attractive pattern, mixing colors for visual impact.
9. In a small saucepan warm the apricot jam and water over low heat until melted and smooth, then brush lightly over the fruit to create a shimmering glaze.
10. Chill the assembled tarts for 15 minutes before serving to ensure the glaze sets and flavors meld.
These charming tarts deserve a beautiful presentation and thoughtful pairings. Whether you’re serving guests or indulging solo, these ideas will elevate your mini fruit tarts to centerpiece status:
Creating picture-perfect tarts takes a few savvy moves. Follow these friendly hints to streamline prep and amp up flavor:
Keeping these tartlets at their peak involves a bit of planning and the right containers. With proper storage, you can prepare elements in advance and assemble with ease on the day you want to serve:
Here are quick answers to some of the most common Mini Fruit Tarts questions:
To achieve a smooth pastry cream, whisk the sugar, egg yolks, and cornstarch thoroughly before adding any hot liquid. When you pour the heated milk into the egg mixture, add it gradually while whisking constantly to temper the yolks. After returning the mixture to the saucepan, keep stirring over medium-low heat until it thickens and comes to a gentle boil. Continuous stirring prevents scorching and lumps, so scrape the bottom and sides of the pan as you cook.
Yes, you can make the pastry cream a day ahead. Once cooked, transfer it to a bowl, press plastic wrap directly onto the surface to prevent a skin from forming, and refrigerate for up to 24 hours. Before using, give it a gentle stir or whisk to restore its smooth texture, and if it has firmed too much, let it sit at room temperature for 10 to 15 minutes to soften.
Feel free to customize the tarts with any seasonal fruit you prefer. Peaches, mango slices, blackberries, or pomegranate seeds work beautifully. Just ensure your fruit is thinly sliced or small enough to sit neatly atop the cream. Choose firm, ripe fruit so it holds its shape and matches the sweetness of the pastry cream.
After glazing, place the tarts in a single layer in an airtight container and refrigerate. The assembled tarts are best enjoyed within 24 hours, as the crust may begin to soften over time. Keep them chilled until just before serving to maintain the crunch of the shell and the freshness of the fruit.
If your glaze is too thin, return it to the saucepan and simmer over low heat for an additional minute or two to reduce excess liquid. Alternatively, you can stir in a small pinch of cornstarch dissolved in water, heating until it thickens slightly. Cool just enough so it’s spreadable, then gently brush over the fruit.
While you can use 2% milk, whole milk provides a richer, creamier texture and fuller flavor. If you opt for a non-dairy substitute like soy or almond milk, expect a slightly thinner custard and a different taste profile. Coconut milk yields a luscious result but will impart a coconut flavor. Adjust sugar to taste if your alternative milk is sweeter or less creamy.
Fit a pastry bag with a plain round tip or simply snip the corner of a sturdy disposable bag. Hold the bag vertically over each shell and squeeze gently, filling to about three-quarters full. Move the bag slightly upward as the cream fills the shell to create an even base. If any spills occur, use a small offset spatula or clean finger to wipe the edges before adding fruit.
What sets these Mini Fruit Tarts apart is how they balance buttery crunch with pillowy custard and vibrant, juicy fruit—a flavor adventure in every bite! The glossy apricot glaze not only looks stunning but seals in freshness, while the petite size makes them irresistibly snackable. Feel free to print this recipe and keep it in your collection for those moments when you want to wow friends or treat yourself. Drop a comment below if you try them or have any questions—I’m here to help and would love to hear your feedback!
Crunchy shells cradle a silky custard base, while sliced strawberries, kiwi, blueberries, and raspberries form a rainbow of juicy sweetness, lightly glazed for shimmering color and added shine.

I’m Sophia Montgomery, your guide and fellow food enthusiast on this delicious journey. As a home cook with a deep love for creating meals that bring people together, I started this blog to share my passion for simple, flavorful, and heartwarming dishes