
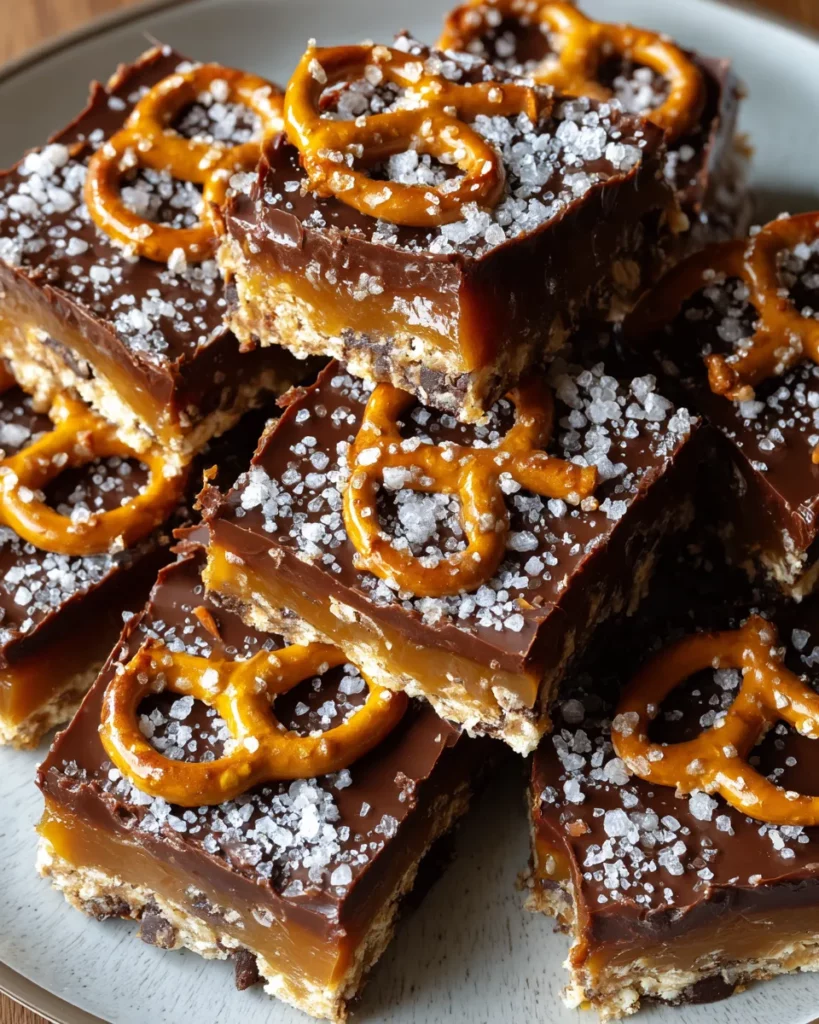
There’s something magical about uncovering a dessert that checks every box on your craving list—sweet, salty, crunchy, and oh-so-indulgent—without ever turning on the oven. These No-Bake Salted Caramel Pretzel Bars swoop in like the ultimate crowd-pleaser, bringing together a crunchy pretzel crust, a ribbon of homemade caramel, and a silky chocolate cap that sets in the fridge. As someone who prides herself on whipping up easy recipes in no time, I can’t get over how these bars hit all the right notes with just 20 minutes of prep, 10 minutes of stovetop magic, and a couple of hours of chilling. They’re beginner-friendly, yet impressive enough to serve at dessert tables, potlucks, or cozy nights at home. Trust me—once you taste that pinch of sea salt on top of the glossy chocolate, you’ll be hooked for life.
When I first made these bars for a backyard gathering last summer, I watched them disappear faster than I could sneak a second piece. My friends raved about the way the buttery pretzel base snaps against your teeth, how the caramel floods your taste buds with deep, rich brown sugar notes, and how the semi-sweet chocolate layer ties it all together in the best way possible. Every bite feels like a little celebration, and the contrast between textures keeps you coming back for more. Whether you’re a seasoned baker looking for a no-fuss treat or a busy parent who needs a quick sweet fix, these bars are guaranteed to become your next signature dessert.
Before we dive into the step-by-step magic, let’s get to know the stars of the show. Each of these ingredients plays a vital role in delivering that perfect balance of crunch, creaminess, and sweetness that makes these bars so irresistible.
Now that you’ve got your ingredients lined up and ready, let’s walk through how to transform them into a dreamy, layered dessert. This straightforward process ensures even beginners can achieve professional-looking bars with minimal fuss.
1. Line an 8x8-inch baking dish with parchment paper, leaving a generous overhang on two sides. This makes it effortless to lift the finished bars out when they’re set.
2. In a large mixing bowl, combine crushed pretzels and melted butter. Stir until each crumb is evenly coated in butter, ensuring your crust will hold together beautifully.
3. Transfer the pretzel-butter mixture into the lined dish. Use the back of a measuring cup to press firmly, creating a compact, even base that won’t crumble apart when you cut the bars.
4. Place a saucepan over medium heat and add brown sugar, granulated sugar, heavy cream, and butter. Stir frequently until the mixture comes to a rolling boil, taking care to scrape down the sides.
5. Once boiling, cook for 2–3 minutes without stirring. This step thickens the caramel, giving it that perfect slightly tacky texture.
6. Remove the pan from the heat and stir in vanilla extract and sea salt until the caramel is smooth and glossy.
7. Immediately pour the caramel over the pretzel crust, then use a spatula to spread it out into an even layer. Let it sit at room temperature for 15–20 minutes to cool and firm up slightly.
8. While the caramel chills, place semi-sweet chocolate chips in a microwave-safe bowl. Heat in 30-second intervals, stirring between each, until the chocolate is melted and silky smooth.
9. Once the caramel layer has cooled, pour the melted chocolate over it and gently spread to cover every inch.
10. Sprinkle a final pinch of sea salt on top of the chocolate for that extra burst of flavor.
11. Refrigerate the bars for at least 2 hours, or until the chocolate is fully set and the layers are firm.
12. Use the parchment paper overhang to lift the set bars from the dish. With a sharp knife, cut them into 16 squares or your preferred size, wiping the blade clean between cuts for neat edges.
Now comes the fun part: sharing these decadent bars with family and friends! Presentation and pairing can make all the difference, so let’s explore some creative ways to serve these sweet-and-salty bites.
Keeping these bars fresh is key to maintaining their crisp crust, chewy caramel, and glossy chocolate. Whether you’re saving leftovers or prepping ahead for an event, here are the best storage strategies to preserve flavor and texture.
Storing these bars in the refrigerator is ideal if you plan to enjoy them within a week. Place the cut pieces in an airtight container, layering parchment or wax paper between them to prevent sticking. Keep the container sealed and tucked away from strong-smelling foods to maintain that pure caramel-chocolate taste.
We’ve walked through everything you need to whip up a batch of these no-bake salted caramel pretzel bars, from understanding the key ingredients to mastering each layer, and even how to store and serve them with flair. As a beginner-friendly dessert that delivers maximum flavor with minimal effort, this recipe is perfect for busy weeknights, celebratory gatherings, or whenever you need a reliable sweet-and-salty treat on short notice. Remember that you can prep your crust, make the caramel, and melt the chocolate all within about 30 minutes of hands-on time, then let the refrigerator do the rest of the work while you socialize or unwind.
Feel free to print out this article and keep it in your recipe binder for future cravings, and don’t forget to save it somewhere handy. There’s also a FAQ section below if you have questions about substitutions, troubleshooting, or creative twists—so you’ve got all the support you need in one place. I’d love to hear how your bars turn out, any flavor variations you try, or any tips you pick up along the way. Drop a comment with your thoughts, questions, or mouthwatering photos once you dive into this sweet-and-salty adventure. Your feedback helps me make recipes even better and encourages our community of home cooks to keep exploring fun, easy desserts together. Happy no-baking!
Experience the perfect blend of salty and sweet with these decadent bars. Crunchy pretzel crust, rich caramel, and silky chocolate create a treat that’s downright addictive!

I’m Sophia Montgomery, your guide and fellow food enthusiast on this delicious journey. As a home cook with a deep love for creating meals that bring people together, I started this blog to share my passion for simple, flavorful, and heartwarming dishes