
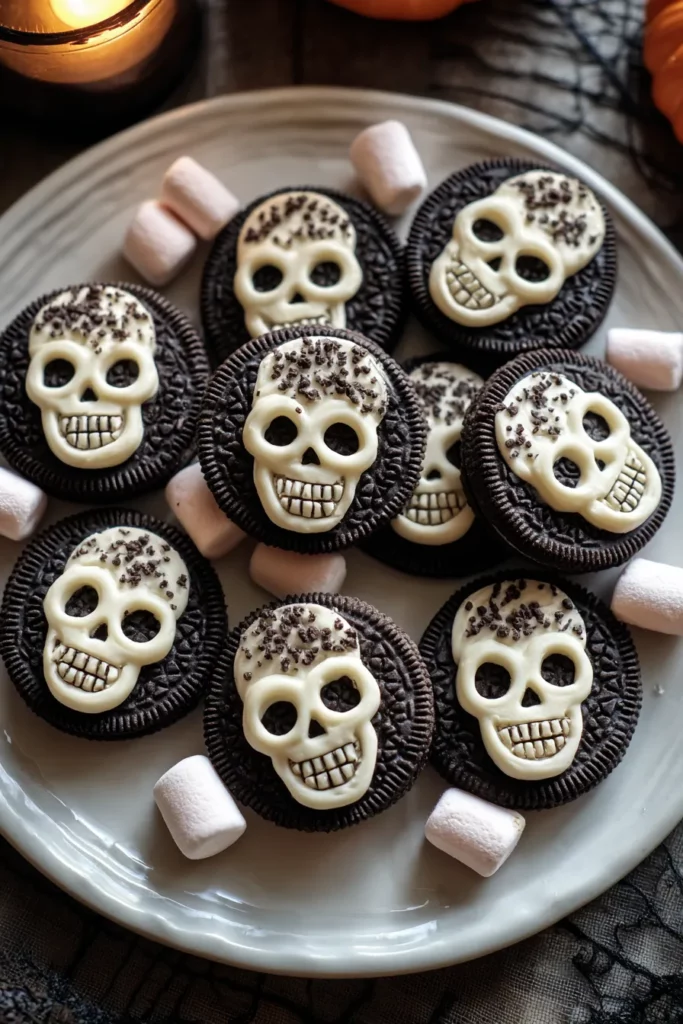
Spooky season is upon us, and what better way to celebrate than with a dessert that’s as fun to make as it is to eat? These Spooky Skeleton Oreo’s Halloween Dessert balls bring together the classic crunch of Oreo cookies, the silky tang of cream cheese, and the sweet luxury of white chocolate. Whether you’re hosting a haunted house party, helping little ghouls and goblins with a kitchen craft, or simply treating yourself to some festive indulgence, these bite-sized skeletons hit every note: creamy, crunchy, and delightfully spooky. Best of all, this recipe is tailor-made for beginners—no complicated techniques required, just a bit of chilling time and a dash of creative flair.
With 30 minutes of preparation, 10 minutes of “cooking” (melting chocolate!), and about 50 minutes of rest time, you’ll end up with 24 adorable skeleton bites at roughly 200 calories per serving. The combination of Oreo crumbs bound by softened cream cheese forms a dough that’s both sturdy and velvety in texture. Coating them in smooth white chocolate and decorating with mini marshmallow skulls and dark chocolate features adds flair and dimension—perfect for impressing friends and family. Pull on your favorite spooky apron, cue the Halloween playlist, and get ready to create hauntingly delicious Spooky Skeleton Oreo treats that are a perfect addition to your Halloween festivities!
Nothing makes a recipe come together like a well-stocked ingredient lineup. In this section, we’ll introduce each key player in our spooky dessert scene. From the foundation of crisp cookie crumbs to the finishing accents that bring our skeletons to life, every component has a role in delivering flavor, texture, and that unmistakable Halloween charm. Ready to dive into the pantry and start gathering your supplies? Let’s take a closer look at what you’ll need.
The iconic sandwich cookie provides the signature chocolatey crunch. Once crushed into fine crumbs, Oreos form the base of our dough, adding both flavor and structure.
This smooth, tangy binder creates a thick, pliable mixture when combined with Oreo crumbs. It ensures our balls hold their shape and adds a lovely, creamy contrast to the sweet chocolate.
Melted into a glossy coating, white chocolate transforms each Oreo ball into a ghostly skeleton canvas. Its sweet, buttery notes pair perfectly with the tang of cream cheese and the richness of the cookie.
These darker chips are melted down to create spooky facial features and rib patterns. Their slight bitterness balances the white chocolate’s sweetness and adds definition to each little skull.
Miniature clouds of sweetness become the perfect “skull” on top of each ball. Soft and spongy, they stick effortlessly to the warm coating before it sets.
Ready to bring these ghostly bites to life? In the next section, we’ll walk you through every step of the process, from crushing those cookies to decorating your cutest (or creepiest) skeleton faces. Grab your bowls and let’s get started on crafting a dessert that’s as much fun to assemble as it is to devour!
1. Begin by crushing the Oreo cookies into fine crumbs using a food processor or by placing them in a sealable bag and crushing with a rolling pin. Aim for a uniform texture so the crumbs bind easily with the cream cheese.
2. In a large bowl, mix the softened cream cheese with the crushed Oreo crumbs until well combined to create a thick dough-like mixture. Use a sturdy spatula or your clean hands to ensure every crumb is coated.
3. Shape the mixture into small balls, about 1 inch in diameter, and place them on a lined baking sheet. Make each ball as even as possible for consistent chilling and coating. Chill in the refrigerator for 30 minutes to firm up.
4. While chilling, melt the white chocolate baking chips in a microwave-safe bowl by heating in 30-second intervals and stirring in between until smooth. Be careful not to overheat to prevent seizing.
5. Dip each chilled Oreo ball into the melted white chocolate, ensuring they are fully coated. Gently tap or shake off any excess chocolate before placing them back on the lined baking sheet.
6. Before the white chocolate sets, take a mini marshmallow and press it gently onto the top of each Oreo ball to create the “skull” of the skeleton. The marshmallow should adhere easily if the chocolate is still warm.
7. Once all Oreo balls are coated, melt the semi-sweet chocolate chips in a microwave-safe bowl in 30-second intervals, stirring until velvety smooth.
8. Use a fork or a piping bag with a small tip to drizzle or draw the skeleton’s facial features and ribs over the white chocolate coating. Let your creativity flow—each skull can have its own personality!
9. Let the finished Oreo balls set completely; refrigerate for another 15–20 minutes if required to firm the chocolate.
10. Serve these deliciously spooky snacks on a festive platter for your Halloween gathering and watch them disappear before your eyes!
Once your Spooky Skeleton Oreo’s Halloween Dessert is assembled, presentation becomes the final spooky flourish. Whether you’re planning a large party or just indulging with a few friends, these skeleton bites shine brightest when given a little extra thought in how they’re served. From tabletop decor to pairing suggestions, a few creative touches can elevate these treats from simple cookie balls to a Halloween centerpiece that everyone will talk about. Let’s explore some fun and festive serving ideas to make your dessert spread truly unforgettable.
Proper storage ensures your Spooky Skeleton Oreo’s retain their charm and flavor long after the last trick-or-treater has left. Because these treats rely on cream cheese and chocolate, tackling temperature and moisture is key to keeping them pristine. From refrigerator tips to freezer tricks, this section covers everything you need to know about stashing your skeleton snacks until the next ghoulish gathering. Follow these guidelines so each bite remains as fresh as the day you made them.
From start to finish, these Spooky Skeleton Oreo’s Halloween Dessert balls capture the very essence of festive fun. We began by transforming familiar Oreo cookies and cream cheese into a pliable dough, then gave them ghostly garb with smooth white chocolate and miniature marshmallow skulls. A final drizzle of semi-sweet chocolate brought each skeleton’s personality to life, making them as entertaining to design as they are to devour. With beginner-friendly steps, minimal equipment, and ingredient substitutions that accommodate nut-free diets, this recipe is a versatile addition to your Halloween repertoire. Don’t forget: print out this article and save it for later use—you can jot down notes in the margins or circle your favorite decorating ideas. There’s even an FAQ section below if questions arise as you’re mixing, shaping, or chilling your spooky creations.
We’d love to hear how it goes when you try this recipe in your own kitchen. Did your skeletons end up grinning with goofy faces or sporting sinister scowls? Feel free to leave comments, share your decorating triumphs, or ask any questions if you hit a snag. Your feedback helps fellow home cooks conquer their fears of melted chocolate and marshmallow mishaps. Whether you’re a Halloween party veteran or a dessert-loving beginner, these little skeleton treats are guaranteed to bring smiles—and maybe a few happy shrieks—to your table. Let us know how you customize them, and here’s to making this season the most deliciously spooky one yet!
These spooky skeleton Oreo’s are a delightful mix of creamy, crunchy, and sweet, making them a perfect treat for Halloween gatherings. Fun to make and even more fun to eat!

I’m Sophia Montgomery, your guide and fellow food enthusiast on this delicious journey. As a home cook with a deep love for creating meals that bring people together, I started this blog to share my passion for simple, flavorful, and heartwarming dishes