
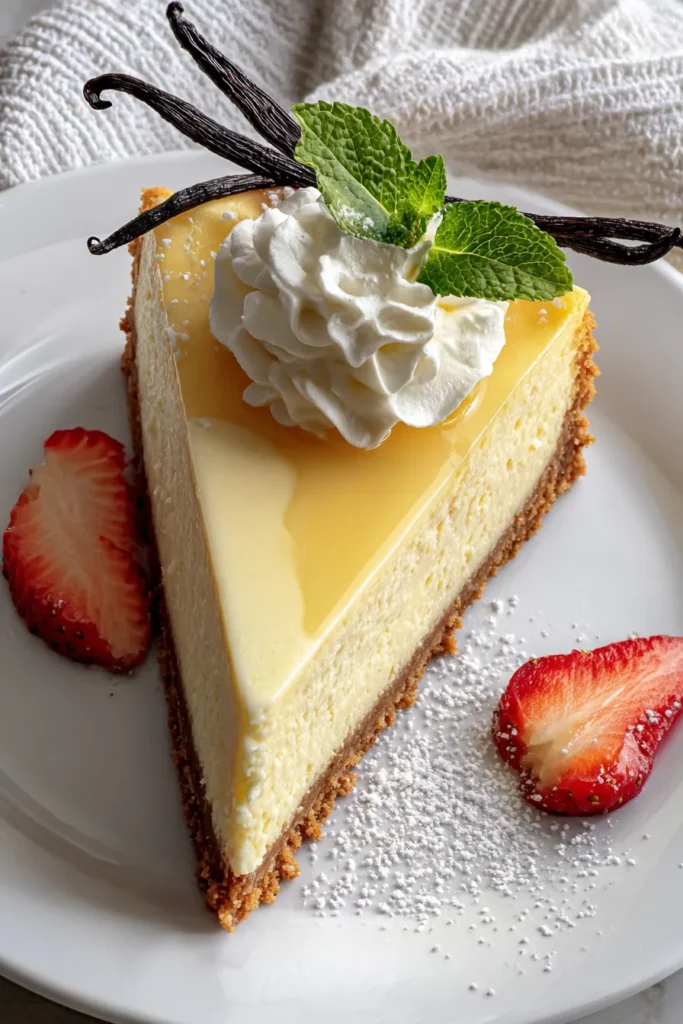
Every bite of this Vanilla Bean Butter Cheesecake feels like a little celebration for your taste buds. Creamy, velvety cheesecake filling meets a buttery graham cracker crust, creating that perfect harmony of crunchy and smooth textures. The richness of four packages of cream cheese is perfectly balanced by the tangy touch of sour cream and the luscious silkiness of heavy cream. Infused with pure vanilla bean paste, every forkful bursts with warm, aromatic vanilla flavor that elevates a simple dessert into something truly special. With 12 generous slices yielding about 450 calories each, this intermediate-level recipe is ideal for weekend baking projects or special gatherings where you want to impress without spending all day in the kitchen.
I vividly remember the first time I shared this cheesecake at a family brunch—friends and relatives alike couldn’t get enough. Within seconds, forks were flying to plates as eyes lit up at that first creamy mouthful. This is more than just a dessert; it’s a conversation starter, a mood lifter, and a make-ahead wonder that keeps everyone asking, “Can I have seconds?” With a prep time of about 30 minutes, an hour in the oven, and a restful chill of five hours (or overnight if you plan ahead), you’ll have a showstopping centerpiece that tastes like it came from a pastry shop. Homemade never tasted so heavenly!
Before diving into the step-by-step magic, let’s meet the stars of this creamy creation. Each ingredient plays a crucial role in crafting that perfect texture, depth of flavor, and buttery base you’ll swoon over.
Provide a crunchy foundation for the crust, offering a toasty, sweet backdrop that complements the rich filling.
Binds the crumbs together, adding that irresistible buttery bite and ensuring the crust holds its shape when sliced.
Sweetens the crust just enough without overpowering, helping the crumbs toast lightly and crisp up in the oven.
The hero of the filling, delivering a rich, tangy creaminess that forms the cheesecake’s signature lush texture.
Balances the tang of cream cheese and regulates sweetness, contributing to the smooth, glossy finish of the batter.
Stabilizes the filling, giving it structure and preventing cracks while keeping the texture tender and supple.
Infuses deep, aromatic vanilla flavor with those tiny flecks of bean for an upscale, professional taste profile.
Act as a binding agent, setting the custard-like filling when gently baked and ensuring a velvety, cohesive slice.
Adds a subtle tang and creaminess, lightening the texture and giving a silky mouthfeel.
Enhances richness and smoothness, rounding out the filling with a luscious, decadent finish.
Now that you know your ingredients, let’s roll up our sleeves and bring this dreamy dessert to life. Follow each step carefully for a crack-free, perfectly set cheesecake.
1. Preheat your oven to 325°F (163°C). Grease a 9-inch springform pan thoroughly with butter or a non-stick spray to ensure clean, easy release.
2. In a mixing bowl, combine the graham cracker crumbs, melted butter, and 1/4 cup of sugar. Stir until the mixture resembles wet sand, with all crumbs coated evenly.
3. Press the crumb mixture firmly into the bottom of the prepared pan, using the back of a measuring cup or your fingers to create an even, compact layer.
4. Bake the crust for 10 minutes. Once golden and fragrant, remove the pan from the oven and set it aside to cool while you prepare the filling.
5. In a large bowl, beat the softened cream cheese with a hand mixer or stand mixer on low speed until smooth and creamy, scraping down the sides as needed.
6. Gradually add 1 1/4 cups of sugar, followed by the flour. Continue mixing until the batter is well combined and silky.
7. Mix in the vanilla bean paste until fully incorporated, ensuring those flecks are distributed throughout the batter.
8. Add the eggs one at a time, mixing on low speed and blending fully before adding the next to prevent overbeating.
9. Gently fold in the sour cream and heavy cream until the batter is smooth and homogenous.
10. Pour the cheesecake filling over the cooled crust, smoothing the top with a spatula for an even surface.
11. Place the cheesecake in the oven and bake for about 1 hour, or until the edges are set and the center still has a slight jiggle.
12. Turn off the oven, crack the door slightly, and let the cheesecake cool in the open oven for 1 hour—this gradual temperature drop helps prevent cracks.
13. Once completely cooled, refrigerate the cheesecake for at least 4 hours, preferably overnight, to allow it to fully set and develop flavor.
14. Before serving, run a knife around the edge of the pan to gently loosen the cake, then release the springform and transfer to your serving platter.
Elevate every slice by pairing it with complementary flavors and presentation touches. Whether you’re hosting a casual family get-together or an elegant dinner party, these serving ideas will get everyone excited.
Top each slice with a handful of plump strawberries, raspberries, or blueberries and a sprig of mint for a vibrant pop of color and refreshing contrast.
Heat store-bought or homemade caramel sauce until just warm, then drizzle in delicate ribbons over each serving for an extra layer of sweet indulgence.
Pour rich, glossy ganache over the top, allowing it to cascade down the sides for a dramatic, chocolatey flair that pairs beautifully with vanilla.
Pipe light and fluffy whipped cream around the edge of each slice, finishing with a sprinkle of vanilla bean seeds or a dusting of cocoa powder.
Proper storage ensures your cheesecake stays as fresh and flavorful as the moment it came out of the oven. Follow these tips to maintain its creamy texture and aromatic vanilla notes for days.
After cooling, cover the top of the springform pan loosely with plastic wrap or a cake dome. Store in the coldest part of your fridge for up to 5 days to preserve moisture and freshness.
For single servings, place each cheesecake slice in a sealed container. This prevents the cake from absorbing any fridge odors and makes grabbing a dessert quick and easy.
Wrap the cheesecake or individual slices tightly in plastic wrap, then aluminum foil. Freeze for up to 2 months. Thaw overnight in the fridge before serving for best texture.
About 30 minutes before serving, remove the cheesecake from the fridge to let it soften slightly, allowing flavors to bloom and making slicing smoother.
Crafting this Vanilla Bean Butter Cheesecake is like giving yourself—and anyone you share it with—a gift of creamy luxury. From the buttery graham cracker crust to the velvety, vanilla-kissed filling, every element works in harmony to create a dessert that’s both elegant and comforting. By following the simple steps of combining quality ingredients with a bit of patience, you’ll achieve a crack-free, perfectly set cheesecake that looks as good as it tastes. Whether you’re planning a special celebration or simply want to treat yourself, this recipe accommodates both last-minute cravings and carefully planned menus. The intermediate difficulty level makes it accessible to home bakers who are ready to elevate their dessert game, and the overall timeline—30 minutes of prep, one hour of baking, and a restful five-hour chill—lets you fit it into busy schedules.
Feel free to print this article and save it for future gatherings or quiet afternoons when you need a sweet pick-me-up. You can also find a FAQ below with answers to common cheesecake questions, from troubleshooting cracks to adjusting for high-altitude baking. If you give this recipe a try, please leave your comments, questions, or feedback—I love hearing how your cheesecake turns out or offering tips if you need a hand. Your baking journey is as important to me as it is to you, and I’m here cheering you on every delicious step of the way. Enjoy every creamy bite!
Experience the luxurious blend of rich cream cheese with the aromatic flavors of vanilla bean in every bite, all atop a buttery graham cracker crust.

I’m Sophia Montgomery, your guide and fellow food enthusiast on this delicious journey. As a home cook with a deep love for creating meals that bring people together, I started this blog to share my passion for simple, flavorful, and heartwarming dishes