
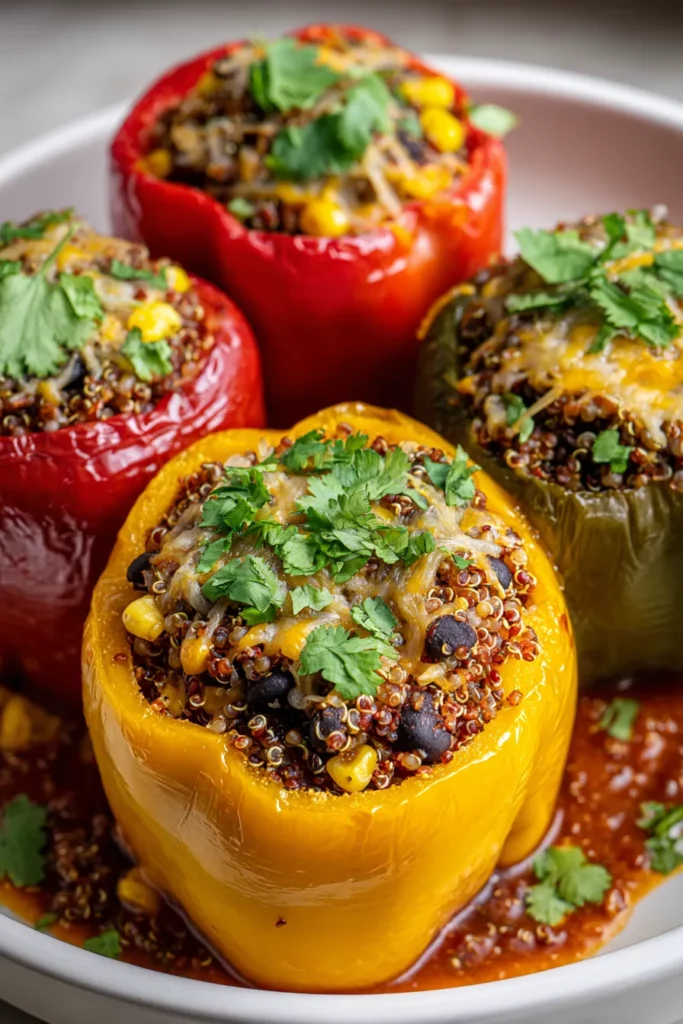
These vegetarian stuffed peppers pack a punch of flavor and color that instantly brightens any dinner table. They’re not just visually appealing with their glossy red, yellow, and green hues; they’re also bursting with nutrients and hearty ingredients that make every bite satisfying. Combining fluffy quinoa with a medley of beans, veggies, and spices, then crowning the mix with gooey melted cheese, this recipe strikes the perfect balance between wholesome and indulgent. Whether you’re hosting a casual weeknight meal or meal-prepping for the week ahead, these peppers deliver on taste, texture, and nutrition. The dish’s vibrancy truly shines through when you cut into each pepper and discover that flavorful filling nestled inside.
As someone who’s always on the hunt for meatless meals that thrill the taste buds, I can’t help but rave about how these stuffed peppers come together. The natural sweetness of the bell peppers complements the earthy quinoa and black beans, while the corn kernels add playful pops of flavor. A hint of cumin and paprika brings warmth and a subtle smoky edge, and the final sprinkle of fresh herbs adds a zesty finish. Every forkful feels like a celebration of simple, wholesome ingredients working in harmony. Plus, with only a beginner-level difficulty rating and just under an hour from start to finish, this recipe is a go-to for cooks at any skill level. Cozy, colorful, and bursting with personality, these vegetarian stuffed peppers are guaranteed to become a fast favorite in your kitchen.
Before we roll up our sleeves and dive into cooking, let’s take a moment to appreciate the star players in this recipe. These ingredients combine to create a filling that’s rich in protein, fiber, and vibrant flavors, while the peppers themselves serve as sturdy, edible bowls. Understanding each component’s role not only helps you follow the recipe but also inspires you to experiment with tweaks or substitutions down the road.
These sturdy vessels come in red, yellow, green, or orange varieties, each offering a subtle difference in sweetness and intensity. They provide a colorful presentation, a satisfying crunch when raw, and a tender, roasted texture after baking.
A gluten-free seed that cooks up light and fluffy, quinoa adds a protein-packed base and a delicate chewiness to the filling. It soaks up the vegetable broth, ensuring each grain is flavorful and perfectly cooked.
Used to cook the quinoa, this flavorful liquid infuses each grain with savory depth. It replaces water for an extra layer of seasoning that enhances the overall filling.
This heart-healthy fat is the perfect medium for sautéing aromatics without sticking. It lends a silky richness to the vegetable mixture and helps distribute flavor evenly.
Finely chopped, the onion softens into sweet, fragrant morsels when cooked. It forms part of the aromatic foundation, releasing natural sugars that balance the other textures and tastes.
Minced garlic adds a sharp, pungent note that mellows and sweetens as it cooks. Its distinct flavor deepens the overall profile of the filling.
Diced zucchini brings tender bites and a slight crunch. It also contributes moisture that keeps the filling juicy and prevents dryness.
Drained and rinsed, these beans pack a plant-based protein punch and deliver an earthy, creamy texture that complements the quinoa.
Drained to avoid excess liquid, these tomatoes introduce bright acidity and a hint of juiciness that ties the rest of the ingredients together.
Whether fresh, frozen, or canned, corn adds sweet bursts and a playful texture contrast that makes every spoonful exciting.
A warm, slightly nutty spice that imparts a gentle earthiness, cumin is one of the signature flavors in this filling.
Whether you choose sweet or smoked paprika, this spice brings a mild peppery warmth and a rich red hue that enhances both taste and appearance.
Essential seasonings used to adjust and balance the flavors, ensuring that each component shines without overpowering the rest.
Cheddar or mozzarella work beautifully here. When melted, the cheese adds a creamy, stretchy layer on top that ties the filling and pepper together in every bite.
A final garnish of bright herbs adds a pop of color and a fresh, zesty lift that brightens the rich, warm filling.
Now that we’ve gathered our flavorful lineup, it’s time to bring everything together. This recipe walks you through cooking the quinoa, sautéing the vegetable and bean mixture, stuffing the peppers, and baking them to melty perfection. Follow each step carefully to achieve peppers that are tender, fillings that are perfectly seasoned, and cheese that’s irresistibly gooey.
1. Preheat the oven to 375°F (190°C) to ensure it’s hot and ready for baking. A fully preheated oven guarantees even cooking and those signature roasted pepper edges.
2. In a medium saucepan, combine the rinsed quinoa with the vegetable broth. Bring the mixture to a boil over high heat, then reduce the heat to low and cover with a tight-fitting lid. Let it simmer for about 15 minutes, or until the broth is fully absorbed and the quinoa is tender and fluffy. Once done, remove from heat and set aside.
3. While the quinoa cooks, heat the olive oil in a large skillet over medium heat. Add the finely chopped onion and minced garlic, and sauté for about 5 minutes, stirring occasionally, until the onion becomes soft, translucent, and fragrant.
4. Add the diced zucchini to the skillet and continue to cook for an additional 3–4 minutes. The zucchini should become tender but still retain a slight bite, contributing both texture and moisture to the filling.
5. Stir in the black beans, drained diced tomatoes, and corn kernels. Sprinkle in the cumin and paprika, then allow the mixture to cook together for about 5 minutes so the spices can bloom and meld with the vegetables.
6. Fold the cooked quinoa into the skillet, stirring until every grain is coated and distributed evenly. Season generously with salt and pepper to taste, adjusting until the flavors are balanced and vibrant.
7. Stand the hollowed-out bell peppers upright in a baking dish. Spoon the quinoa mixture into each pepper, using the back of the spoon to pack the filling down lightly and fill each pepper to the top.
8. Cover the baking dish with aluminum foil and place it in the preheated oven. Bake for 30 minutes, allowing the peppers to soften and the flavors to marry under gentle, moist heat.
9. Carefully remove the foil and evenly sprinkle the shredded cheese over the tops of the peppers. Return the dish to the oven, uncovered, and bake for an additional 10–15 minutes, or until the cheese is melted, bubbly, and starting to turn golden around the edges.
10. Finish by garnishing with freshly chopped cilantro or parsley before serving. The vibrant green herbs add a lively contrast and a hint of freshness to each savory, cheese-topped pepper.
Now that your stuffed peppers are golden, bubbly, and irresistible, let’s talk about how to present and serve them in style. Serving these peppers isn’t just about plating; it’s about creating a little moment of indulgence and comfort. Whether you’re dishing them up for a cozy family dinner or bringing them to a potluck, a few thoughtful touches can elevate the experience. Consider pairing them with fresh textures and zesty accents that contrast the warmth of the filling and complement the peppers’ natural sweetness. From light salads to creamy dollops, these suggestions will help you turn a simple stuffed pepper into a showstopper that feels both gourmet and homey. Dive in, experiment, and make each plate as vibrant as the peppers themselves.
Serve with a crisp salad of mixed baby greens, cherry tomatoes, and a tangy lemon vinaigrette on the side. The bright acidity and crunchy leaves balance the rich, cheesy filling.
Whip up a quick avocado crema by blending ripe avocado, lime juice, and a splash of water until smooth. Drizzle over the peppers for a lush, creamy contrast and a hint of citrus.
Place lime wedges alongside the peppers and offer your favorite hot sauce. A squeeze of lime brings brightness, while a dash of heat adds a playful kick to each bite.
Top each pepper with a handful of baked tortilla strips or crushed tortilla chips. The added crunch brings a fun, unexpected textural contrast that keeps every forkful exciting.
Leftovers of these stuffed peppers are just as delightful as the first serving, and proper storage is key to maintaining their flavors and textures. Whether you’re tucking them away for tomorrow’s lunch or freezing portions for a busy week ahead, these tips will help you keep the filling moist, the peppers tender, and the cheese delectably gooey when reheated. Understanding the best methods for refrigeration, freezing, and reheating ensures you maintain the dish’s integrity and avoid sogginess or dryness. Read on for easy-to-follow storage solutions that let you enjoy these hearty, flavor-packed peppers whenever you’re craving a nutritious, meatless meal.
Allow the stuffed peppers to cool completely, then place them in a shallow, airtight container. Store in the refrigerator for up to 4 days. When ready to eat, reheat individual peppers in the microwave for 1–2 minutes or in a preheated 350°F (175°C) oven until warmed through.
Wrap each cooled pepper tightly in plastic wrap, then place them in a freezer-safe bag or container. Freeze for up to 2 months. To reheat, unwrap and bake at 375°F (190°C) for 20–25 minutes, covered with foil to prevent over-browning, then uncover for 5 minutes to refresh the cheese topping.
Keep chopped cilantro, parsley, and any avocado crema or lime wedges in small, separate containers. This prevents herbs from wilting and toppings from becoming soggy, ensuring fresh, vibrant garnishes when you serve.
If you notice the filling has dried out after refrigeration, sprinkle a teaspoon of vegetable broth over the top before reheating. Cover with foil and warm in the oven to revive moisture and keep the quinoa fluffy.
We’ve taken a vibrant array of ingredients—from colorful bell peppers and fluffy quinoa to black beans, corn, and a mix of spices—and transformed them into a wonderfully satisfying vegetarian stuffed pepper dish. By following simple steps like sautéing aromatics, simmering quinoa in vegetable broth, and baking everything to melty perfection, you’ve created a meal that’s both approachable for beginners and exciting enough to impress guests. These peppers strike the ideal balance between wholesome nutrition and comforting, cheesy indulgence. Plus, they’re flexible: you can swap in rice for quinoa, add a kick of jalapeños, or go vegan by skipping the cheese. This recipe’s vibrant presentation, combined with its nutrient-packed filling, makes it a true standout for lunch, dinner, or meal prep. Feel free to print this article and save it for later use—you can also find a FAQ below to help troubleshoot any questions. If you give this recipe a try, I’d love to hear how it turns out. Leave a comment, share your tips, or ask any questions you have about the process!
Thanks for joining me on this stuffed pepper adventure! Whether you’re making them for a cozy family dinner or prepping for lunches all week, these vegetarian stuffed peppers are sure to become a staple in your kitchen. Don’t forget to experiment with your favorite herbs, spices, or side dishes to make the recipe your own. If you encounter any hiccups, need guidance on substitutions, or simply want to share your successes (or photos!), drop a comment below. Your feedback helps me refine recipes and provides inspiration for fellow home cooks. Happy cooking, and enjoy every colorful, flavor-packed bite!
Bursting with nutrients and vibrant colors, these stuffed peppers are a hearty blend of quinoa, beans, and vegetables, topped with gooey cheese—a perfect meal for any time!

I’m Sophia Montgomery, your guide and fellow food enthusiast on this delicious journey. As a home cook with a deep love for creating meals that bring people together, I started this blog to share my passion for simple, flavorful, and heartwarming dishes