

When the crisp air of October nudges your senses, a warm, tender pumpkin scone feels like the ultimate treat. These bakery-style delights boast a golden-brown exterior and a soft, pillowy center, with just the right amount of sweetness to pair beautifully with your morning coffee or afternoon tea. Soft swirls of cinnamon, nutmeg, ginger, and cloves meld with velvety pumpkin puree, creating a flavor mosaic that dances on your tongue. Each bite is a cozy hug, reminiscent of falling leaves and crackling fires—perfect for those fall baking cravings.
Whether you’re an experienced baker or trying your hand at an easy recipe for the first time, these glazed pumpkin scones strike the perfect balance between rustic charm and refined bakery style. The sweet, smooth glaze adds a glossy finish that contrasts beautifully with the spiced crumb beneath. Best of all, they’re beginner-friendly: a quick 15-minute prep, a few simple ingredients, and about 15 minutes in the oven is all it takes to transform your kitchen into a bakery haven. Let’s dive in and make breakfast treats that are as fun to chat about as they are to devour.
KEY INGREDIENTS IN BAKERY-STYLE PUMPKIN SCONES
Before we roll up our sleeves, let’s get to know the stars of this easy recipe. Each ingredient plays an essential role, from building structure to amplifying cozy fall flavors and adding that irresistible bakery-style finish.
- All-purpose flour
Provides the foundational structure and lightness for each scone. The balance of protein in all-purpose flour gives a tender crumb while still holding its shape.
- Brown sugar
Brings a deep, molasses-like sweetness that complements pumpkin’s natural earthiness. It also helps with browning, giving the scones their warm, caramelized edges.
- Baking powder
Acts as the leavening agent, creating lift and airy pockets throughout each scone. This is what gives them that bakery-style rise.
- Salt
Enhances all the flavors, balancing sweetness and intensifying the blend of spices and pumpkin.
- Ground cinnamon
Infuses a warm, sweet-spicy note that’s quintessential for fall baking. It pairs beautifully with nutmeg and ginger.
- Ground nutmeg
Adds a rich, nutty depth that rounds out the spice mix, giving a slightly sweet and woody undertone.
- Ground ginger
Offers a bright, zesty kick that cuts through the richness of pumpkin, adding complexity to each bite.
- Ground cloves
Provides an intense, aromatic warmth, perfect for making these scones feel extra cozy and festive.
- Unsalted butter
When cold and cubed, butter creates pockets of steam that yield flaky, tender layers. Be sure it’s well chilled for the best texture.
- Canned pumpkin puree
The star ingredient that gives these scones their signature flavor and moist texture. Use pure pumpkin for maximum pumpkin-y intensity.
- Milk
Hydrates the dough and helps bind the ingredients, ensuring a tender crumb. A little extra milk in the glaze thins it to a perfect drizzle.
- Egg
Adds richness, moisture, and color, helping the scones brown beautifully in the oven.
- Vanilla extract
Heightens the warm spice notes and adds a subtle sweetness that ties all the flavors together.
- Powdered sugar
Key for the sweet glaze. Its fine texture dissolves smoothly into milk, creating a glossy finish that hardens slightly once set.
HOW TO MAKE BAKERY-STYLE PUMPKIN SCONES
Let’s walk through this beginner-friendly recipe step by step so you can achieve bakery-quality pumpkin scones right at home. We’ll blend dry and wet components carefully, shape the dough gently, and finish with a sweet drizzle.
1. Preheat your oven to 400°F (200°C) and line a baking sheet with parchment paper. This ensures even baking and easy cleanup, while the parchment prevents sticking and promotes golden edges.
2. In a large bowl, whisk together the flour, brown sugar, baking powder, salt, cinnamon, nutmeg, ginger, and cloves. The whisking step ensures that your spices and leavening agent are evenly distributed, so each scone has consistent flavor and rise.
3. Add the cold, cubed butter to the dry ingredients. Use a pastry cutter or your clean fingers to cut the butter in until the mixture resembles coarse crumbs. The small butter pockets will melt during baking, creating flaky layers.
4. In a separate bowl, mix the pumpkin puree, milk, egg, and vanilla extract until well combined. This wet mixture should be smooth and homogenous before you integrate it with the dry ingredients.
5. Pour the wet ingredients over the dry ingredients. Stir gently until the dough just comes together—avoid overmixing to keep your scones tender rather than tough.
6. Turn the dough out onto a lightly floured surface. Knead it gently a few times—just enough to bring it together—and then pat or roll it into a 1-inch-thick circle.
7. Use a sharp knife to cut the circle into 8 even triangular pieces. A clean cut helps the scones bake evenly without rough edges.
8. Transfer the scones to the prepared baking sheet, leaving at least an inch of space between each piece to allow for expansion and even browning.
9. Bake for 12–15 minutes, or until the scones are lightly golden on top and a toothpick inserted into the center comes out clean.
10. While the scones are baking, prepare the glaze. In a small bowl, whisk together the powdered sugar, milk, and vanilla extract until you achieve a smooth and pourable consistency. Adjust milk for a thicker or thinner glaze.
11. Allow the scones to cool on a wire rack for a few minutes. Once they’re just warm or at room temperature, drizzle the glaze over each scone and let it set before serving.
SERVING SUGGESTIONS FOR BAKERY-STYLE PUMPKIN SCONES
These scones are flexible breakfast treats or dessert companions that fit into any cozy gathering. Their warm spice profile and sweet glaze make them perfect for pairing with a variety of beverages and toppings. Whether you’re hosting a fall brunch, need a pick-me-up for chilly afternoons, or simply crave a sweet bite alongside your coffee, these serving ideas will elevate your pumpkin scone experience. Here are four simple yet delightful ways to present these glazed beauties:
- Classic Coffee Pairing: Serve warm scones with a bold dark roast coffee or a spiced latte. The rich bitterness of the coffee perfectly balances the sweet glaze and warm pumpkin spices, making each bite feel like an indulgent treat.
- Cream Cheese Spread: Offer a side of whipped cream cheese lightly sweetened with a touch of honey and vanilla. The tangy cream cheese cuts through the sweetness and adds a luxurious mouthfeel.
- Fruit and Nut Plate: Arrange scones on a platter with fresh berries, sliced apples, and a handful of toasted pecans or walnuts. The fresh fruit adds brightness, and the nuts provide crunchy contrast to the tender crumb.
- Warm Honey Drizzle: Heat a little honey with a pinch of ground cinnamon and drizzle it over the scones right before serving. This extra layer of sweetness glazes the pastry with a sticky finish that’s utterly irresistible.
HOW TO STORE BAKERY-STYLE PUMPKIN SCONES
Keeping your glazed pumpkin scones fresh means preserving their tender crumb and preventing the glaze from becoming sticky or soggy. With the right storage techniques, you can enjoy these breakfast treats for days. Always let your scones cool completely on a wire rack before storing to avoid condensation that leads to a damp texture. Here are some reliable methods to maintain flavor and freshness:
- Airtight Container at Room Temperature
Place fully cooled scones in a single layer inside a sealed airtight container. This prevents moisture loss and external odors from altering their taste. Stored this way, they stay fresh for up to 3 days.
- Refrigeration
If you live in a humid climate or want to extend shelf life to 5 days, store the scones in an airtight container in the refrigerator. Make sure to place a sheet of parchment between layers to protect the glaze.
- Freezing for Long-Term Storage
For up to 3 months of freshness, wrap each cooled scone individually in plastic wrap, then place them in a freezer-safe bag or container. Thaw at room temperature or gently warm in the oven at 300°F for 5–7 minutes.
- Reheating Tips
To revive that just-baked softness, reheat scones in a preheated oven at 300°F for about 5 minutes or pop in the microwave for 10–15 seconds. This restores warmth and softens the crumb without melting the glaze completely.
CONCLUSION
This comprehensive guide to bakery-style pumpkin scones has walked you through every step, from gathering key ingredients to serving and storage tips. You’ve learned how the flour, butter, and warm spices come together with pumpkin puree to form a tender, lightly spiced dough, and how a simple powdered sugar glaze adds just the right amount of sweetness. Whether you’re new to fall baking or you’re on the hunt for an easy recipe that yields bakery-worthy results, these glazed scones deliver a cozy, irresistible flavor profile perfect for breakfast or dessert. The clear, step-by-step instructions ensure a foolproof process, even for first-time bakers, and the serving suggestions offer plenty of creative ways to showcase your creation at brunches, coffee breaks, or special gatherings.
Feel free to print this article and save it for later—bookmark it for those crisp mornings when you crave a sweet, spicy treat without leaving home. You can also scroll down to the FAQ section for quick tips and answers to common questions. If you try the recipe or have any questions, feedback, or ideas for twists—like adding chocolate chips or chopped nuts—let me know in the comments. I’d love to hear how your pumpkin scones turn out, share in your successes, and help troubleshoot any baking hiccups. Happy baking, and here’s to cozy fall flavors in every bite!
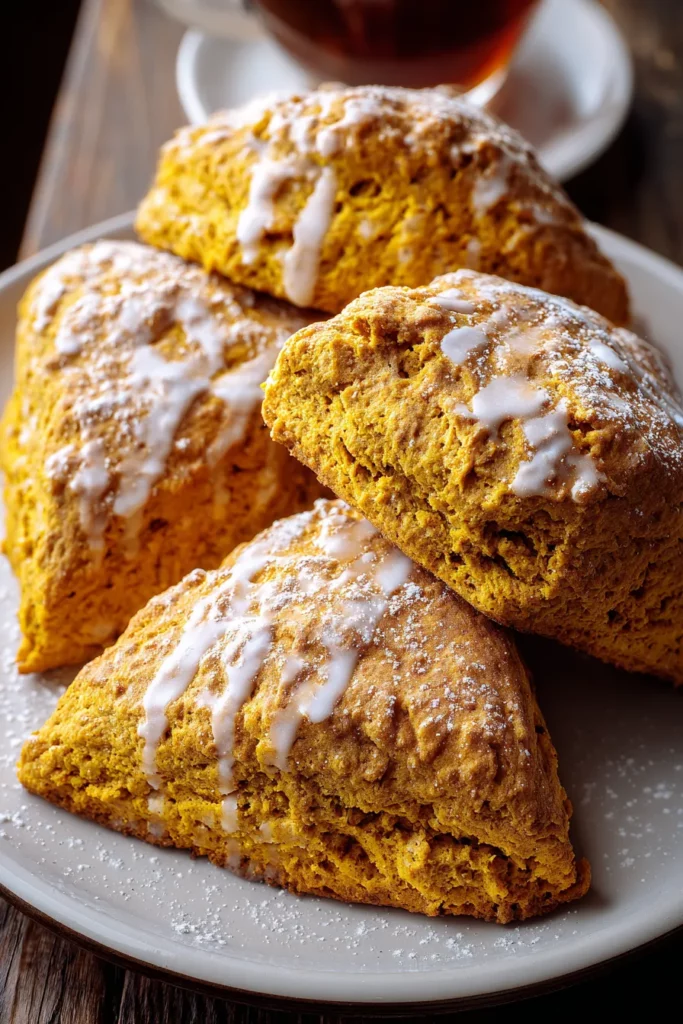

Bakery-Style Pumpkin Scones
Description
These pumpkin scones are perfectly tender, bursting with warm spices, and drizzled with a sweet glaze. Perfect for cozy mornings with coffee or tea!
Ingredients
Instructions
-
Preheat your oven to 400°F (200°C) and line a baking sheet with parchment paper.
-
In a large bowl, whisk together the flour, brown sugar, baking powder, salt, cinnamon, nutmeg, ginger, and cloves.
-
Add the cold, cubed butter to the dry ingredients. Use a pastry cutter or your fingers to cut the butter into the mixture until it resembles coarse crumbs.
-
In a separate bowl, mix the pumpkin puree, milk, egg, and vanilla extract until well combined.
-
Pour the wet ingredients over the dry ingredients. Stir until the dough just comes together. Do not overmix.
-
Turn the dough out onto a lightly floured surface. Knead gently a few times and shape into a circle about 1 inch thick.
-
Use a sharp knife to cut the circle into 8 triangular pieces.
-
Transfer the scones to the prepared baking sheet, leaving enough space between each piece.
-
Bake for 12-15 minutes, or until the scones are lightly golden and a toothpick inserted into the center comes out clean.
-
While the scones are baking, prepare the glaze by mixing together the powdered sugar, milk, and vanilla extract in a small bowl until smooth.
-
Allow the scones to cool on a wire rack. Once cooled, drizzle the glaze over each scone and let it set before serving.
Note
- For an extra flavor boost, add some chopped nuts or chocolate chips to the scone batter.
- These scones can be stored in an airtight container for up to 3 days.
- The glaze can be adjusted with more or less milk to achieve your desired consistency.

