

Every bite of a beef and cheese chimichanga delivers a symphony of textures and flavors that will have you grinning from ear to ear. From the very first crunch, you’ll taste the crispy, golden shell giving way to juicy, seasoned ground beef harmonized with creamy Monterey Jack and sharp cheddar. Each forkful offers a comforting warmth that feels like a cozy Tex-Mex hug. Whether you’re cooking for a casual weeknight dinner or spicing up a weekend gathering, these chimichangas bring a festive flair that will turn any meal into a celebration.
The magic of this recipe lies not only in its taste but also in its simplicity. With just a handful of pantry staples and about 45 minutes from start to finish—including a brief resting period—you’ll transform ordinary ingredients into a golden-fried, cheesy masterpiece. Marked as an intermediate difficulty, this dish invites adventurous home cooks to sharpen their frying skills and layering techniques. Perfect for lunch or dinner and clocking in around 500 kcal per serving, these chimichangas make a stellar main course when paired with Mexican rice or refried beans. Once you take your first bite, you’ll understand why they’ve become a beloved Tex-Mex favorite!
KEY INGREDIENTS IN BEEF AND CHEESE CHIMICHANGA
To create these golden-fried Tex-Mex favorites, we start by assembling simple yet flavorful ingredients. Each one plays a crucial role in building that irresistible combination of savory beef, melty cheese, and a touch of spice.
- Ground beef: Provides a rich, meaty foundation that absorbs spices beautifully and offers hearty substance to every bite.
- Onion: Adds subtle sweetness and depth when sautéed until tender, balancing the richness of the beef.
- Garlic: Offers aromatic warmth and a classic flavor boost that ties all the spices together.
- Ground cumin: Delivers earthy, smoky notes that complement the beef and enhance the Tex-Mex profile.
- Chili powder: Infuses a mild heat with fragrant chili pepper undertones, giving the filling its signature kick.
- Salt: Brings out natural flavors and harmonizes the seasoning mix for a well-rounded taste.
- Black pepper: Contributes a sharp, peppery edge that enlivens every mouthful.
- Chopped green chilies: Introduce a tangy, mildly spicy element that brightens the filling and adds color contrast.
- Cheddar cheese: Melts into gooey pockets of sharp, tangy goodness, enriching the texture.
- Monterey Jack cheese: Blends smoothly with cheddar for creamy meltiness and a mellow flavor balance.
- Flour tortillas: Act as the perfect vessel, soft and pliable when warmed, yet sturdy enough to hold all that delicious filling.
- Oil for frying: Ensures a crisp, golden exterior that contrasts beautifully with the tender interior.
- Optional toppings: Sour cream, salsa, guacamole, and chopped fresh cilantro each add bright, cooling, or herbaceous layers that elevate every bite.
HOW TO MAKE BEEF AND CHEESE CHIMICHANGA
Let’s jump into creating your own crunchy, golden chimichangas. This step-by-step guide will help you master each technique, from browning meat to achieving that perfect crispy finish.
1. In a large skillet over medium heat, cook the ground beef, chopped onion, and minced garlic until the beef is fully browned and the onion turns tender. Once done, drain any excess fat to keep the filling from becoming greasy.
2. Stir in the ground cumin, chili powder, salt, and black pepper, then mix thoroughly so every morsel of beef is coated with the fragrant spice blend.
3. Add the drained chopped green chilies and cook for another two minutes, allowing all the flavors to meld together and intensify.
4. Remove the skillet from heat and let the mixture cool slightly. Then, gently fold in the shredded cheddar and Monterey Jack cheeses, creating a melty, gooey filling.
5. Warm the flour tortillas in the microwave for about 15–20 seconds to make them pliable and easy to roll without tearing.
6. Spoon roughly one-third cup of the beef and cheese mixture into the center of each tortilla, ensuring an even distribution for consistent flavor.
7. Fold in the sides of the tortilla, then roll it up tightly, securing with a toothpick if needed to keep everything in place.
8. In a heavy skillet or deep fryer, heat enough oil to reach 350°F (175°C), which guarantees that golden, crispy exterior.
9. Carefully place each chimichanga seam-side down into the hot oil, frying a few at a time. Cook for about 2–3 minutes per side until the shells turn a rich, golden brown and crackle with crunch.
10. Using a slotted spoon, transfer the chimichangas to paper towels to drain off any excess oil.
11. Serve immediately, topped with sour cream, salsa, guacamole, and a sprinkle of fresh cilantro for that perfect finishing touch.
SERVING SUGGESTIONS FOR BEEF AND CHEESE CHIMICHANGA
When your chimichangas emerge piping hot and golden, it’s time to think about the perfect accompaniments. These serving ideas will help you create a truly memorable Tex-Mex feast.
- Salsa trio platter: Offer a selection of salsa verde, smoky roasted tomato salsa, and a chunky pico de gallo on the side. The contrasting textures and varying spice levels let guests customize each bite for maximum flavor fun.
- Creamy guacamole dollop: Serve a generous scoop of homemade guacamole sprinkled with lime juice and sea salt. The fresh, buttery avocado provides a cooling counterpoint to the warm, crispy chimichanga.
- Sour cream swirl: Drizzle or dollop smooth sour cream atop each chimichanga. Its tangy richness cuts through the fried exterior, creating a delightful temperature and flavor contrast.
- Cilantro-lime rice and beans: Pair your chimichangas with fluffy cilantro-lime rice and seasoned black beans for a hearty, well-balanced plate. The herbal brightness of the rice lifts the heavier elements, while the beans add extra protein and texture.
HOW TO STORE BEEF AND CHEESE CHIMICHANGA
Keeping your chimichangas fresh and crispy requires a few simple steps. Proper storage ensures you can enjoy leftovers just as much as the day you cooked them.
Storing fried foods can be tricky, because moisture leads to sogginess. Before stashing chimichangas away, always let them cool to room temperature on a wire rack. This prevents steam from getting trapped and making the shells limp. Once they’re completely cooled:
- Refrigeration: Place chimichangas in an airtight container, separating layers with parchment paper. Store in the fridge for up to three days. When ready to eat, reheat in a 375°F oven for 10–12 minutes until the exterior crisps up again.
- Freezing: Wrap each cooled chimichanga tightly in plastic wrap, then place them in a freezer-safe bag. Freeze for up to two months. To reheat, bake from frozen at 400°F for 18–20 minutes, flipping halfway through to achieve even crispness.
- Avoid plastic under steam: If you wrap hot chimichangas immediately after cooking, condensation forms and ruins the crunch. Always cool before sealing.
- Re-crisping tips: For the crispiest results on reheating, skip the microwave. Opt for an air fryer or oven; both tools restore that freshly-fried snap without overcooking the filling.
CONCLUSION
Your journey through making crunchy beef and cheese chimichangas has shown just how rewarding Tex-Mex comfort food can be. We’ve explored everything from assembling a simple list of ingredients—ground beef, precise spices, tangy green chilies, melty cheddar and Monterey Jack cheeses—to mastering the art of frying until each tortilla turns a perfect golden brown. Prep time takes only 15 minutes, the cooking process is about 25, and a brief five-minute rest gives you a total of roughly 45 minutes in the kitchen. Thanks to this intermediate recipe, you’ll have a satisfying lunch or dinner course that clocks in around 500 calories per serving. Remember, you can bake these instead of frying if you prefer a lighter approach, and experimenting with chicken, vegetables, or extra beans opens up a world of filling possibilities.
Feel free to print this article and tuck it into your recipe binder for easy access at dinnertime. You’ll find a handy FAQ section below, ready to address any questions that might pop up as you prepare your chimichangas. If you give this recipe a try, please drop a comment or send feedback—whether you nailed that perfect fry temperature or added your own twist with extra spices, I’d love to hear how it went. Your stories and questions help our cooking community grow and inspire new twists on this beloved Tex-Mex classic. Enjoy every crunchy, cheesy bite!
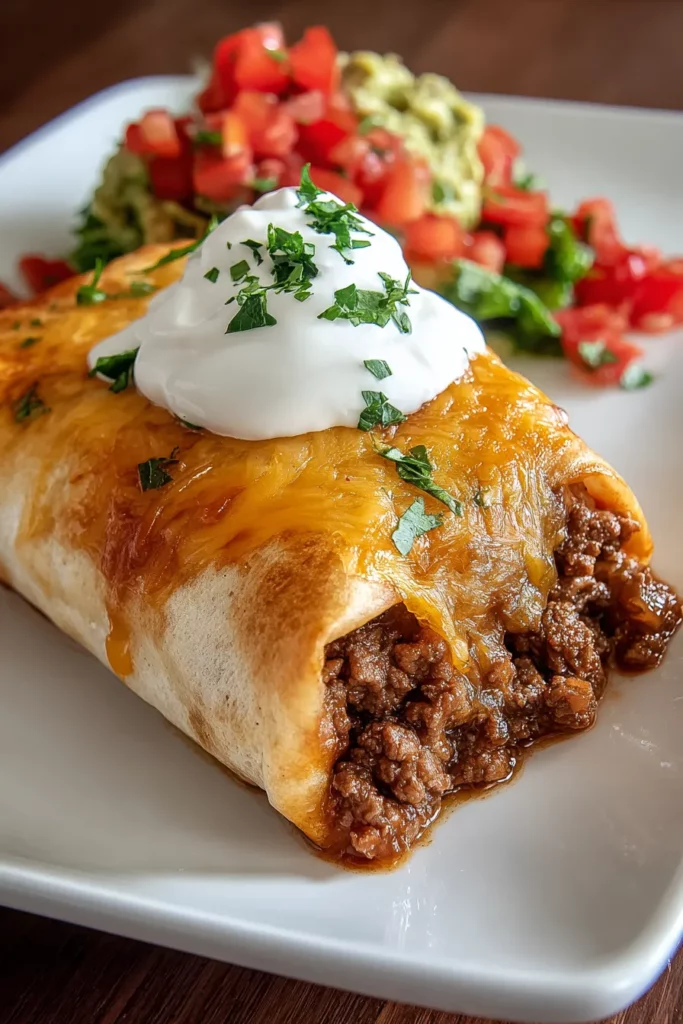

Beef and Cheese Chimichanga
Description
These golden-fried chimichangas are stuffed with seasoned beef, melted cheddar and Monterey Jack cheese, and green chilies for a crispy, cheesy Tex-Mex treat perfect for any meal.
Ingredients
Instructions
-
In a large skillet over medium heat, cook the ground beef, onion, and garlic until the beef is browned and the onion is tender. Drain excess fat.
-
Stir in the cumin, chili powder, salt, and black pepper. Mix well.
-
Add the chopped green chilies and cook for another 2 minutes, combining all flavors.
-
Remove from heat and let the mixture cool slightly, then stir in the shredded cheddar and Monterey Jack cheeses.
-
Warm the tortillas in the microwave for about 15-20 seconds to make them pliable.
-
Spoon about 1/3 cup of the beef and cheese mixture onto the center of each tortilla.
-
Fold in the sides of the tortilla, then roll it up tightly, securing with a toothpick if necessary.
-
In a heavy skillet or deep fryer, heat the oil to 350°F (175°C).
-
Carefully place the chimichangas, seam-side down, into the hot oil, a few at a time. Fry for about 2-3 minutes on each side until golden brown and crispy.
-
Remove them from the oil using a slotted spoon, and drain on paper towels.
-
Serve hot, with optional toppings like sour cream, salsa, guacamole, and a sprinkle of chopped cilantro.
Note
- Chimichangas are believed to have originated in the Southwestern United States or Northern Mexico.
- You can bake the chimichangas instead of frying for a healthier version: brush them with oil and bake at 425°F (220°C) for about 15-20 minutes.
- Feel free to experiment with fillings like chicken or vegetables.
- Leftover chimichangas can be refrigerated and reheated in the oven to maintain crispness.
- Pair them with a side of Mexican rice or beans for a complete meal.

