

Craving a dinner that tastes like you ordered it from your favorite takeout spot but made in the comfort of your own kitchen? This Better-Than-Takeout Honey Garlic Chicken Stir-Fry is here to rescue you on even the busiest of weeknights. With tender bites of chicken breast coated in a glossy, sweet-and-savory honey garlic sauce, every bite feels indulgent without being overly complicated. The combination of fresh veggies—vibrant red bell peppers, crisp broccoli florets, and sweet snap peas—adds a satisfying crunch and a pop of color that instantly elevates the entire meal. And the best part? You’ll have this complete dish ready in just thirty minutes, making it the perfect go-to recipe for lunch or dinner when time is of the essence but flavor is non-negotiable.
What sets this stir-fry apart is the harmony of flavors working their magic together. A gentle zing from minced ginger and garlic pairs beautifully with coconut-like sweetness from honey, while soy sauce and apple cider vinegar lend depth and a tiny hint of tang. The simple cornstarch slurry transforms into a luscious coating that clings to each piece of chicken and vegetable, creating that irresistible restaurant-quality sheen. Whether you’re a culinary newbie or a seasoned home cook, this beginner-friendly recipe requires only basic techniques—whisking, stir-frying, and sautéing—yet yields results that will impress everyone at your table. So roll up your sleeves, fire up your wok or skillet, and let’s make a homemade takeout favorite that’s healthier, fresher, and unquestionably delicious.
KEY INGREDIENTS IN BETTER-THAN-TAKEOUT HONEY GARLIC CHICKEN STIR-FRY
Before diving into the cooking process, let’s talk about the star players in this recipe. Each ingredient has been carefully selected to provide the right balance of texture, flavor, and color, ensuring that every mouthful is as exciting as it is tasty. You’ll find that with just a handful of pantry staples and fresh produce, you can recreate a dinner that easily rivals what you’d get on a delivery menu—often at a fraction of the cost.
- Chicken Breast: Lean, tender, and perfect for absorbing the honey garlic glaze. Cut into bite-sized pieces so each cube cooks evenly and quickly.
- Vegetable Oil: A neutral oil ideal for high-heat cooking without overpowering the other flavors. It helps achieve a beautiful sear on the chicken.
- Red Bell Pepper: Adds vibrant color and a hint of sweetness, balancing the savory garlic and ginger while providing a crisp bite.
- Broccoli Florets: Contribute a satisfying crunch and a wealth of vitamins, making the dish both hearty and nutritious.
- Snap Peas: Offer a delicate snap and a sweet, fresh flavor, rounding out the vegetable selection with minimal prep.
- Garlic: Brings pungent, aromatic depth to the sauce. Mince finely so it infuses every element with that signature garlicky punch.
- Ginger: Adds warmth and a slight peppery note, cutting through the sweetness of the honey for a well-rounded taste.
- Honey: Delivers natural sweetness and helps create a thick, glossy coating when combined with cornstarch.
- Soy Sauce: Provides savory umami richness and saltiness, anchoring the sweet and tangy elements of the sauce.
- Apple Cider Vinegar: Introduces a gentle acidity that brightens the sauce and keeps it from becoming cloying.
- Cornstarch: Essential for thickening the honey-soy glaze into a silky, clingy sauce that coats each ingredient beautifully.
- Salt and Pepper: Simple seasonings to enhance the natural flavors of the chicken and vegetables.
- Cooked Rice: The perfect base for soaking up every last drop of sauce, transforming this stir-fry into a fulfilling meal.
- Sesame Seeds: A final sprinkle for toasted, nutty crunch and visual appeal.
- Green Onions: Thinly sliced for a fresh, crisp garnish that adds a pop of color and mild onion flavor.
HOW TO MAKE BETTER-THAN-TAKEOUT HONEY GARLIC CHICKEN STIR-FRY
Let’s walk through the step-by-step process that transforms these simple ingredients into a mouthwatering, restaurant-style dish. This recipe is designed to move quickly—from whisking the sauce to stir-frying the chicken and veggies—so make sure all your components are prepped and within reach before you fire up the stove.
1. In a small bowl, whisk together the honey, soy sauce, apple cider vinegar, and cornstarch until completely smooth. This mixture will thicken beautifully as it cooks, so set it aside while you work on the other elements.
2. Heat 1 tablespoon of vegetable oil in a large skillet or wok over medium-high heat until shimmering.
3. Season the chicken pieces with salt and pepper, then add them to the hot skillet. Cook undisturbed for about 2 minutes to develop a golden sear, then stir and continue cooking until the chicken is cooked through and lightly browned, about 5–7 minutes total. Remove the chicken from the skillet and set it aside.
4. In the same skillet, add the remaining tablespoon of vegetable oil. Add the minced garlic and ginger, and sauté for about 30 seconds—just until fragrant and tender, being careful not to let the garlic burn.
5. Add the red bell pepper, broccoli florets, and snap peas to the skillet. Stir-fry the vegetables for 3–4 minutes, tossing constantly so they remain tender-crisp and vividly colored.
6. Return the cooked chicken to the skillet and pour the prepared honey-soy mixture over the ingredients. Stir vigorously to coat every piece of chicken and vegetable.
7. Cook for another 2–3 minutes, continuing to stir and allowing the sauce to thicken and adhere to each ingredient, creating that irresistible glossy finish.
8. Remove the skillet from heat and serve immediately over cooked rice, letting the grains soak up that sticky sauce.
9. Garnish with a generous sprinkle of sesame seeds and sliced green onions for contrasting texture, color, and flavor.
SERVING SUGGESTIONS FOR BETTER-THAN-TAKEOUT HONEY GARLIC CHICKEN STIR-FRY
When it comes to serving this honey garlic chicken stir-fry, presentation and thoughtful pairings can take it from simple weeknight fare to a memorable meal experience. Whether you’re plating it up for family dinner, meal-prepping for the week ahead, or impressing guests, paying attention to the details will make every bite even more delightful. With vibrant colors and glossy textures at play, consider how you can accentuate these qualities on the plate. From layering techniques to complementary side dishes, these serving suggestions will help you present your stir-fry with flair and flavor.
- Layered Rice Base: Spoon a helping of steaming white or brown rice onto each plate, creating a small well in the center. Pile the honey garlic chicken stir-fry on top so that the sauce seeps down into the rice, infusing every grain with flavor.
- Family-Style Platter: Transfer the stir-fry to a large, shallow serving bowl or platter. Garnish with extra sesame seeds and green onions, then place it in the middle of the table for a communal vibe—perfect for casual family dinners or potluck gatherings.
- Colorful Vegetable Couscous: For a twist, serve the stir-fry over a bed of couscous mixed with chopped fresh herbs like cilantro or parsley. The bright green flecks and tiny grains provide a contrasting texture and a light, zesty complement to the rich sauce.
- Mason Jar Meal Prep: Layer cooled rice, chilled stir-fry, and garnishes like sesame seeds in a tall mason jar for an eye-catching, grab-and-go lunch. When you’re ready to eat, simply microwave the jar (lid off) for a few minutes until warmed through.
HOW TO STORE BETTER-THAN-TAKEOUT HONEY GARLIC CHICKEN STIR-FRY
Storing your honey garlic chicken stir-fry properly ensures that you can enjoy delicious leftovers without sacrificing texture or flavor. Whether you’re packing lunches for the week or saving dinner for another night, a few key tips will keep everything fresh, vibrant, and ready to reheat. Pay attention to airtight containers and proper separation of components when possible, and you’ll find that this dish is even better the next day.
- Airtight Containers: Once completely cooled to room temperature, transfer the stir-fry into airtight meal prep containers. Seal them tightly and store in the refrigerator for up to four days.
- Separate Rice and Stir-Fry: If possible, keep the cooked rice in its own container. This prevents the rice from getting gummy overnight. Reheat rice and stir-fry separately in the microwave or on the stovetop, then combine just before serving.
- Freezer-Friendly Portions: For longer storage, portion the stir-fry (without rice) into freezer-safe bags or containers. Lay the bags flat to freeze quickly. Use within two months for best quality, and thaw overnight in the fridge before reheating.
- Reviving the Sauce: When reheating, add a tiny splash of water or broth to the stir-fry and gently reheat on low heat. This will loosen the sauce, preventing it from drying out and restoring that glossy finish.
CONCLUSION
As we wrap up this deep dive into making the Better-Than-Takeout Honey Garlic Chicken Stir-Fry, you’ve learned not only how to whip up a delectable sweet-and-savory sauce but also how to achieve that perfect stir-fry texture that makes this dish shine. From understanding the role of each key ingredient—honey’s sweetness, soy sauce’s umami, and cornstarch’s thickening power—to mastering the step-by-step stir-fry technique, you now have all the tools to create a restaurant-worthy meal right at home. Remember that this recipe is rated Beginner and comes together in 30 minutes (15 minutes prep, 15 minutes cooking) for a stress-free, satisfying experience. At around 560 calories per serving, it strikes a fantastic balance between indulgence and nutrition, making it ideal for both lunch and dinner.
Feel free to print this article and save it for later so it becomes a staple in your weeknight dinner rotation. There’s a handy FAQ section below to answer any lingering questions you might have, from ingredient swaps to storage clarifications. If you decide to try out this recipe, please drop a comment with your thoughts, questions, or any twists you’ve tried—your feedback is incredibly valuable. Whether you’re spicing it up with red pepper flakes or swapping chicken for tofu, I’d love to hear how you’ve made this stir-fry your own. Happy cooking, and here’s to many more homemade takeout victories!
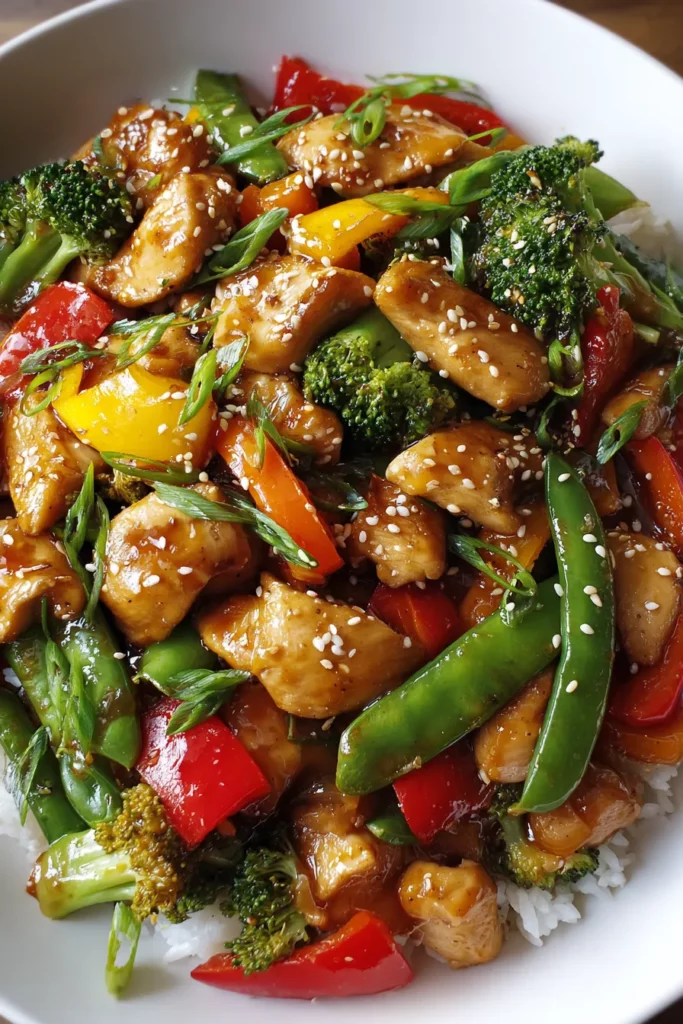

Better-Than-Takeout Honey Garlic Chicken Stir-Fry
Description
Experience the perfect balance of sweet honey, savory garlic, and tender chicken tossed with crisp bell peppers, broccoli, and snap peas in a glossy homemade sauce. Ready in just 30 minutes for a stress-free meal!
Ingredients
Instructions
-
In a small bowl, whisk together the honey, soy sauce, apple cider vinegar, and cornstarch until smooth. Set aside.
-
Heat 1 tablespoon of vegetable oil in a large skillet or wok over medium-high heat.
-
Season the chicken pieces with salt and pepper, then add them to the skillet. Cook until the chicken is browned and cooked through, about 5-7 minutes. Remove the chicken from the skillet and set aside.
-
In the same skillet, add the remaining tablespoon of vegetable oil. Add the minced garlic and ginger, sauté for about 30 seconds until fragrant.
-
Add the red bell pepper, broccoli, and snap peas to the skillet. Stir-fry the vegetables for 3-4 minutes, or until they are tender-crisp.
-
Return the cooked chicken to the skillet and pour the honey-soy mixture over the ingredients. Stir well to coat everything evenly.
-
Cook for another 2-3 minutes, allowing the sauce to thicken and coat the chicken and vegetables thoroughly.
-
Remove from heat and serve immediately over cooked rice.
-
Garnish with sesame seeds and sliced green onions.
Note
- This stir-fry is customizable with your favorite vegetables like carrots, mushrooms, or baby corn.
- To make it spicy, add a pinch of red pepper flakes or a splash of sriracha to the sauce.
- For a more authentic flavor, try using toasted sesame oil instead of vegetable oil.
- Marinating the chicken overnight in some soy sauce and ginger can enhance the flavors.
- This dish can also be made with shrimp or tofu as a variation for different dietary preferences.

