

Black Magic Cake is a show-stopping dessert that dives into layers of rich, velvet-dark chocolate that melt on your tongue with each forkful. This cake bakes into a moist, tender crumb drenched in glossy, fudge-like frosting, offering deep bittersweet cocoa notes and a silky finish that lingers. With beginner-friendly steps and minimal fuss, you’ll conjure this decadent treat in no time—perfect for celebrations or whenever you need a chocolate fix. Ready to enchant your taste buds and impress your friends?
Key Ingredients
Gather these essentials to cast your chocolate spell—each one plays a starring role in building decadent flavor and tender crumb:
- 2 cups all-purpose flour: Provides the structure and body for a tender cake crumb.
- 2 cups granulated sugar: Adds sweetness and helps keep the cake moist.
- 3/4 cup unsweetened cocoa powder: Delivers that intense, bitter chocolate flavor.
- 2 teaspoons baking soda: Leavens the batter for a light, airy texture.
- 1 teaspoon baking powder: Gives extra lift and helps the cake rise evenly.
- 1 teaspoon salt: Balances sweetness and enhances the chocolate notes.
- 2 large eggs: Bind the ingredients and contribute to a rich, tender crumb.
- 1 cup buttermilk: Adds moisture and a slight tang for tenderizing the cake.
- 1/2 cup vegetable oil: Keeps the crumb moist while making slicing easier.
- 2 teaspoons vanilla extract: Boosts the overall flavor profile with warm, aromatic notes.
- 1 cup hot water: Intensifies the cocoa and creates a smooth, pourable batter.
- 1/2 cup unsalted butter: Forms the base for a fudge-like frosting.
- 2/3 cup unsweetened cocoa powder: Powers the frosting's deep chocolate taste.
- 3 cups confectioners sugar: Sweetens and thickens the frosting into a velvety glaze.
- 1/3 cup milk: Adjusts the frosting consistency for easy spreading.
- 1 teaspoon vanilla extract: Rounds out the frosting with a hint of vanilla.
How To Make Black Magic Cake
Creating this cake is truly magical—simple steps transform pantry staples into a moist, flavorful masterpiece under a shiny layer of chocolate frosting. You’ll whisk, bake, melt, and swirl your way to dessert heaven, all without complicated techniques. Follow each step closely, and you’ll have a gorgeous Black Magic Cake that looks as impressive as it tastes.
1. Preheat oven to 350°F (175°C) and grease and flour a 9×13 inch baking pan. Make sure you coat every corner with butter or non-stick spray and dust with flour to prevent sticking.
2. In a large bowl whisk together flour, sugar, cocoa powder, baking soda, baking powder and salt. Use a whisk to break up any lumps and ensure a uniform dry mix.
3. Add eggs, buttermilk, oil and vanilla extract to the dry ingredients and beat until just combined. Avoid overmixing—stop as soon as the batter looks smooth.
4. Stir in hot water until the batter is smooth and thin. The heat helps bloom the cocoa for deeper chocolate flavor and creates a pourable consistency.
5. Pour the batter into the prepared pan and bake for 30 to 35 minutes or until a toothpick inserted into the center comes out clean. Rotate the pan halfway for even baking.
6. Allow the cake to cool in the pan for 10 minutes, then transfer to a wire rack to cool completely. This prevents the frosting from melting into the cake.
7. Meanwhile, in a saucepan melt butter over medium heat, then whisk in cocoa powder until smooth. Stir constantly to avoid scorching.
8. Remove from heat and stir in confectioners sugar, milk and vanilla extract until a spreadable frosting forms. Adjust milk or sugar if you need a thinner or thicker consistency.
9. Let the frosting cool slightly, then spread evenly over the cooled cake. Smooth with a spatula or create swirls for a decorative finish.
Serving Suggestions
Once your Black Magic Cake is frosted and ready, the fun is just beginning. Here are four delightful ways to serve each slice so it shines on your dessert table:
- Warm with ice cream: Serve piping-hot cake slices with a scoop of vanilla or coffee ice cream for a heavenly contrast of temperatures.
- Dust of cocoa powder: Lightly dust the top with unsweetened cocoa or powdered sugar to add a touch of elegance and extra chocolate hit.
- Fresh berries: Plate each slice alongside raspberries or strawberries to introduce a bright, tangy counterpoint to the rich cake.
- Whipped cream swirl: Pipe or dollop freshly whipped cream on top for an airy, cloud-like accent that complements the fudgy frosting.
Tips For Perfect Black Magic Cake
To achieve pure chocolate perfection, keep these friendly pointers in mind as you bake. They’ll help you avoid common pitfalls and customize the cake to your taste:
- Substitute hot coffee for water to intensify the chocolate flavor.
- Be careful not to overmix the batter to keep the cake light and fluffy.
- Store leftover cake in an airtight container in the refrigerator for up to three days.
- You can adjust frosting thickness by adding more milk for a thinner glaze or more sugar for a firmer frosting.
How To Store It
Proper storage ensures every slice of your Black Magic Cake stays moist and delicious. Whether you plan to enjoy it over a few days or freeze extra portions, these methods will preserve its flavor and texture:
- Room temperature: Keep slices covered with plastic wrap or in an airtight container at room temp for up to 2 days to maintain a tender crumb.
- Refrigeration: Store the whole cake or individual pieces in a sealed container for up to 3 days; let come to room temperature before serving to soften the frosting.
- Freezing: Wrap individual slices tightly in plastic wrap, then place in a freezer-safe bag for up to 2 months. Thaw overnight in the fridge.
- Layer separation: If stacking multiple pieces, place a square of parchment paper between slices to prevent sticking when covered.
Frequently Asked Questions
Here are answers to common questions about creating and enjoying your Black Magic Cake:
- How long does it take to prepare and bake the Black Magic Cake?
— Prep time is about 15 minutes, including measuring and mixing the ingredients. Bake time is 30 to 35 minutes, plus 10 minutes of cooling in the pan and additional time to cool completely on a wire rack before frosting. Allow another 10–15 minutes to prepare and slightly cool the frosting before spreading.
- Can I substitute coffee for the hot water in the batter?
— Yes. Replace the 1 cup of hot water with 1 cup of hot brewed coffee to deepen the chocolate flavor. Use a strong or espresso roast for best results. The temperature should still be hot when added so it helps dissolve the cocoa and keeps the batter thin and smooth.
- What’s the best way to avoid a dense cake?
— Be careful not to overmix once you add wet ingredients. Stir until just combined and the batter is smooth. Overmixing develops gluten, which can yield a tougher texture. Also ensure your baking soda and baking powder are fresh to help the cake rise properly.
- How can I adjust the frosting consistency?
— For a thinner glaze, add extra milk one teaspoon at a time until you reach desired pourable consistency. For a firmer, pipeable frosting, gradually add more confectioners’ sugar until the frosting holds its shape. Always let the melted butter and cocoa cool slightly before whisking in sugar and milk to prevent a runny glaze.
- What pan sizes and types work for this recipe?
— The recipe is calibrated for a 9×13-inch pan. You can use a similarly sized glass or metal pan; metal yields crisper edges, glass may require reducing oven temperature by 25°F. If using two 9-inch round pans, divide batter evenly, reducing bake time to about 25–30 minutes. Test doneness with a toothpick.
- How should I store the leftover cake and how long will it stay fresh?
— Once frosted and cooled, store the cake in an airtight container or cover the pan tightly with plastic wrap. Keep it at room temperature for up to two days; refrigerate for up to three days. If refrigerated, bring individual slices to room temperature or microwave briefly before serving to restore softness.
- Can I make this cake gluten-free or vegan?
— To make it gluten-free, substitute the all-purpose flour with a 1:1 gluten-free baking blend that contains xanthan gum, and verify other ingredients are gluten-free. For a vegan version, replace eggs with flax eggs (2 tablespoons ground flaxseed mixed with 6 tablespoons water, chilled), use plant-based milk in place of buttermilk (add 1 tablespoon vinegar per cup of non-dairy milk), and swap butter for vegan margarine. Results may vary slightly in texture.
What Makes This Special
Black Magic Cake works like a charm because it balances deep, bittersweet cocoa with a fudgy, glossy frosting—and it’s surprisingly easy to nail even if you’re a beginner. The hot water (or coffee) step really unlocks that intense chocolate character, and the simple glaze brings a silky finish that clings to every crumb. Feel free to print this guide and save it for your next chocolate craving—or whip it out at a dinner party for instant applause. Drop a comment below if you’ve tried it or need troubleshooting; I’d love to hear how your magic cake turned out!
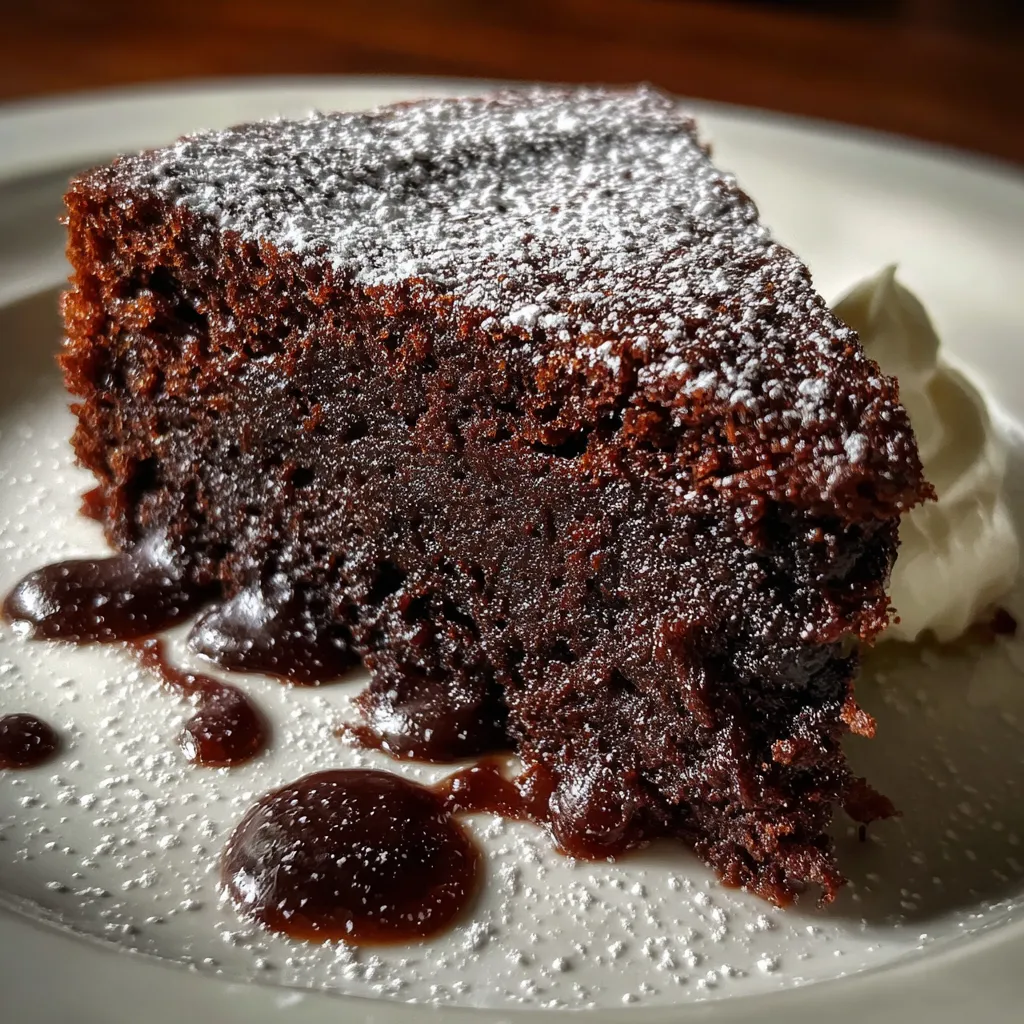

Black Magic Cake
Description
This cake bakes into a moist, tender crumb drenched in glossy, fudge-like frosting, offering deep bittersweet cocoa notes and a silky finish that lingers.
Ingredients
Instructions
-
Preheat oven to 350°F (175°C) and grease and flour a 9x13 inch baking pan.
-
In a large bowl whisk together flour, sugar, cocoa powder, baking soda, baking powder and salt.
-
Add eggs, buttermilk, oil and vanilla extract to the dry ingredients and beat until just combined.
-
Stir in hot water until the batter is smooth and thin.
-
Pour the batter into the prepared pan and bake for 30 to 35 minutes or until a toothpick inserted into the center comes out clean.
-
Allow the cake to cool in the pan for 10 minutes, then transfer to a wire rack to cool completely.
-
Meanwhile, in a saucepan melt butter over medium heat, then whisk in cocoa powder until smooth.
-
Remove from heat and stir in confectioners sugar, milk and vanilla extract until a spreadable frosting forms.
-
Let the frosting cool slightly, then spread evenly over the cooled cake.
Note
- Substitute hot coffee for water to intensify the chocolate flavor.
- Be careful not to overmix the batter to keep the cake light and fluffy.
- Store leftover cake in an airtight container in the refrigerator for up to three days.
- You can adjust frosting thickness by adding more milk for a thinner glaze or more sugar for a firmer frosting.

