

Nothing says summer quite like biting into a perfectly grilled ear of corn that’s been showered in a velvety garlic herb butter. The moment you lift that golden cob toward your lips, you’re greeted by a delightful crunch, the charred kernels giving way to a tender, sweet interior bursting with flavor. Each bite is a playful dance between the natural sweetness of the corn and the savory punch of garlic, while the melted butter oozes between your fingers in the most satisfying way. This Buttery Garlic Corn on the Cob isn’t just another side dish; it’s the star of the cookout, the thing guests will line up for, and the recipe you’ll find yourself making on repeat all season long.
As the sun dips low and backyard conversations drift into laughter, this recipe is the kind that sparks joy from prep to plate. It’s beginner-friendly, coming together in just 10 minutes of hands-on time and about 20 minutes on the grill or stovetop. Whether you’re serving it alongside marinated grilled chicken, piling plates high with vibrant summer salads, or simply offering it as a stand-alone snack, every element of this dish feels polished yet approachable. Four ears of fresh corn yield four generous portions, each about 260 calories—perfect for a light dinner or a fun side to round out a feast for friends. With a handful of simple ingredients and minimal effort, you’re set to savor that smoky, buttery goodness accented by fresh parsley and a hint of lime. Let’s dive into all the juicy details and get you ready to make the best grilled corn of your life.
KEY INGREDIENTS IN BUTTERY GARLIC CORN ON THE COB
Before we fire up the grill or fill the pot, let me walk you through the stars of this recipe. These simple ingredients work together to create a symphony of sweet, garlicky, and buttery flavors that elevate humble corn into a dish you’ll rave about all summer long.
- Fresh corn on the cob
The foundation of this recipe. Choose plump, vibrant ears with bright green husks and silky tassels. Their natural sweetness and firm kernels are what make every bite pop with juicy flavor.
- Unsalted butter
Room-temperature butter provides a smooth, rich base that carries all the seasonings. Using unsalted allows you to control the salt level perfectly.
- Garlic
Minced garlic imparts a robust, aromatic punch. As it melds with the butter, it transforms into a mellow, toasty note that complements the corn’s sweetness.
- Fresh parsley
Finely chopped parsley adds a burst of fresh, herbaceous color and flavor. It brightens each kernel and makes the dish look as good as it tastes.
- Salt
A simple seasoning that enhances all the other flavors. It’s essential for balancing the sweetness of the corn and the richness of the butter.
- Black pepper
Freshly cracked black pepper brings a gentle heat and complexity. It cuts through the fat and ties every element together.
- Paprika or chili powder (optional)
For those who love a hint of smokiness or gentle heat. This optional spice layer adds depth and a cheeky kick without overpowering.
- Lime wedges
A final flourish. A squeeze of bright, tangy lime juice at serving time brings a refreshing zing that lifts the entire dish.
HOW TO MAKE BUTTERY GARLIC CORN ON THE COB
Let’s roll up our sleeves and get that garlic herb butter blended and your corn cooked to juicy, tender perfection. Whether you choose to grill or boil, these straightforward steps will guide you through an effortless, flavorful process.
1. Begin by husking the corn. Gently peel away the outer leaves and remove every strand of silk from each ear. Rinse under cold water, rubbing lightly with your fingers to ensure no fine threads remain stuck to the kernels.
2. In a medium bowl, combine the softened butter, minced garlic, chopped parsley, salt, pepper, and optional paprika or chili powder. Use a fork to whip the mixture until it’s a smooth, homogenous garlic herb butter that’s easy to spread.
3. Preheat your grill to medium-high heat. If you’re in a boiling mood instead, fill a large pot with water, bring it to a rolling boil, and prepare to cook the corn for about 3–5 minutes.
4. For grilling, generously slather each ear of corn in the garlic herb butter, then wrap it tightly in aluminum foil. This technique traps steam and flavor, ensuring every kernel is infused with that buttery, garlicky goodness.
5. Place the wrapped corn on the hot grill and cook for 15–20 minutes, turning occasionally for even charring. If you opted for boiling, gently lower the ears into the boiling water, cook until tender (about 3–5 minutes), then drain well.
6. Once the corn is cooked, carefully unwrap (watch out for hot steam!) and give each ear a second light coating of garlic herb butter if you’re feeling extra indulgent.
7. Serve hot with fresh lime wedges on the side. A quick squeeze of lime right before the first bite adds a vibrant, citrusy note that perfectly balances the richness.
SERVING SUGGESTIONS FOR BUTTERY GARLIC CORN ON THE COB
Presenting your perfectly slathered corn is just the beginning—how you serve it can turn a simple side into an unforgettable experience. Whether you’re hosting a laid-back backyard barbecue or an intimate dinner for two, these serving touches will ensure your guests are wowed from the first glance to the final bite.
- Rustic Plank Display
Lay the hot, foil-wrapped ears on a wooden board or plank for a casual, farm-to-table vibe. Garnish with extra parsley and lime wedges. Guests can peel and serve themselves, creating an interactive, communal feel.
- Skewered Corn Bites
Slide each ear onto a sturdy wooden or metal skewer, then slice into smaller segments. Arrange on a platter and offer toothpicks. This makes for easy grab-and-go portions at a party or potluck.
- Cheesy Topping Bar
Set out small bowls of grated Parmesan, crumbled cotija, or shredded cheddar, plus chili flakes and chopped cilantro. Let friends customize their cobs for a festive, DIY twist.
- Paired with Chilled Summer Salad
Serve the corn alongside a crisp, chilled salad—think cherry tomatoes, cucumber ribbons, fresh basil, and a light vinaigrette. The contrast between hot, buttery corn and cool, crunchy greens creates a delightful balance.
HOW TO STORE BUTTERY GARLIC CORN ON THE COB
Leftover grilled corn might just be the hero of your next quick lunch or late-night snack. With a few simple storage strategies, you can keep that buttery, garlicky flavor intact and enjoy it for days to come. Proper storage not only preserves texture and taste but also saves precious time when you need a speedy side.
- Refrigerate in an Airtight Container
Allow the corn to cool slightly, then wrap each ear individually in plastic wrap or place them in a sealed container. Store in the fridge for up to 3 days. Reheat gently on a hot skillet or in the microwave to maintain moisture.
- Freeze for Longer Shelf Life
Slather each ear in butter, wrap tightly in foil, then slip into a freezer bag. Remove as much air as possible before sealing. Store for up to 2 months. Thaw overnight in the fridge, then reheat in foil on a low grill or in a 350°F oven.
- Reheat with Extra Moisture
When you’re ready to enjoy, sprinkle a few drops of water or brush on a bit more melted butter before reheating. This helps prevent the kernels from drying out and restores that just-made juiciness.
- Make-Ahead Garlic Herb Butter
Whip up the garlic butter in advance and refrigerate or freeze it in a small container or ice cube tray. When you cook fresh corn, simply melt a cube over the hot cob. This shortcut speeds up prep and keeps flavors intense.
CONCLUSION
We’ve taken you on a flavorful journey from selecting the freshest ears of corn to the sizzling moment you unwrap that foil-wrapped treasure, brimming with melted garlic herb butter. This Buttery Garlic Corn on the Cob is your go-to for busy summer nights, backyard gatherings, or whenever you crave a quick yet impressive side dish. With just 10 minutes of prep and 20 minutes of cooking, even beginner cooks can deliver a dinner table sensation—complete with bright parsley, a hint of paprika or chili powder, and a spritz of lime that lifts every bite. The recipe serves four and clocks in at about 260 calories per serving, making it a guilt-friendly addition to any meal. Because it’s so easy to customize—add cheese to the butter mix, make it vegan with margarine, or pair it with vibrant salads and grilled meats—you’ll find yourself coming back to this recipe again and again.
Feel free to print this article and stash it in your recipe binder for quick reference, or bookmark it on your device to save for the next cookout. You can also find a FAQ below where I’ve answered common questions about ingredient swaps, cooking methods, and storage tips. Have you tried this recipe? Did you add your own special twist—maybe a sprinkle of cayenne or a dash of smoked sea salt? Drop a comment, ask any questions, or share your feedback! I love hearing your stories, troubleshooting kitchen quandaries, and celebrating each corn-on-the-cob victory with you. Happy cooking!
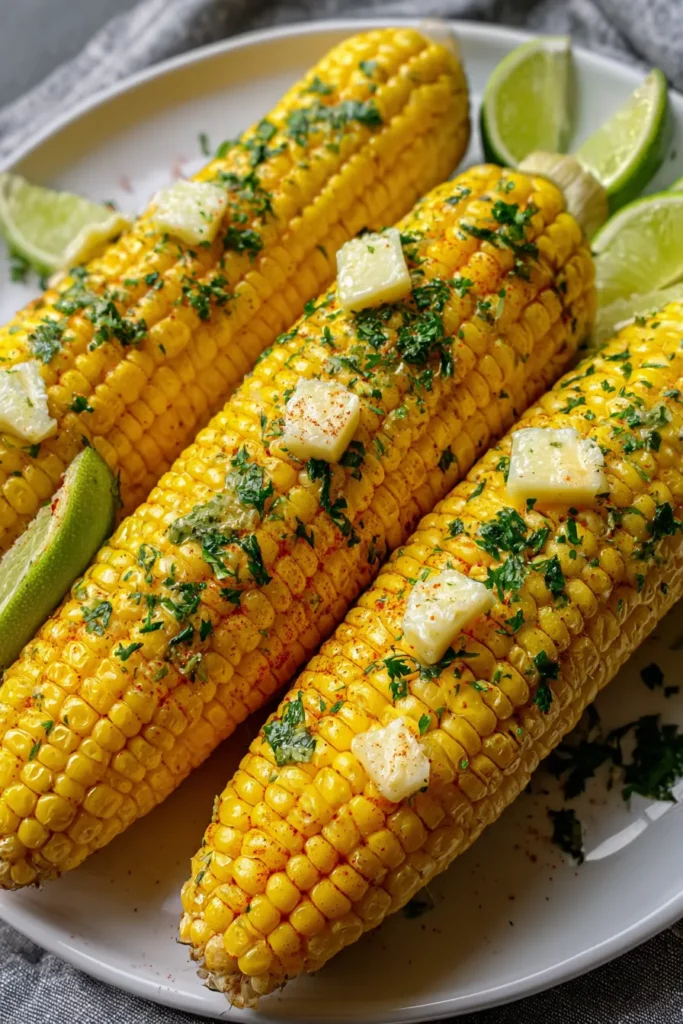

Buttery Garlic Corn on the Cob
Description
Experience the sweet crunch of fresh corn smothered in a luscious garlic butter, complemented by fresh parsley and a hint of lime for a vibrant finish.
Ingredients
Instructions
-
Begin by husking the corn. Remove the outer leaves and silk from each ear of corn. Rinse them under cold water to ensure no silk remains.
-
In a medium bowl, combine the softened butter, minced garlic, chopped parsley, salt, pepper, and optional paprika or chili powder. Use a fork to mix everything together well until it creates a smooth garlic herb butter.
-
Preheat your grill to medium-high heat. If you prefer to boil the corn, fill a large pot with water, bring it to a boil, and prepare to cook the corn for about 3-5 minutes.
-
If grilling, wrap each ear of corn in aluminum foil after you have slathered it in the garlic herb butter. This will help seal in the flavors while it cooks on the grill.
-
Place the wrapped corn on the grill and cook for about 15-20 minutes, turning occasionally. If boiling, place the corn in the boiling water and cook for about 3-5 minutes until tender; drain well.
-
Once cooked, unwrap the corn from the foil (be careful of the steam) and give it another light coating of the garlic herb butter if desired.
-
Serve hot with lime wedges on the side for an extra zing. Enjoy your buttery garlic corn on the cob!
Note
- For a unique twist, try adding cheese to the butter mix for a rich flavor.
- This dish pairs wonderfully with grilled meats and summer salads.
- You can make the garlic herb butter ahead of time and refrigerate it until you're ready to cook.
- For a vegan version, substitute the butter with plant-based margarine or olive oil.

