

Ever found yourself doodling in your kitchen, dreaming about a twist on the classic pizza that’s both playful and downright drool-worthy? These Cheesy Pepperoni Pizza Roll-Ups are here to answer every pizza lover’s midnight snack prayers and party hosting dilemmas. Think of soft, pillowy dough swaddling gooey layers of mozzarella cheese, kissed by tangy marinara sauce, punctuated by spicy, savory pepperoni that curls at the edges as it bakes. Once they emerge from the oven, the edges crisp up to a light golden hue while the centers stay luxuriously melty, begging to be torn apart. Each bite is like a mini pizza explosion in your mouth, ready for dunking into extra sauce or savoring as is. It’s the ultimate hand-held comfort food that transforms dinner routines into festive celebrations, no matter how simple the occasion.
And oh, the flavors as they mingle—notes of garlic powder and aromatic Italian herbs dance in every mouthful, transporting you straight to a cozy trattoria. But what truly makes these roll-ups magical is their versatility: serve them as a fun appetizer at game nights, pack them into lunchboxes for a surprise send-off, or treat your family to an impromptu pizza party right at home. Whether you're a seasoned chef or a kitchen newbie, these roll-ups promise a foolproof recipe and endearing faces of delight all around the table.
Beyond the irresistible taste, part of the fun is getting your hands a little messy—rolling out dough, layering in your favorite toppings, sealing up tiny pockets of pizza goodness. It transforms cooking into a hands-on experience that’s perfect for dragging kids into the kitchen or hosting a relaxed, DIY pizza night with friends. And because this recipe relies on store-bought refrigerated dough, you can skip the fuss without sacrificing any of that fresh-baked charm.
In just 15 minutes of prep time and under 20 minutes in the oven, you’ll pull a golden tray of roll-ups out, boasting crispy, herby edges and melty, ooey-gooey centers. A light shower of grated Parmesan right out of the oven adds a savory zing that takes these bites over the top. Resist the urge to devour them immediately—you’ll want to let them rest for about five minutes to set up perfectly. Feel free to swap in turkey pepperoni for a leaner twist or whole wheat dough if you’re aiming for a healthier spin. Whether served with a crisp Caesar salad, dipped in extra marinara, or paired with a cold drink, these roll-ups are ready to steal the show at any gathering.
KEY INGREDIENTS IN CHEESY PEPPERONI PIZZA ROLL-UPS
Before diving into the roll-up action, let's break down each superstar ingredient and see how it contributes to creating that perfect bite.
- Refrigerated pizza dough
This soft, pliable base bakes up into a golden, slightly chewy crust, saving you time on homemade dough while still giving you fresh bakery vibes.
- Marinara sauce
A rich, tangy layer that adds moisture, depth, and that signature tomato flavor every pizza needs.
- Shredded mozzarella cheese
Known for its stretchy, melty quality, mozzarella brings the ooey-gooey goodness that defines any great pizza treat.
- Pepperoni slices
Each round crisps at the edges, releasing savory oils and a mild, smoky spice that punctuates each bite.
- Olive oil
Brushed over the tops for a glossy finish, it helps the seasonings adhere and promotes a perfectly golden crust.
- Garlic powder
A quick way to sprinkle in savory depth, garlic powder infuses the roll-ups with warm, aromatic notes.
- Dried Italian seasoning
A blend of herbs like oregano, basil, and thyme that brings that classic Italian pizzeria flavor.
- Grated Parmesan cheese
Sprinkled on after baking, Parmesan adds a nutty, slightly salty kick and an elegant finish.
HOW TO MAKE CHEESY PEPPERONI PIZZA ROLL-UPS
Ready to roll? This beginner-friendly recipe transforms simple ingredients into mouthwatering bites in under 30 minutes.
1. Preheat your oven to 375°F (190°C) so it’s evenly heated when you slide in the roll-ups. While it warms, line a large baking sheet with parchment paper for easy removal and cleanup.
2. Unroll the refrigerated pizza dough onto a lightly floured surface and, using your fingers, gently stretch or roll it into a neat rectangle, ensuring an even thickness.
3. Spread the marinara sauce over the dough’s surface, leaving about a 1-inch border all around to allow for sealing. Use the back of a spoon for an even coat.
4. Sprinkle the shredded mozzarella cheese over the saucy layer, distributing it evenly so every roll-up gets oodles of gooey goodness.
5. Place the pepperoni slices over the cheese, spacing them out so no two slices overlap too much—this helps each roll-up hold its structure.
6. Roll the dough starting at one of the longer edges, tucking in as you go. Once you reach the opposite side, pinch the seam and both ends firmly to seal in the fillings.
7. Slice the rolled log into 1-inch pieces with a sharp knife, wiggling gently to maintain shape, then arrange them cut-side up on the prepared baking sheet.
8. Brush the tops of each roll-up with olive oil, then sprinkle them with garlic powder and dried Italian seasoning for an herby, golden finish.
9. Bake in your preheated oven for 15–20 minutes, or until the roll-ups turn a beautiful golden brown and the cheese inside is bubbling.
10. Remove from the oven and immediately sprinkle with grated Parmesan cheese. Let the roll-ups cool for about five minutes before serving so they firm up slightly.
SERVING SUGGESTIONS FOR CHEESY PEPPERONI PIZZA ROLL-UPS
Elevating your roll-ups goes beyond just plating—they’re meant to be shared, dunked, and enjoyed with a dash of flair. Whether you’re hosting a game night or simply treating yourself, these serving ideas will inspire you to get creative.
- Serve with extra marinara sauce in small dipping bowls alongside the platter. The contrast of warm, herby roll-ups and cool tomato dip keeps every bite exciting.
- Garnish the tray with fresh basil leaves or a sprinkle of chopped parsley to introduce a pop of color and bright, herbaceous notes that cut through the richness.
- Pair with a crunchy side salad—think crisp Romaine, shaved Parmesan, and a tangy vinaigrette—to balance the indulgent cheese and add a refreshing crunch.
- For on-the-go snacking, wrap individual roll-ups in foil packets and secure with a toothpick. They stay warm longer and are perfect for picnics, road trips, or packed lunches.
HOW TO STORE CHEESY PEPPERONI PIZZA ROLL-UPS
Leftovers are a gift, and these roll-ups reheat beautifully without losing their charm. Proper storage keeps them tasting freshly baked, even days later.
- Refrigeration: Once completely cooled, place roll-ups in an airtight container or wrap the tray tightly with plastic wrap. Stored in the fridge, they remain tender and flavorful for up to three days.
- Freezing: Arrange cooled roll-ups in a single layer on a baking sheet, freeze for about an hour until firm, then transfer to a freezer-safe bag or container. They’ll keep for up to one month.
- Oven Reheating: For crisp edges and melted centers, preheat your oven to 350°F (175°C). Place roll-ups on a parchment-lined sheet and bake for 8–10 minutes, just until warmed through.
- Make-Ahead: Assemble the roll-ups and place them on a parchment-lined baking sheet. Cover tightly with plastic wrap and store in the fridge for up to 12 hours, then bake following the original baking time when ready.
CONCLUSION
In this article, we explored the simple yet spectacular world of Cheesy Pepperoni Pizza Roll-Ups, turning ordinary pizza night into a fun twist that’s perfect for parties, game nights, or a cozy weeknight treat. Starting with a can of refrigerated pizza dough and filling it with tangy marinara sauce, gooey mozzarella, and classic pepperoni, we guided you through each step with clear instructions and handy tips. From our detailed KEY INGREDIENTS breakdown—where we highlighted the role of each essential component—to the HOW TO MAKE section, which walks you through kneading, rolling, slicing, and seasoning, every part of this recipe is designed for skill levels from beginner to seasoned home cook. The beauty of these roll-ups lies in their adaptability: you can spice things up with red pepper flakes, switch to turkey pepperoni for a leaner bite, or choose whole wheat dough for added fiber—all without sacrificing that irresistible, melted-cheese pull. Don’t forget the finishing touches, like brushing with olive oil and sprinkling garlic powder, Italian herbs, and Parmesan, to elevate every mouthful into a golden, herby delight.
So go ahead and print this article out or save it to refer back whenever you crave a crowd-pleasing appetizer or a no-fuss lunch that feels straight out of a pizzeria. With our prep details—15 minutes hands-on, 15 to 20 minutes in the oven, and a short 5-minute rest—you’ll breeze through each step knowing exactly what to expect. Below, you’ll find a handy FAQ section to troubleshoot anything from dough stickiness to timing tweaks, ensuring your roll-ups emerge perfectly golden every time. I would absolutely love to hear how your kitchen adventure went—drop your comments, questions, or any creative twists you experimented with. Did you add red pepper flakes for extra heat or swap in whole wheat dough for a wholesome spin? Share your stories! Your feedback not only helps fellow readers but also inspires future recipes and tips. Here’s to endless cheesy goodness—thanks for cooking along, and happy rolling!
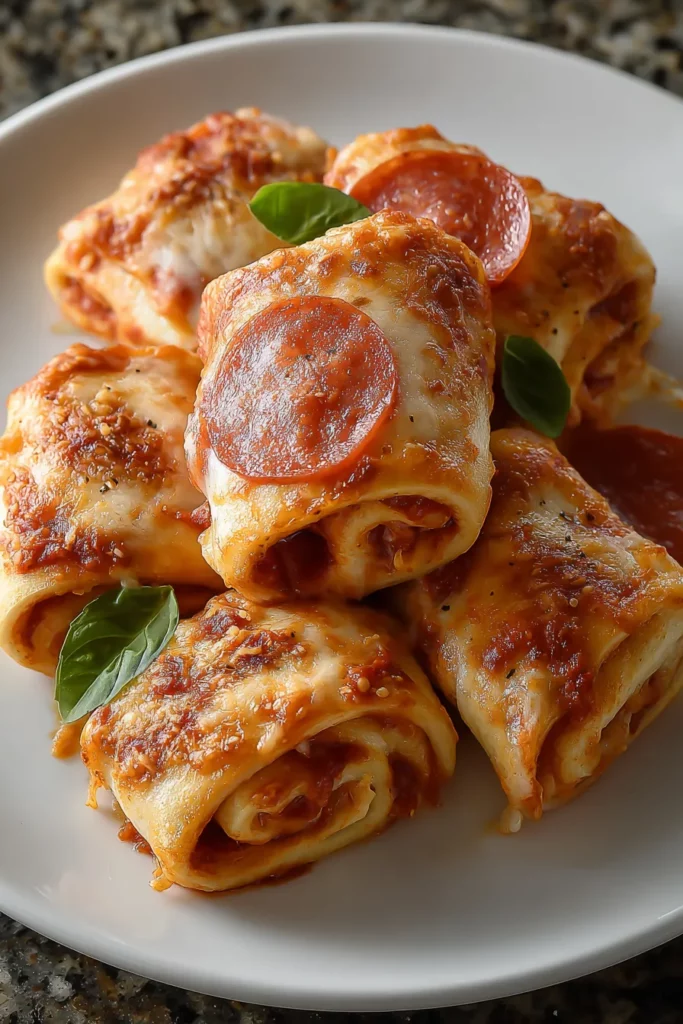

Cheesy Pepperoni Pizza Roll-Ups
Description
These golden-brown pizza roll-ups feature gooey mozzarella, savory pepperoni, and zesty marinara in every bite. Crispy edges and a sprinkle of garlic and Italian herbs make them addictive and fun to share.
Ingredients
Instructions
-
Preheat the oven to 375°F (190°C). Line a baking sheet with parchment paper.
-
Unroll the pizza dough onto a flat surface and gently stretch it into a rectangle.
-
Spread the marinara sauce evenly over the entire surface of the dough, leaving a 1-inch border around the edges.
-
Sprinkle the mozzarella cheese over the marinara sauce, ensuring it's evenly distributed.
-
Place the pepperoni slices evenly over the cheese layer.
-
Starting at one of the longer edges, carefully roll the dough into a log shape. Pinch the seam and ends to seal.
-
With a sharp knife, slice the rolled log into 1-inch pieces and place them cut side up on the prepared baking sheet.
-
Brush the tops of the roll-ups with olive oil, then sprinkle with garlic powder and Italian seasoning.
-
Bake in the preheated oven for 15-20 minutes, or until the rolls are golden brown and the cheese is bubbly.
-
Remove from the oven and sprinkle with grated Parmesan cheese. Allow to cool slightly before serving.
Note
- For a spicier version, consider adding red pepper flakes.
- You can substitute turkey pepperoni for a lighter option.
- Serve with extra marinara sauce on the side for dipping.
- These roll-ups can also be made with whole wheat dough for a healthier twist.
- Perfect appetizer for parties or game nights.

