

There’s something inexplicably comforting about reaching into a warm kitchen and pulling out a fresh batch of chocolate chip cookies. From the first bite, you get that perfect harmony of crispy edges giving way to chewy centers, each mouthful melting into pools of rich, semi-sweet chocolate. It’s an instant mood-lifter—those buttery undertones mingle with vanilla notes and sweet morsels, creating a flavor experience that feels like a hug. Whether you’re a first-time baker or a seasoned home cook, these cookies are the kind of treat you can whip up on any lazy afternoon, filling your home with an inviting warmth that beckons friends and family over for an impromptu taste test.
Beyond the delicious taste, these homemade cookies carry a sense of nostalgia and simple joy. There’s power in that gentle crackle when you break one in half, releasing a steam of warm chocolate that makes your eyes widen in delight. They’re beginner-friendly, requiring no fancy tools beyond a mixing bowl and a cookie sheet, yet delivering results that look and taste like they came from a high-end bakery. Plus, with just 20 minutes of prep, a quick 12-minute bake, and a 5-minute cool-down on the pan, you’re looking at under an hour from start to finish. Each cookie clocks in at about 150 calories—an indulgence you can easily justify when life calls for a little sweet comfort food.
KEY INGREDIENTS IN CHOCOLATE CHIP COOKIES
Every amazing cookie starts with a lineup of trusty ingredients. These pantry staples work together to build structure, provide sweetness, and deliver those signature chocolate pockets in every bite. Let’s break down each one so you know exactly why they’re indispensable.
- All-purpose flour
Acts as the backbone of the dough, offering structure and stability. It’s neutral in flavor, allowing the buttery and chocolate notes to shine through without competing elements.
- Baking soda
Serves as the leavening agent, helping the cookies rise and develop those delightful crinkled tops. It ensures a tender crumb and perfect spread.
- Unsalted butter
Provides richness and moisture, creating a tender, melt-in-your-mouth texture. Using room-temperature butter is key for even creaming with sugars, which traps air and helps the dough become light and fluffy.
- Granulated sugar
Contributes to the crisp exterior by caramelizing at the edges. Its fine crystals help the dough spread just enough for that classic shape.
- Light-brown sugar
Adds a hint of molasses flavor and extra moisture, resulting in chewy centers. Its deeper sweetness complements the chocolate chips beautifully.
- Salt
Balances sweetness and enhances overall flavor, making every ingredient’s character pop without tasting overtly salty.
- Pure vanilla extract
Brings warmth and depth, rounding out the flavors with its aromatic, floral notes. A little goes a long way in elevating each bite.
- Eggs
Provide structure, moisture, and binding. They help emulsify fats and liquids, ensuring a uniform dough that bakes into perfectly tender cookies.
- Chocolate chips
The star attraction—semisweet or milk chocolate morsels that melt into gooey pockets. They deliver bursts of chocolatey goodness and visual appeal.
HOW TO MAKE CHOCOLATE CHIP COOKIES
Ready to roll up your sleeves and bake the best cookies of your life? Follow these steps exactly, and you’ll end up with golden-edged, chewy-centered wonders that’ll have everyone asking for seconds.
1. Preheat your oven to 350°F (175°C). Line a baking sheet with parchment paper or a silicone baking mat to prevent sticking and promote even browning.
2. In a small bowl, whisk together the flour and baking soda; set this dry mixture aside. This ensures the leavening agent is uniformly distributed for consistent rise.
3. In a large bowl, using a hand mixer or stand mixer, beat the butter and both sugars on medium-high speed until light and fluffy, about 2–3 minutes. This creaming step incorporates air and lays the foundation for tender cookies.
4. Reduce the mixer speed to low, then add the salt, vanilla extract, and eggs. Mix gently until just combined, scraping down the bowl to ensure an even mixture without overworking the dough.
5. Gradually add the flour mixture to the butter mixture, mixing on low speed just until incorporated. Avoid overmixing to keep the cookies tender and prevent excessive gluten development.
6. Gently fold in the chocolate chips using a spatula or wooden spoon, making sure they’re evenly distributed without smashing them.
7. Drop rounded tablespoons of dough onto the prepared baking sheet, spacing each mound about 2 inches apart to allow room for spreading.
8. Bake for 10–12 minutes, or until the edges are golden brown but the centers still look slightly undercooked. They will continue to bake on the hot sheet after you remove them from the oven.
9. Allow the cookies to cool on the baking sheet for about 5 minutes before transferring them to a wire rack to cool completely. This helps them set properly and prevents breakage.
SERVING SUGGESTIONS FOR CHOCOLATE CHIP COOKIES
When it comes to enjoying these warm, gooey chocolate chip cookies, the right pairing or presentation can take your snack to the next level. Whether you’re hosting a cozy gathering or just indulging solo with a cup of coffee, these ideas will elevate every bite and make your treats look as good as they taste.
- Serve with cold milk in a tall glass for a classic combo. Dip a still-warm cookie and let it soak up bit by bit—there’s nothing quite like that soft, chocolate-drenched center.
- Pair alongside a steaming mug of freshly brewed coffee or tea. The slight bitterness of coffee balances the cookie’s sweetness, while herbal or black teas bring out the vanilla and brown sugar nuances.
- Create an ice cream sandwich by resting a scoop of vanilla or caramel ice cream between two cookies. Wrap tightly in parchment and freeze for a few hours to let it firm up before serving for a decadent frozen treat.
- Present on a colorful platter with a variety of toppings—sprinkles, chopped nuts, or sea salt flakes. Let your guests customize their cookies, turning a simple dessert into an interactive experience.
HOW TO STORE CHOCOLATE CHIP COOKIES
Ensuring your homemade cookies stay fresh and flavorful is just as important as baking them perfectly. Cookies can lose their chewiness or go stale if not stored properly, but with a few simple techniques, you can keep them tasting bakery-fresh for days (or even weeks!).
- Room-temperature airtight container: Once completely cooled, stack cookies in a sealed container lined with parchment paper. This keeps moisture in and air out, preserving soft centers and crisp edges for up to five days.
- Refrigeration: Place cookies in a single layer on a plate, cover tightly with plastic wrap, and refrigerate for up to a week. Chilling can intensify flavors, but be mindful that some of the crispy texture may soften.
- Freezing baked cookies: Flash-freeze cookies on a baking sheet until firm, then transfer to a freezer bag or container with parchment layers. They’ll stay fresh for up to three months—just thaw at room temperature for 15–20 minutes before serving.
- Freezing dough balls: Scoop dough onto a tray, freeze solid, then move to a sealable bag. When you’re ready to bake, place frozen dough balls on a lined sheet and add a couple of extra minutes to the baking time for fresh-from-the-oven results anytime.
CONCLUSION
These warm, homemade chocolate chip cookies are more than just a dessert—they’re an invitation to pause, savor, and share simple pleasures. From gathering the handful of everyday ingredients to watching tiny chocolate chips ooze into molten pools, the entire process feels like a heartwarming ritual. We’ve covered everything from the foundational roles of flour and sugars to step-by-step instructions for perfect baking, plus tips on serving and storing to keep your treats at their best. Whether you’re a baking newbie or someone who turns the kitchen into a comfort-food haven, this recipe offers both ease and spectacular results.
Feel free to print this article or save it in your favorite recipe collection for those moments when you need a sweet pick-me-up. Scroll down to find a handy FAQ section that tackles common baking questions and troubleshoot any issues that come up along the way. And if you give this recipe a try—perhaps adding a handful of toasted nuts or chilling the dough for thicker cookies—please drop a comment with your thoughts. I’d love to hear about your flavor variations, baking triumphs, or any hurdles you encounter. Your feedback and questions help our community learn and grow together in the wonderful world of homemade desserts!
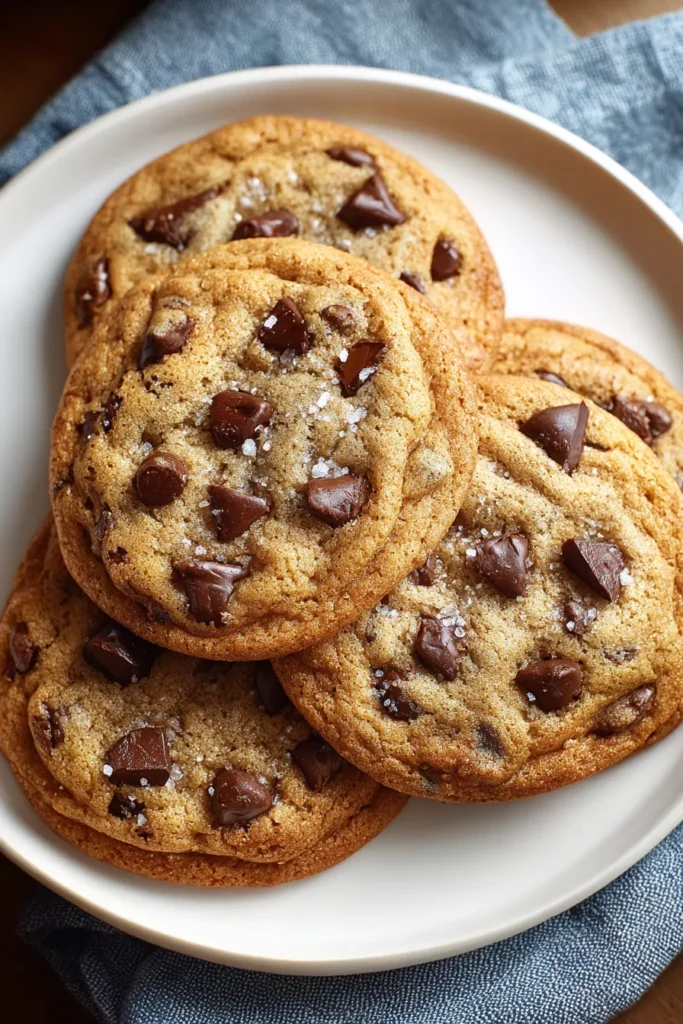

Chocolate Chip Cookies
Description
Freshly baked chocolate chip cookies with crispy edges and chewy centers are pure comfort. Each bite offers a delectable blend of buttery goodness and rich chocolate that will keep you coming back for more.
Ingredients
Instructions
-
Preheat your oven to 350°F (175°C). Line a baking sheet with parchment paper or a silicone baking mat.
-
In a small bowl, whisk together the flour and baking soda; set aside.
-
In a large bowl, using a hand mixer or stand mixer, beat the butter and both sugars on medium-high speed until light and fluffy, about 2-3 minutes.
-
Reduce the mixer speed to low, and add the salt, vanilla extract, and eggs, mixing until combined.
-
Gradually add the flour mixture to the butter mixture, mixing just until incorporated. Avoid overmixing.
-
Gently fold in the chocolate chips using a spatula or wooden spoon.
-
Drop rounded tablespoons of dough onto the prepared baking sheet, spacing them about 2 inches apart.
-
Bake for 10-12 minutes, or until the edges are golden brown but the centers appear slightly undercooked. The cookies will continue to cook on the baking sheet after being removed from the oven.
-
Allow the cookies to cool on the baking sheet for about 5 minutes before transferring them to a wire rack to cool completely.
Note
- For added flavor, consider toasting the nuts and adding them to the dough.
- Chilling the dough for at least 30 minutes before baking can prevent spreading and result in thicker cookies.
- Adjust the cooking time depending on your preferred cookie texture; bake longer for crispier cookies, shorter for chewier ones.

