

There’s something incredibly magical about sinking your fork into a slice of Chocolate Fudge Truffle Cheesecake. From the moment you set eyes on its silky, deep-brown surface, you know you’re in for a treat that transcends ordinary dessert status. Each forkful offers a symphony of textures: a buttery crust that yields just enough, a luxuriously smooth cheesecake layer, and little bursts of fudgy truffle that surprise you like hidden treasure. The balance between the tangy cream cheese and the intense cocoa is nothing short of perfection, creating a melody of flavors that dances across your palate. And let’s not forget that satisfying crackle when you shave chocolate over the top—it’s a multisensory delight!
What I love most about this cheesecake is how it brings people together. I still remember the first time I made it for a cozy movie night with friends: as soon as I opened the fridge, the room lit up with delighted squeals. There’s something instantly communal about passing around that ring of dessert, watching each person’s eyes soften as they discover those fudgy centers hidden inside. Whether you’re celebrating a birthday, hosting a dinner party, or simply craving a decadent moment to yourself, this recipe is your ticket to pure, unadulterated joy. Trust me, once you taste that rich, creamy blend of chocolate and cream cheese, you’ll be hooked forever.
KEY INGREDIENTS IN CHOCOLATE FUDGE TRUFFLE CHEESECAKE
Before diving into the step-by-step instructions, let’s talk about the superheroes that make this cheesecake shine. Each ingredient plays its part, from building the perfect crust to infusing that luscious chocolate flavor throughout. Using the right quality ingredients ensures your dessert has the texture, taste, and visual appeal worthy of any special occasion.
- Chocolate wafer cookies
Crushed into fine crumbs, these cookies form the base of the crust. Their rich cocoa flavor and sturdy texture provide the perfect foundation for the creamy topping.
- Unsalted butter
Melted and mixed with the cookie crumbs, butter adds moisture and helps bind the crust together. Using unsalted ensures you control the overall sweetness and salt levels.
- Semi-sweet chocolate chips
These chips melt into a glossy, rich mixture when combined with cream. They contribute a balanced sweetness and silky mouthfeel to the cheesecake filling.
- Heavy cream
Paired with chocolate chips to create a smooth ganache-like swirl, heavy cream lends silkiness and richness without overpowering the cream cheese.
- Cream cheese
The heart of the cheesecake, its tangy creaminess contrasts beautifully with the cocoa and chocolate, creating that signature cheesecake texture.
- Granulated sugar
Sweetens the filling and helps achieve a smooth, silky texture by dissolving into the cream cheese mixture as you beat it.
- Cocoa powder
Provides intense chocolate flavor and a deeper color without adding extra sugar. It also helps thicken the filling slightly.
- Large eggs
Eggs are the binding agent that gives cheesecake its structure. Adding them one at a time ensures a uniform, crack-free appearance.
- Vanilla extract
A splash of vanilla enhances all the other flavors, adding a subtle aromatic warmth that rounds out the chocolate.
- Salt
Just a pinch of salt balances the sweetness and brings out deeper nuances in both the chocolate and cream cheese.
- Dark chocolate
Chopped into small pieces, this chocolate adds intense bursts of flavor when hidden throughout the filling, creating those delightful truffle surprises.
- Additional cocoa powder and chocolate shavings (optional)
Used for garnish, they provide a professional finishing touch and an extra hint of chocolate aroma.
HOW TO MAKE CHOCOLATE FUDGE TRUFFLE CHEESECAKE
Let’s walk through how to transform these fantastic ingredients into a show-stopping dessert. Follow each step carefully to achieve that ideal creamy texture, prevent cracks, and ensure every bite is as indulgent as the last. Ready to get baking?
1. Preheat your oven to 325°F (163°C). Lightly grease a 9-inch springform pan, then wrap the outside with two layers of heavy-duty aluminum foil. This waterproof barrier prevents moisture from seeping in during the water bath.
2. In a medium bowl, combine the crushed chocolate wafer cookies and melted butter. Stir until the crumbs resemble wet sand. Press firmly and evenly into the bottom of the pan to form a solid crust.
3. Over low heat, melt the semi-sweet chocolate chips and heavy cream together in a small saucepan, stirring continuously until the mixture is smooth. Remove from heat and let it cool just enough so it won’t cook the eggs later.
4. Using a stand mixer or electric hand mixer, beat the cream cheese on medium speed until smooth and lump-free. Gradually add the granulated sugar, scraping down the sides of the bowl as needed, until fully incorporated.
5. Sift in the cocoa powder, continuing to beat until the mixture is uniform with no lumps. Crack in the eggs one at a time, mixing just until each is fully combined before adding the next to maintain a velvety texture.
6. Gently fold in the chocolate-cream mixture, vanilla extract, and salt. Mix just until combined—overmixing can introduce too much air, leading to cracks.
7. Pour the creamy batter over the prepared crust. Smooth the top with a spatula for an even surface.
8. Place the cheesecake pan inside a larger baking dish. Carefully pour hot water into the outer dish so it reaches about halfway up the sides of the springform pan—this water bath ensures gentle, even baking.
9. Bake for 60–70 minutes, or until the edges are set and the center still wobbles slightly when you gently shake the pan. The top should appear just dry.
10. Turn off the oven and let the cheesecake remain in the water bath for 15 minutes. Remove it from the water and transfer the pan to a wire rack. Cool completely to room temperature.
11. Cover and refrigerate for at least 4 hours, although overnight chilling is best for maximum flavor and firmness.
12. Before serving, dust with extra cocoa powder and sprinkle with chocolate shavings for a beautiful, professional finish.
SERVING SUGGESTIONS FOR CHOCOLATE FUDGE TRUFFLE CHEESECAKE
Now that your masterpiece is perfectly chilled, let’s make every serving moment special. The right presentation and pairing can elevate this indulgent treat from “wow” to “absolutely unforgettable.” Whether you’re aiming for a showy dessert table or a cozy after-dinner finale, these suggestions will help you serve with confidence and style.
- Classic Coffee Pairing
Serve a slice alongside a freshly brewed espresso or strong black coffee. The slight bitterness of the coffee cuts through the cheesecake’s richness, creating a harmonious flavor balance.
- Ganache Drizzle
Warm up some semi-sweet chocolate ganache (chocolate chips melted with heavy cream) and artistically drizzle it over each slice. The glossy, velvety ribbons add an extra layer of chocolate intensity.
- Berry Compote
Top slices with a spoonful of tart berry compote—think raspberries or blackberries cooked down with a bit of sugar. The bright acidity and juicy texture offer a refreshing counterpoint.
- Vanilla Ice Cream Scoop
Place a small scoop of rich vanilla ice cream next to each slice. The cold creaminess highlights the cheesecake’s smooth texture and brings out its sweet, chocolaty notes.
HOW TO STORE CHOCOLATE FUDGE TRUFFLE CHEESECAKE
Keeping your cheesecake fresh ensures every slice tastes just as incredible as the first. Proper storage will preserve the creamy texture, prevent drying out, and maintain that decadent chocolate flavor. Here are some foolproof methods to keep your dessert in prime condition.
- Refrigeration in an Airtight Container
Once fully chilled, remove the cheesecake from the springform pan and place it in an airtight container or wrap it tightly with plastic wrap. Store in the coldest part of the fridge for up to 5 days.
- Freezing Individual Slices
For long-term storage, wrap each slice in parchment paper and then in plastic wrap, sealing it tightly. Place wrapped slices in a freezer-safe bag. They’ll keep beautifully for up to 2 months.
- Labeling and Dating
Always label containers or bags with the date you prepared the cheesecake. This simple step helps you track freshness and ensures you enjoy every slice at its best.
- Thawing Properly
To serve frozen slices, transfer them to the refrigerator overnight. Allow them to come to just below room temperature before plating to preserve the ideal creamy consistency.
CONCLUSION
Thank you for joining me on this luscious journey into the world of Chocolate Fudge Truffle Cheesecake. From crafting that buttery cookie crust to folding in velvety chocolate, each step brings you closer to a dessert that’s sure to steal the spotlight at any gathering. You now have a detailed roadmap: a clear understanding of each ingredient’s role, an easy-to-follow method for baking without cracks, and tips for serving and storing your creation like a pro. Whether you’re planning to wow holiday guests or simply indulge in a personal treat, this recipe adapts beautifully to any occasion. Feel free to print this article or save it in your digital recipe box, so it’s always at your fingertips when the craving strikes. And don’t forget—you’ll find an FAQ below to answer any lingering questions about baking techniques or ingredient swaps.
I hope this guide makes your cheesecake experience as joyful and stress-free as possible. If you decide to try this recipe, I would love to hear how it turned out! Share your stories of the first bite, any creative serving twists you tried, or tips you discovered along the way. Got questions about ingredient substitutions, oven variances, or decorating ideas? Drop a comment or send feedback—I’m here to help you every step of the way. Happy baking, and here’s to many decadent slices filled with rich chocolate, creamy cheesecake, and surprise truffle comforts!
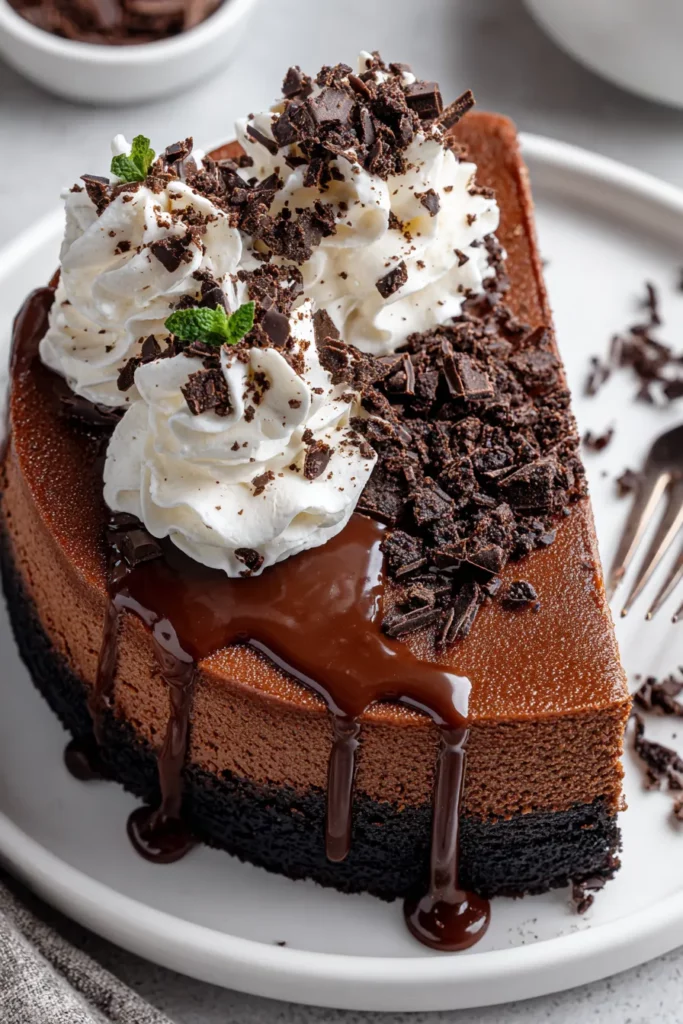

Chocolate Fudge Truffle Cheesecake
Description
Experience layers of velvety cream cheese swirled with rich chocolate fudge and hidden truffle centers. Each bite melts in your mouth with intense cocoa flavor and silky texture.
Ingredients
Instructions
-
Preheat your oven to 325°F (163°C). Prepare a 9-inch springform pan by lightly greasing it, then wrap the outside with a double layer of heavy-duty aluminum foil to prevent any water from seeping in during baking.
-
Combine the crushed chocolate wafer cookies and melted butter in a mixing bowl until the mixture resembles wet sand. Press the mixture firmly and evenly into the bottom of the prepared pan to form the crust.
-
In a small saucepan over low heat, melt together the semi-sweet chocolate chips and heavy cream, stirring until smooth. Set the mixture aside to cool slightly.
-
Using a stand mixer or electric hand mixer, beat the cream cheese on medium speed until it becomes smooth and creamy. Gradually add the sugar and continue to beat until well combined. Scrape the sides of the bowl as needed.
-
Blend in the cocoa powder, ensuring no lumps remain. Add the eggs, one at a time, mixing just until each egg is incorporated before adding the next.
-
Stir in the melted chocolate and cream mixture, vanilla extract, and salt until everything is evenly combined. Be careful not to overmix to maintain a light texture.
-
Pour the cheesecake batter over the prepared crust in the springform pan, smoothing the top with a spatula.
-
Place the springform pan inside a larger baking dish. Fill the outer dish with hot water halfway up the sides of the cheesecake pan to create a water bath. This helps prevent cracks in your cheesecake.
-
Bake for about 60-70 minutes, or until the center is just set and the top appears slightly dry. The center should still wobble slightly when gently shaken.
-
Remove the cheesecake from the oven and let it cool in the water bath for about 15 minutes. Then, remove the pan from the water and place it on a wire rack. Allow the cheesecake to cool to room temperature.
-
Once cooled, refrigerate the cheesecake for at least 4 hours, or preferably overnight, to set completely.
-
Before serving, decorate with optional cocoa powder and chocolate shavings, if desired.
Note
- To prevent cracking, ensure all ingredients are at room temperature before mixing.
- The water bath technique helps provide even baking and prevents the cheesecake's edges from overcooking.
- For easier slicing, use a sharp knife dipped in hot water and wipe clean between each slice.
- Allow the cheesecake to stand at room temperature for about 15 minutes before serving for optimal texture.

