

When the air turns crisp and leaves begin painting the sidewalks in shades of gold and blush, there’s nothing quite like the welcoming comfort of a warm dessert wafting through the kitchen. Classic Apple Crisp delivers on every cozy craving: tender, sweet-tart slices of apple bathed in a simple mixture of sugar, flour, and cinnamon, crowned with a buttery, golden crumble that crackles beneath the spoon. Whether you’re knee-deep in fall baking or just craving an all-season treat, this beginner-friendly dessert comes together with minimal effort—just 15 minutes of prep, 45 minutes of baking, and a 10-minute rest. It’s the ultimate comfort food that turns your oven into a haven of nostalgia and flavor, clocking in at around 350 calories per serving when enjoyed in eight generous helpings. With a simple array of pantry staples and humble ingredients, this dish manages to feel luxurious without any fuss. Whether you’re planning a cozy weekend brunch or craving a sweet finish to a casual weeknight meal, this dessert is a guaranteed crowd-pleaser.
I still remember my very first attempt at this Classic Apple Crisp—it was a crisp October afternoon, and I decided to surprise my family on a whim. I gathered the juiciest apples I could find at the local orchard, excited to recreate a recipe I’d read in a tattered family cookbook. As I peeled and sliced, the kitchen counter soon became scattered with rosy apple crescents, each waiting for its turn to transform. A squeeze of lemon juice brightened the fruit, while cinnamon, sugar, and flour joined forces to season each tender wedge. When I topped the fruit with that glorious mixture of oats, brown sugar, and buttery crumble, I felt like a true baking pioneer. By the time it emerged from the oven, the house was buzzing with warmth and that trademark crackle of crisp topping.
That first spoonful was pure magic: sweet, slightly tangy apples soft enough to melt on my tongue, followed by a generous crunch that made my taste buds dance. Ever since, this starter-friendly dessert has been my go-to for gatherings, study sessions, or simply a luxurious evening treat. And now I’m thrilled to share all my tips and tricks so you can enjoy the same heartwarming flavors and satisfying textures!
KEY INGREDIENTS IN CLASSIC APPLE CRISP
Before we dive into the baking process, let’s talk about the star players that make this dessert shine. Each ingredient brings its own personality: some add sweetness, others texture, and a few introduce those signature warm spices we all adore. Here’s what you’ll need:
- Sliced, peeled apples
These juicy, tender slices form the heart of the dessert. Opt for a mix of sweet and tart varieties to achieve a perfect balance of flavors and keep the filling from becoming too one-note.
- Freshly squeezed lemon juice
A quick drizzle helps prevent the apples from browning and adds a bright, zesty note that cuts through the sweetness and enhances the fruit’s natural tang.
- Granulated sugar
Sweetens the apple mixture while drawing out the fruit’s juices, creating a light syrup that keeps every bite moist and flavorful.
- All-purpose flour
A small amount in the filling helps thicken the apple juices as they bake, while in the topping it provides structure, so those oats and sugars come together as golden crumbs.
- Ground cinnamon
The quintessential warm spice for any apple dessert, cinnamon infuses both filling and topping with its cozy, aromatic charm.
- Salt
Just a pinch enhances the overall flavor, balancing sugar and spices so the blend never tastes flat or overly sweet.
- Rolled oats
Give the topping its hearty, rustic texture. These oats crisp up in the oven and deliver a delightful contrast to the soft apples below.
- Brown sugar
Caramel undertones deepen the topping’s sweetness and encourage that irresistible golden brown color.
- Ground nutmeg
Adds subtle warmth and complexity to the crumble, complementing the cinnamon without overshadowing it.
- Unsalted butter
Softened butter is the glue that binds the topping together. As it melts, it creates pockets of rich, buttery goodness that crisp up beautifully.
HOW TO MAKE CLASSIC APPLE CRISP
Ready to roll up your sleeves and turn crisp apples into a golden, bubbling dessert? This step-by-step guide will walk you through every move, so you’ll end up with a perfectly balanced filling and a topping that’s equal parts crunchy and buttery.
1. Preheat your oven to 350°F (175°C) and lightly grease a 9×9-inch baking dish to prevent sticking and ensure even browning.
2. In a large bowl, combine the sliced apples with lemon juice, granulated sugar, 1/4 cup of the all-purpose flour, 1/2 teaspoon of the ground cinnamon, and salt. Toss gently until every apple slice is evenly coated in the spiced sugar mixture.
3. Pour the apple mixture into the prepared baking dish, spreading it into an even layer so each bite bakes uniformly.
4. In another bowl, prepare the topping by whisking together the all-purpose flour, rolled oats, brown sugar, 1/4 teaspoon of the ground cinnamon, and the ground nutmeg until well blended.
5. Add the softened butter to the topping mixture. Using your fingers or a pastry cutter, blend the butter into the dry ingredients until the mixture resembles coarse crumbs with pea-sized bits.
6. Sprinkle the crumbly topping evenly over the apples, making sure every spot is covered for a consistent golden crust.
7. Bake in the preheated oven for 40–45 minutes, or until the topping is deeply golden and the apples are tender when pierced with a fork.
8. Allow the apple crisp to cool for at least 10 minutes before serving. This short rest helps the filling thicken and the flavors to meld for the best taste and texture.
SERVING SUGGESTIONS FOR CLASSIC APPLE CRISP
Serving this Classic Apple Crisp is like welcoming an old friend—there’s so much you can do to make it uniquely yours! Whether you’re hosting a festive family dinner, cozying up on the couch, or sharing a simple slice after school, the way you present it can take this humble dessert to new heights. Garnishes, temperature contrasts, and thoughtful pairings all play a part in creating that moment when everyone says, “Wow!”
- Top each warm serving with a generous scoop of vanilla ice cream. The cold cream melting into the crackly topping creates a dreamy blend of temperatures and textures.
- Add a dollop of fresh whipped cream lightly sweetened with a hint of vanilla. Its airy softness complements the dense, fruit-forward filling.
- Drizzle a little homemade caramel sauce (or warmed store-bought) over the crisp just before serving for an extra layer of gooey sweetness and visual flair.
- Sprinkle on toasted chopped walnuts or pecans for an added crunch and nutty dimension. Lightly toast the nuts in a dry skillet until fragrant before chopping and sprinkling.
HOW TO STORE CLASSIC APPLE CRISP
After savoring every last bite, you might find yourself with leftovers that deserve to be enjoyed again. Proper storage will keep that buttery topping crisp and the apples perfectly tender—so you can relive that cozy, comforting taste days later.
When fully cooled, transfer the crisp to an airtight container and store in the refrigerator. Chilling slows bacterial growth and keeps each layer intact for up to 3 days.
- To enjoy at room temperature, simply leave an individual portion on the counter for about 30 minutes before eating. The topping will regain some of its crunch as it warms.
- For best reheating, set your oven to 325°F (160°C), place the crisp in an oven-safe dish, and bake for 10–15 minutes until heated through and slightly crisped on top.
- To freeze for longer storage, wrap the dish tightly in plastic wrap and aluminum foil. Freeze flat for up to one month. Thaw overnight in the refrigerator, then reheat in a 325°F oven until bubbly and warmed through.
CONCLUSION
Classic Apple Crisp is more than just a dessert; it’s a bridge to cherished memories, warm gatherings, and simple moments of joy. From the first fragrant spray of cinnamon to the final crunch of buttery crumble, this recipe brings together pantry staples and fresh apples in perfect harmony. You’ve learned about the key ingredients that give it structure and flavor, walked through each baking step in detail, and discovered creative serving ideas that make every slice feel like an occasion. Whether you keep it traditional with vanilla ice cream or sprinkle on toasted nuts for extra texture, there’s room for your own personal twist. Don’t forget to jot down any adjustments you love—whether it’s swapping apple varieties, adding a hint of cardamom, or tossing in a handful of dried cranberries for a pop of color. Feel free to print this article and tuck it into your recipe binder so it’s ready whenever your kitchen calls for a comforting treat.
I hope this guide has inspired you to gather your ingredients, preheat that oven, and dive into the delightful world of homemade Apple Crisp. If you have any questions about technique, timing, or ingredient swaps, or if you simply want to share your own success stories (or happy accidents), please leave a comment below. I can’t wait to hear how your kitchens fill with that sweet-tart aroma and golden crunch—and I’m here to help if you ever get stuck. Happy baking!
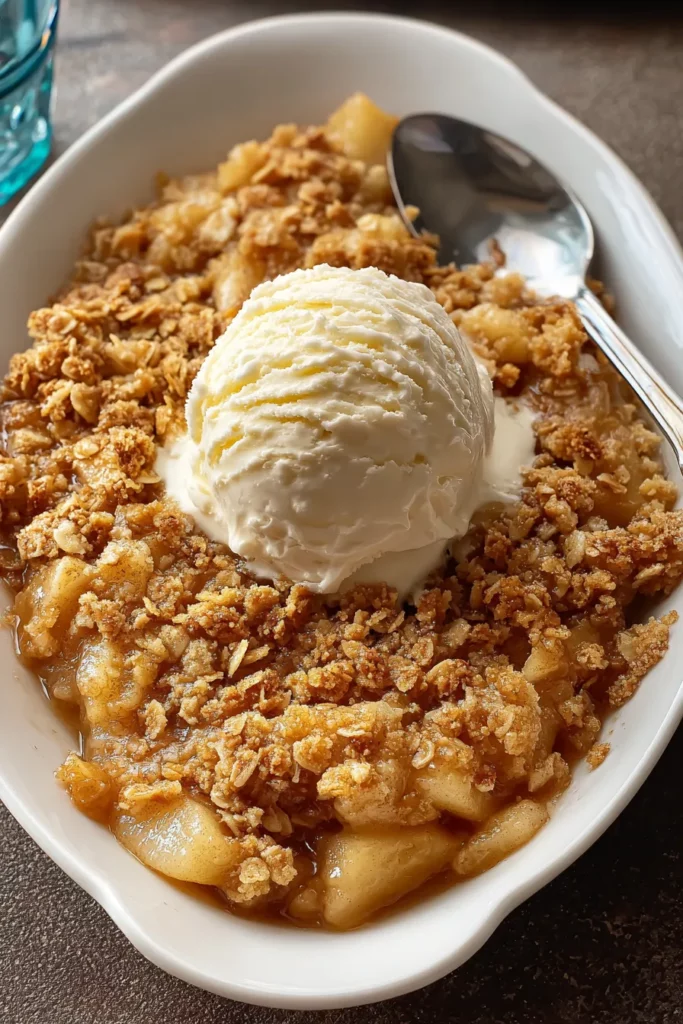

Classic Apple Crisp
Description
Crispy, buttery topping perfectly balances tender, sweet-tart apples in this nostalgic dessert. Serve it warm with ice cream for a cozy treat any time of year.
Ingredients
Instructions
-
Preheat your oven to 350°F (175°C). Lightly grease a 9x9-inch baking dish.
-
In a large bowl, combine the sliced apples with lemon juice, granulated sugar, 1/4 cup flour, 1/2 teaspoon cinnamon, and salt. Mix until apples are evenly coated.
-
Pour the apple mixture into the prepared baking dish, spreading it evenly.
-
In another bowl, prepare the topping by whisking together 1/2 cup flour, rolled oats, brown sugar, 1/4 teaspoon cinnamon, and nutmeg.
-
Add the softened butter to the topping mixture, using your fingers or a pastry cutter, blend until the mixture resembles coarse crumbs.
-
Sprinkle the topping evenly over the apples in the baking dish.
-
Bake in the preheated oven for 40-45 minutes or until the topping is golden brown and the apples are tender.
-
Allow the apple crisp to cool for at least 10 minutes before serving for the best flavor and texture.
Note
- For extra crunch, add chopped walnuts or pecans to the topping.
- Serve warm with a scoop of vanilla ice cream or a dollop of whipped cream.
- This recipe is versatile and works well with different types of apples. Try a combination of tart and sweet apples for more depth of flavor.
- Leftovers can be stored in the refrigerator for up to 3 days and reheated in the oven to retain crispiness.

