

There’s something incredibly satisfying about digging into a bubbling pan of baked mac and cheese, where each forkful promises a perfect balance of stretchy cheese and tender pasta. This creamy, cheesy baked mac and cheese is that ultimate comfort food that hugs you from the inside out—ideal for family dinners, casual gatherings, or whenever you need a little extra warmth on your plate. Rich cheddar and gooey mozzarella swirl together in a silky sauce, while a crisp golden topping adds that irresistible crunch you crave. Every bite delivers that creamy texture we all gush over, with just a hint of paprika for a warm, gentle zing.
Growing up, I remember sneaking into the kitchen to catch a whiff of bubbling cheese as it came out of the oven, steam swirling around my nose and filling the air with cheesy goodness. With only 30 minutes of prep and 25 minutes in the oven, this recipe is a total win for busy weeknights or lazy Sunday afternoons. It’s rated Beginner difficulty, so even if you’re new to the kitchen, you’ll nail this dish without a hitch. Plus, there’s a 10-minute rest time baked right in—just long enough to set the flavors and textures before you dive in. At around 600 calories per hearty serving, it’s rich enough to satisfy every cheese lover while still feeling like a treat.
KEY INGREDIENTS IN CREAMY BAKED MAC AND CHEESE
Every great recipe starts with quality ingredients, and this baked mac and cheese is no exception. Below is a roundup of the stars that come together to create that luscious, velvety sauce and golden-crisp topping. Understanding each component’s role helps you customize and elevate this classic dish.
- Elbow macaroni or pasta of your choice
A sturdy, tube-shaped pasta that holds onto creamy sauce. Feel free to swap in shells, cavatappi, or fusilli for extra sauce-catching curves.
- Unsalted butter
The base for the roux that thickens your sauce. Using unsalted lets you control the seasoning without surprises.
- All-purpose flour
Mixed into melted butter to form a smooth paste (roux) that gives body to the milk and cream, creating a rich, velvety base.
- Whole milk
Adds creaminess and moisture without thinning out the sauce. Its natural fats help create that signature, silky mouthfeel.
- Heavy cream
Elevates richness for an extra-luxurious texture. It makes the sauce cling beautifully to each piece of pasta.
- Sharp cheddar cheese
The flavor backbone—its tangy, robust profile brings classic mac and cheese taste and a gorgeous golden hue.
- Mozzarella cheese
Provides ooey-gooey stretch and mild creaminess, ensuring each bite is soft and stringy in the best way possible.
- Parmesan cheese
Gives a nutty, salty kick that deepens the overall cheese flavor and balances out the creaminess.
- Salt
Enhances all the flavors and ensures the cheese and pasta aren’t bland.
- Black pepper
Adds a subtle heat and complexity, cutting through the richness with a hint of spice.
- Garlic powder
Infuses a gentle garlicky aroma that complements the cheese without overpowering it.
- Onion powder
Offers a savory depth, mimicking the effect of finely sautéed onions in the sauce.
- Paprika
Brings warmth and a faint smokiness, plus it gives the sauce a sun-kissed color.
- Breadcrumbs
Sprinkled on top for that irresistible crunchy crust—contrast is everything in baked mac and cheese.
- Melted butter
Coats the breadcrumbs so they brown evenly and deliver a buttery crunch on top.
HOW TO MAKE CREAMY BAKED MAC AND CHEESE
Let’s dive into the step-by-step process of transforming simple pantry staples into a soul-satisfying, bubbling casserole. Follow along carefully and you’ll end up with a cheesy masterpiece that’s perfect for any occasion.
1. Preheat your oven to 350°F (175°C). Getting the oven up to temperature first ensures even baking and the perfect golden crust.
2. Boil the macaroni in a large pot of salted water until al dente, following package instructions. The slight bite helps it hold up under all that sauce. Drain thoroughly and set aside.
3. In a large saucepan over medium heat, melt the butter. Once bubbling, stir in the flour and whisk constantly for about one minute until you have a smooth paste—this is your roux.
4. Gradually whisk in the whole milk and heavy cream, continuing to stir until the mixture begins to thicken, about three to five minutes. This gentle cooking helps eliminate any raw flour taste.
5. Remove the saucepan from the heat and add the shredded cheddar, mozzarella, and grated Parmesan. Stir until all the cheese melts into a silky smooth sauce.
6. Season the sauce with salt, black pepper, garlic powder, onion powder, and paprika. Mix well to distribute the spices evenly throughout the cheesy base.
7. Add the drained macaroni to the sauce. Use a gentle folding motion to ensure every noodle is coated in that velvety mixture.
8. Transfer the mac and cheese into a greased 9×13-inch baking dish, smoothing the top with a spatula for even coverage.
9. In a small bowl, mix the breadcrumbs with the melted butter until each crumb is evenly coated—this ensures a golden, crispy topping.
10. Sprinkle the buttery breadcrumb mixture over the macaroni and cheese in an even layer.
11. Bake in the preheated oven for 20–25 minutes, or until the topping is golden brown and irresistibly crispy.
12. Remove from the oven and let it cool slightly for about 5–10 minutes. This rest time helps the sauce set so you get perfect slices.
SERVING SUGGESTIONS FOR CREAMY BAKED MAC AND CHEESE
Once your creamy baked mac and cheese emerges from the oven, it’s time to think about presentation and pairing. This soul-warming dish shines on its own, but a few thoughtful touches can elevate it from comforting to unforgettable. Whether you’re feeding a crowd or spoiling yourself, follow these serving suggestions to turn every bite into a celebration of cheesy goodness.
- Serve alongside a crisp green salad drizzled with a zesty vinaigrette. The bright acidity and crunchy greens cut through the richness, creating the perfect flavor and texture contrast.
- Top each portion with freshly chopped parsley or chives for a pop of color and freshness that balances the creamy sauce.
- Garnish with crisp bacon pieces or prosciutto chips to add smoky, savory crunch—ideal for meat lovers looking to up the flavor ante.
- Offer warm garlic bread or buttery dinner rolls on the side. The extra carbs are perfect for soaking up any stray cheese sauce and ensuring no delicious bite is left behind.
HOW TO STORE CREAMY BAKED MAC AND CHEESE
Storing leftover mac and cheese correctly ensures you can enjoy that same creamy goodness days later without sacrificing flavor or texture. This section covers everything from refrigeration to freezing, plus tips on reheating so your next helping tastes freshly baked.
- Refrigeration: After the dish has fully cooled, transfer portions into airtight containers or cover the baking dish tightly with plastic wrap. Store in the fridge for up to 3–4 days. Chilling allows flavors to meld even more, making each reheated serving taste just as good.
- Freezing: For longer storage, portion the cooled mac and cheese into freezer-safe containers or aluminum pans. Press a layer of plastic wrap directly onto the surface to prevent ice crystals, then seal. Freeze for up to 2 months. Thaw overnight in the fridge before reheating for the best texture.
- Oven Reheating: Preheat to 325°F (160°C). If refrigerated, sprinkle a few drops of milk over the top to restore creaminess, cover with foil, and bake until heated through, about 15–20 minutes. Uncover for the last 5 minutes to crisp the topping.
- Microwave Reheating: For single servings, place mac and cheese in a microwave-safe bowl. Add a teaspoon of milk or cream, cover loosely, and heat on medium power in 30-second intervals, stirring in between until hot and creamy.
CONCLUSION
This creamy baked mac and cheese recipe brings together the perfect marriage of gooey cheese, tender pasta, and crunchy topping to deliver comforting goodness in every bite. We’ve walked through each ingredient—why it matters, how it shapes the sauce—and offered a step-by-step guide to transform simple pantry staples into a crowd-pleasing casserole. Along the way, we shared tips for serving it in style, storage methods for savoring leftovers, and tricks for reheating without losing any of the dish’s signature creaminess. Whether you’re preparing a cozy weeknight dinner or feeding a gathering, this mac and cheese fits the bill as a beginner-friendly recipe that never disappoints.
Feel free to print this article and save it in your recipe collection for instant comfort whenever cravings strike. You can also find a FAQ below addressing common questions and troubleshooting tips. If you give this baked mac and cheese a try, let me know how it turned out! I’d love to hear about your personal twists, favorite cheese combinations, or any questions you have along the way. Your feedback and stories make the recipe even more special, so please share your thoughts in the comments or reach out if you need a hand mastering that golden, cheesy perfection.
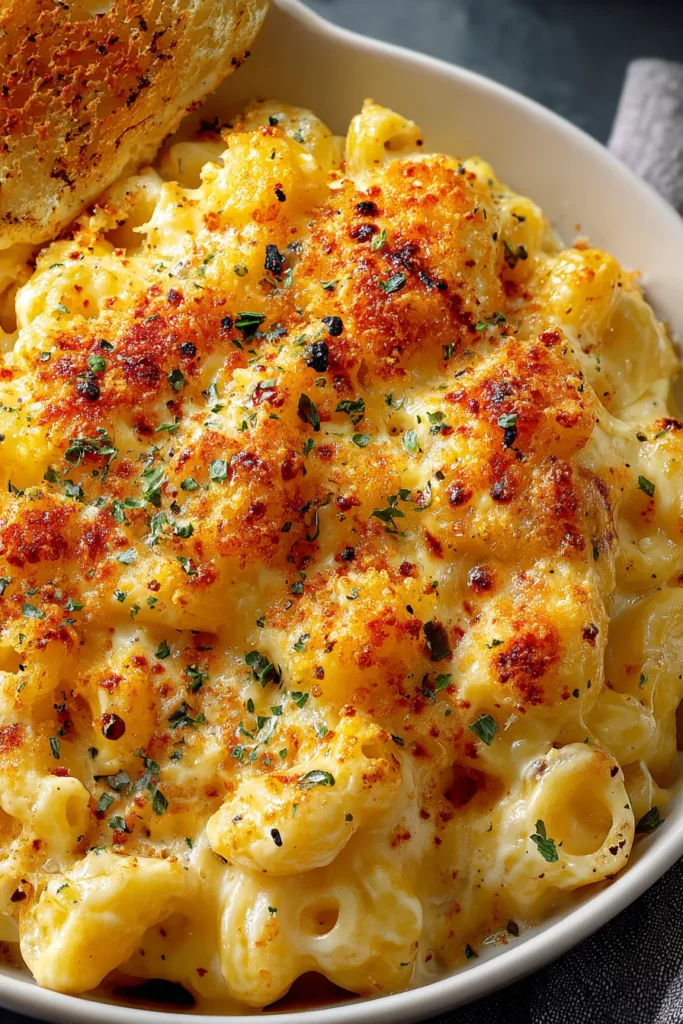

Creamy Baked Mac and Cheese
Description
Rich, velvety cheese coats perfectly cooked pasta in this baked mac and cheese recipe. Topped with a crispy breadcrumb layer, it’s a heavenly blend of flavors and textures that everyone will love.
Ingredients
Instructions
-
Preheat your oven to 350°F (175°C).
-
Boil the macaroni in a large pot of salted water until al dente, following package instructions. Drain and set aside.
-
In a large saucepan, melt the 1/4 cup of butter over medium heat. Stir in the flour, whisking constantly for about 1 minute until smooth.
-
Gradually whisk in the whole milk and heavy cream, continuing to whisk until the mixture begins to thicken, about 3-5 minutes.
-
Remove the saucepan from the heat and add in the cheddar, mozzarella, and Parmesan cheese. Stir until the cheese has melted into a smooth sauce.
-
Season the sauce with salt, black pepper, garlic powder, onion powder, and paprika, mixing well to combine.
-
Add the drained macaroni to the cheese sauce, gently stirring until all the pasta is coated with the creamy mixture.
-
Transfer the mac and cheese into a greased 9x13 inch baking dish.
-
In a small bowl, mix the breadcrumbs with the 2 tablespoons of melted butter until the breadcrumbs are evenly coated.
-
Sprinkle the breadcrumb mixture over the macaroni and cheese.
-
Bake in the preheated oven for 20-25 minutes, or until the top is golden brown and crispy.
-
Remove from the oven and let it cool slightly before serving.
Note
- You can add cooked bacon for additional flavor and texture.
- For a spicy kick, consider adding a pinch of cayenne pepper to the cheese sauce.
- This dish can be made ahead and reheated. Simply prepare until the baking step, cover, and refrigerate.
- Substitute cheeses to experiment with different flavors – Gruyère, Gouda, or Fontina work well.
- A sprinkle of fresh parsley or chives before serving adds a bright, fresh touch.

