

These Creamy No Bake Mini Cheesecakes are the perfect bite-sized treat for when you want dessert without heating up the kitchen. With a crisp graham cracker crust and a velvety cream cheese filling kissed by vanilla, these little delights chill to a melt-in-your-mouth consistency that will have everyone asking for seconds. They’re effortless to whip up, make-ahead friendly, and totally crowd-pleasing—let’s dive in!
Key Ingredients
Before you start assembling these mini marvels, gather your simple yet essential ingredients. Each one plays a crucial role in creating that dreamy texture and balanced flavor.
- 90 g graham cracker crumbs: Forms a sweet, crunchy base that holds together beautifully.
- 40 g unsalted butter, melted: Binds the crumbs into a sturdy crust and adds rich, buttery flavor.
- 10 g granulated sugar: Adds a touch of extra sweetness to the crust.
- 200 g cream cheese, room temperature: Provides the silky, creamy body of the cheesecake filling.
- 100 ml heavy cream, cold: Whips into soft peaks to lighten the filling and add airy richness.
- 40 g powdered sugar: Sweetens the cream cheese mixture without any graininess.
- 5 ml vanilla extract: Infuses the filling with warm, aromatic vanilla notes.
- 5 g unflavored gelatin powder: Stabilizes the filling so the cheesecakes hold their shape.
- 30 ml cold water: Allows the gelatin to bloom properly before dissolving.
How To Make Creamy No Bake Mini Cheesecakes
Ready to transform these ingredients into adorable no-bake treats? The process is wonderfully straightforward, taking you from crumbly base to creamy topping in just a few easy steps. Follow along to create perfectly set mini cheesecakes that hold up beautifully and taste irresistible.
1. In a medium bowl combine graham cracker crumbs, melted butter, and granulated sugar, stirring until the mixture resembles wet sand—this ensures a sturdy, even crust.
2. Line a 12-cup muffin tin with paper liners and divide the crumb mixture evenly. Press down firmly into the bottom of each cup to form solid crusts, then chill in the refrigerator for 10 minutes to set.
3. In a small bowl sprinkle gelatin over cold water and let stand for 5 minutes to bloom. Gently heat—either in short microwave bursts or over a double boiler—until fully dissolved, then set aside to cool slightly.
4. In a large bowl beat cream cheese, powdered sugar, and vanilla extract until smooth and creamy, scraping down the sides as needed to eliminate any lumps.
5. In a separate chilled bowl whip the cold heavy cream to soft peaks, then gently fold it into the cream cheese mixture until fully incorporated for lightness.
6. Slowly fold the cooled gelatin into the cheesecake filling, stirring gently to maintain an even, lump-free consistency.
7. Spoon or pipe the filling over the chilled crusts, smoothing the tops with the back of a spoon. Refrigerate for at least 2 hours or until fully set before serving.
Serving Suggestions
These mini cheesecakes are incredibly versatile and pair beautifully with a variety of toppings and accompaniments. From fruity bursts to indulgent drizzles, here are four ways to showcase these little delights:
- Fresh Berries: Top each cheesecake with a mix of raspberries, blueberries, and strawberries for a pop of color and natural sweetness.
- Caramel Drizzle: Warm some store-bought caramel sauce and lightly drizzle over the tops for a gooey, decadent finish.
- Chocolate Shavings: Use a vegetable peeler on a bar of dark chocolate to create delicate curls that add texture and a hint of bitterness.
- Mint Leaves: Garnish with a small sprig of fresh mint for a fragrant, refreshing contrast to the rich filling.
Tips For Perfect Creamy No Bake Mini Cheesecakes
Mastering these mini cheesecakes is all about attention to detail and a few insider tricks. Follow these friendly pointers to ensure every bite is flawless—and don’t be surprised if friends start calling you “The Cheesecake Whisperer.”
- Cheesecakes can be stored in the refrigerator for up to 3 days in an airtight container.
- For the creamiest texture, ensure the cream cheese is fully at room temperature before mixing.
- Make sure the gelatin is completely dissolved and slightly cooled before adding to avoid lumps.
- Top with fresh berries, chocolate shavings, or a drizzle of caramel for extra flavor.
How To Store It
Storing your mini cheesecakes properly will keep them tasting as fresh as the day you made them. Here are the best methods to maintain their creamy texture and prevent any unwanted fridge odors:
- Refrigerate in an airtight container: Place cheesecakes in a single layer to avoid squishing the tops and seal tightly.
- Separate layers with parchment paper: If stacking is necessary, slip a square of parchment between layers to protect the filling.
- Freeze for longer storage: Arrange fully set cheesecakes on a baking sheet until firm, then transfer to a freezer-safe container for up to one month.
- Thaw in the fridge: Move frozen cheesecakes to the refrigerator and let them thaw for 4–6 hours or overnight before serving.
Frequently Asked Questions
Here are quick answers to the most common questions about these creamy no-bake mini cheesecakes:
- How long does it take to prepare and set these creamy no-bake mini cheesecakes?
The active prep time is about 15–20 minutes—10 minutes to make the crusts and chill them, plus 10 minutes to bloom the gelatin and whip the filling. After assembly, refrigerate for at least 2 hours to fully set, for a total of roughly 2 hours 20 minutes.
- What is the best way to bloom and dissolve the gelatin powder to avoid lumps?
Sprinkle the gelatin evenly over cold water and let it stand for 5 minutes to bloom. Then gently heat the mixture—either in 5-second microwave bursts or over a double boiler—stirring constantly until fully dissolved. Allow it to cool slightly (but not gel) before folding into the filling.
- Can I make these cheesecakes in advance or freeze them?
You can prepare and refrigerate the cheesecakes up to 3 days in advance in an airtight container. For longer storage, freeze the fully set mini cheesecakes in a single layer on a baking sheet until firm, then transfer to a freezer-safe container for up to one month. Thaw in the refrigerator for 4–6 hours or overnight.
- How can I ensure the filling is smooth and perfectly creamy?
Bring the cream cheese to full room temperature before mixing to prevent lumps. Beat cream cheese, powdered sugar, and vanilla until silky, scraping the bowl sides. Whip cold heavy cream to soft peaks separately and fold gently into the cream cheese mixture. Finally, fold in the slightly cooled dissolved gelatin slowly and evenly.
- What can I use if I don’t have graham crackers or need a gluten-free crust?
Substitute gluten-free graham or digestive cookie crumbs in equal measure, or use crushed Oreo cookies (omit the granulated sugar since they’re sweet). You can also try finely chopped pretzels for a sweet-salty twist or almond flour mixed with melted butter for a nutty gluten-free crust.
- How should I store any leftovers and how long will they stay fresh?
Store leftover cheesecakes in an airtight container in the refrigerator for up to 3 days. To maintain the best texture, keep the container sealed to prevent moisture loss and protect against absorbing other fridge odors.
- What are some topping ideas or flavor variations for these mini cheesecakes?
Top with fresh berries (strawberries, blueberries, raspberries), fruit compote, chocolate shavings, caramel or chocolate drizzle, or a dusting of cocoa powder. For flavor twists, add lemon zest and a teaspoon of juice to the filling, swirl in a spoonful of fruit jam before chilling, or fold in a teaspoon of matcha powder for green tea-infused cheesecakes.
What Makes This Special
These Creamy No Bake Mini Cheesecakes shine because they combine effortless preparation with decadent, silky-smooth texture—no oven required! The secret lies in balancing a crisp, buttery graham crust with a rich, vanilla-kissed filling that sets beautifully thanks to gelatin. They’re perfect for parties, make-ahead gifts, or an everyday sweet fix. Feel free to print and save this article for future cravings, and don’t hesitate to drop a comment or question if you try the recipe or need a hand tweaking it to perfection. Enjoy every creamy bite!
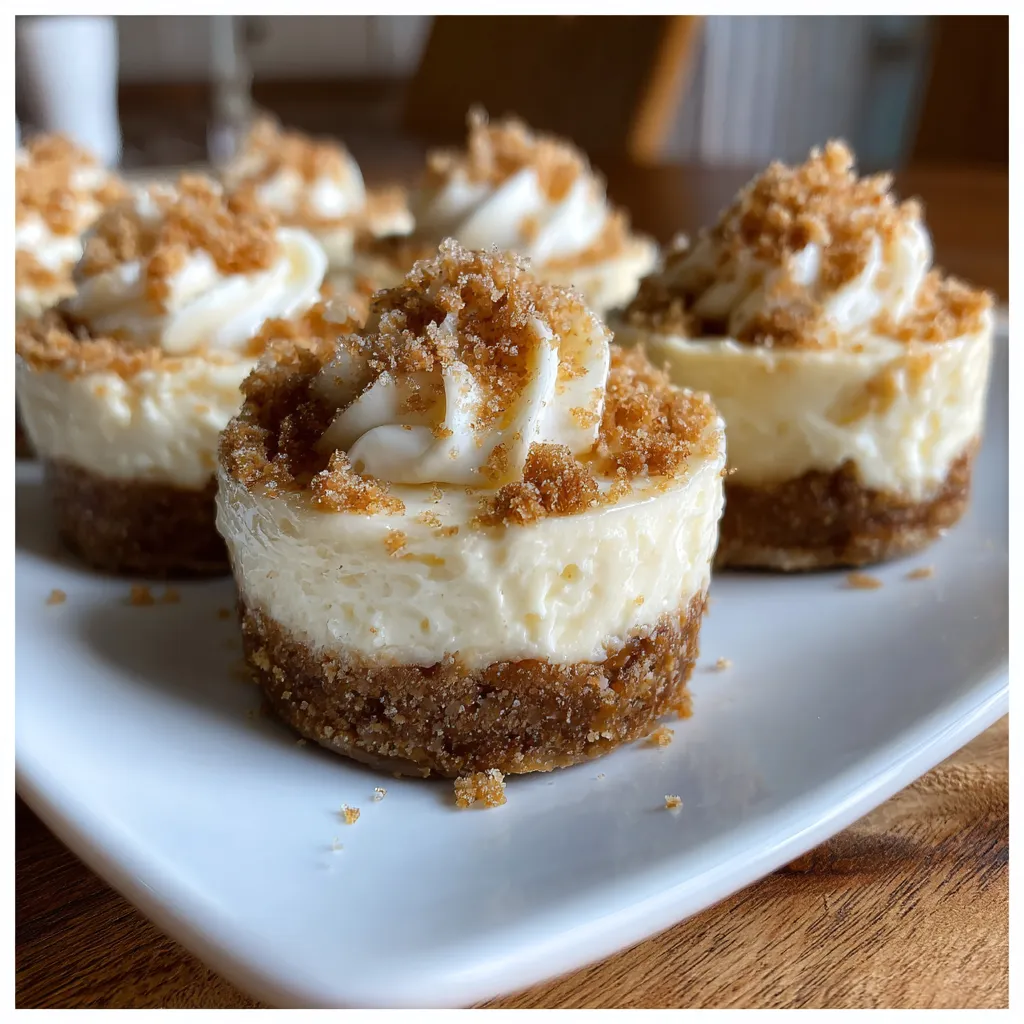

Creamy No Bake Mini Cheesecakes
Description
These bite-sized cheesecakes combine velvety cream cheese filling and sweet buttery crust, chilled to creamy perfection. A hint of vanilla and melt-in-your-mouth texture make them an effortless, crowd-pleasing treat.
Ingredients
Instructions
-
In a medium bowl combine graham cracker crumbs, melted butter, and granulated sugar until mixture resembles wet sand.
-
Line a 12-cup muffin tin with paper liners and divide the crumb mixture evenly, pressing firmly into the bottom of each cup to form crusts. Chill in the refrigerator for 10 minutes.
-
In a small bowl sprinkle gelatin over cold water and let stand for 5 minutes to bloom, then gently heat until fully dissolved and set aside to cool slightly.
-
In a large bowl beat cream cheese, powdered sugar, and vanilla extract until smooth and creamy, scraping down the sides as needed.
-
In a separate bowl whip the cold heavy cream to soft peaks, then fold gently into the cream cheese mixture until fully incorporated.
-
Slowly fold the cooled gelatin into the cheesecake filling, ensuring an even consistency.
-
Spoon or pipe the filling over the chilled crusts, smoothing the tops, then refrigerate for at least 2 hours or until set.
Note
- Cheesecakes can be stored in the refrigerator for up to 3 days in an airtight container.
- For the creamiest texture, ensure the cream cheese is fully at room temperature before mixing.
- Make sure the gelatin is completely dissolved and slightly cooled before adding to avoid lumps.
- Top with fresh berries, chocolate shavings, or a drizzle of caramel for extra flavor.

