

Creamy Southern Layered Banana Pudding transforms ripe bananas, crisp vanilla wafers, and silky vanilla pudding into a beginner-friendly dessert that feels like a lazy afternoon on a Southern porch. Velvety vanilla pudding folds into cloud-like whipped cream, layered between fresh banana slices and crunchy wafers, then chilled until set—every spoonful delivers a creamy-crunchy harmony that melts on the tongue. You’ll want to make this over and over!
Key Ingredients
Here’s what you need to build those irresistible layers of creamy pudding, fresh fruit, and sweet crunch:
- 1 box vanilla wafers: Provides a crisp, sweet foundation that softens just enough in the fridge for that perfect bite-and-melt texture.
- 4 each bananas, sliced: Fresh, ripe bananas add natural sweetness and a creamy fruit layer that balances the vanilla.
- 1 package vanilla pudding mix: The flavor base that sets up firm yet silky when combined with milk and condensed milk.
- 2 cups whole milk: Contributes richness and creaminess to the pudding base for a smooth finish.
- 1 can sweetened condensed milk: Adds extra sweetness and a luscious, velvety texture to the pudding mix.
- 1 teaspoon vanilla extract: Enhances the overall vanilla flavor with a fragrant, aromatic boost.
- 2 cups heavy whipping cream: Whipped to soft peaks, it gives the pudding cloud-like lightness and volume.
- 1/4 cup powdered sugar: Sweetens and stabilizes the whipped cream for glossy, sturdy peaks.
How To Make Creamy Southern Layered Banana Pudding
Let’s walk through the simple steps to assemble this show-stopper dessert. You’ll start by preparing a silky pudding base and cloud-like whipped cream, then layer everything in a 9×13-inch dish. Follow each step carefully—proper whipping and folding ensure a light texture, while chilling helps meld flavors and soften wafers just right.
1. In a large bowl, whisk together the vanilla pudding mix, whole milk, and sweetened condensed milk until completely smooth, then stir in the vanilla extract to infuse a rich fragrance.
2. In a separate bowl, beat the heavy whipping cream and powdered sugar on medium-high speed until stiff peaks form, creating a light, airy texture.
3. Gently fold half of the whipped cream into the pudding mixture using a spatula, combining until light and fluffy without deflating those peaks.
4. Arrange a single layer of vanilla wafers in the bottom of a 9×13-inch dish and top with half of the banana slices, distributing evenly for consistent flavor in every forkful.
5. Spoon half of the pudding mixture over the banana layer and spread carefully, then repeat with another layer of wafers, banana slices, and the remaining pudding for perfect stacking.
6. Spread the remaining whipped cream over the top layer, smoothing with a spatula, and garnish with extra wafers or banana slices for a pretty finish.
7. Cover the dish and chill in the refrigerator for at least 4 hours or overnight to set, allowing flavors to meld and wafers to soften just right.
Serving Suggestions
Before diving in, let your banana pudding sit at room temperature for about 10 minutes to take the chill off and let those flavors shine. Here are four simple ways to serve this classic Southern dessert:
- Individual Parfaits: Layer pudding in small glass jars or cups for an elegant presentation—alternate wafers, bananas, and pudding so each guest gets perfect layers.
- Rustic Family Dish: Scoop directly from the 9×13-inch baking dish onto plates, offering generous portions alongside a dollop of whipped cream and a wafer garnish.
- Garnish with Fresh Berries: Add a pop of color and tartness by topping each serving with a few raspberries or strawberries for contrast.
- Drizzle with Caramel Sauce: Warm a bit of caramel and drizzle over the top for an extra layer of sweetness and a beautiful finish.
Tips For Perfect Creamy Southern Layered Banana Pudding
Mastering this dessert is all about timing, texture, and the right ingredients. With these friendly pointers, you’ll get every layer just right:
- Use ripe bananas for maximum sweetness and flavor, but avoid overripe ones to prevent browning too quickly.
- Chill thoroughly before serving to achieve clean, neat slices and well-set layers that hold their shape.
- Substitute shortbread cookies for vanilla wafers for a richer, buttery crunch that complements the creamy pudding.
- Assemble a day ahead for best texture and flavor melding—this extra rest time lets the wafers soften perfectly and the flavors deepen.
How To Store It
Proper storage keeps your banana pudding fresh and delicious for days. Here’s how to maintain that creamy-crunchy magic:
- Cover and refrigerate: After chilling, cover the dish tightly with plastic wrap to prevent odors from seeping in. Store in the fridge for up to 3 days.
- Use airtight containers: Portion leftovers into individual containers with tight-fitting lids to preserve freshness and make grab-and-go servings.
- Press plastic wrap on surface: Lay wrap directly on the pudding’s top layer to stop a film from forming and keep the whipped cream vibrant.
- Avoid freezing: Texture can suffer when frozen; if you must, freeze single portions, thaw overnight in the fridge, and stir gently before serving.
Frequently Asked Questions
Here are answers to common questions about making and storing this pudding:
- How long does it take to prepare this Creamy Southern Layered Banana Pudding?
From start to finish, expect about 20 minutes of active prep time. This includes whisking the pudding base, whipping the cream, slicing bananas, and layering the wafers, bananas, and pudding mixture. Chilling requires at least 4 hours or overnight for the best set and flavor melding.
- Can I assemble the pudding a day ahead, and will the texture hold up?
Yes, assembling a day ahead is ideal for optimal creaminess and flavor infusion. After layering, cover the dish tightly and refrigerate. The wafers will soften slightly, blending with the bananas and pudding for a smoother mouthfeel. Just ensure it’s chilled for at least 8 hours before serving.
- What’s the best way to keep the bananas from browning in the pudding?
To slow oxidation, choose ripe but firm bananas and coat each slice lightly with a squeeze of fresh lemon juice before layering. The acidity helps preserve color without altering taste. Assemble the layers promptly and refrigerate immediately to minimize air exposure.
- Are there ingredient substitutions if I don’t have vanilla wafers or want a lighter version?
You can swap vanilla wafers for shortbread cookies for a richer crunch or graham crackers for a slightly toasty note. For a lighter pudding, use low-fat milk and substitute half the heavy cream with Greek yogurt, though the texture will be a bit less cloud-like. Adjust sweetness by reducing powdered sugar or using a sugar substitute in the whipped cream.
- How should I store leftovers, and how long will the pudding remain fresh?
Cover the dish tightly with plastic wrap or transfer portions into airtight containers. Keep refrigerated and consume within 3 days. Over time the layers will soften further, so it’s best enjoyed by day three for a pleasing texture and flavor.
- Can I freeze this banana pudding, and if so, what’s the best method?
Freezing is not recommended because the whipped cream and pudding layers can separate and become grainy upon thawing. If you must freeze, divide into individual freezer-safe containers, leaving headspace, and freeze for up to one month. Thaw overnight in the refrigerator, then gently stir before serving, though texture may differ from fresh.
What Makes This Special
This Creamy Southern Layered Banana Pudding works like a charm because it balances sweet, creamy, and crunchy layers with minimal fuss—perfect for beginners and busy home cooks. The combination of velvety pudding and cloud-light whipped cream, nestled between ripe banana slices and crisp wafers, delivers pure comfort in every spoonful. Feel free to print this recipe and save it for lazy weekends or potluck show-offs. Tried it? Drop your comments or questions below—I’d love to hear how it turned out!
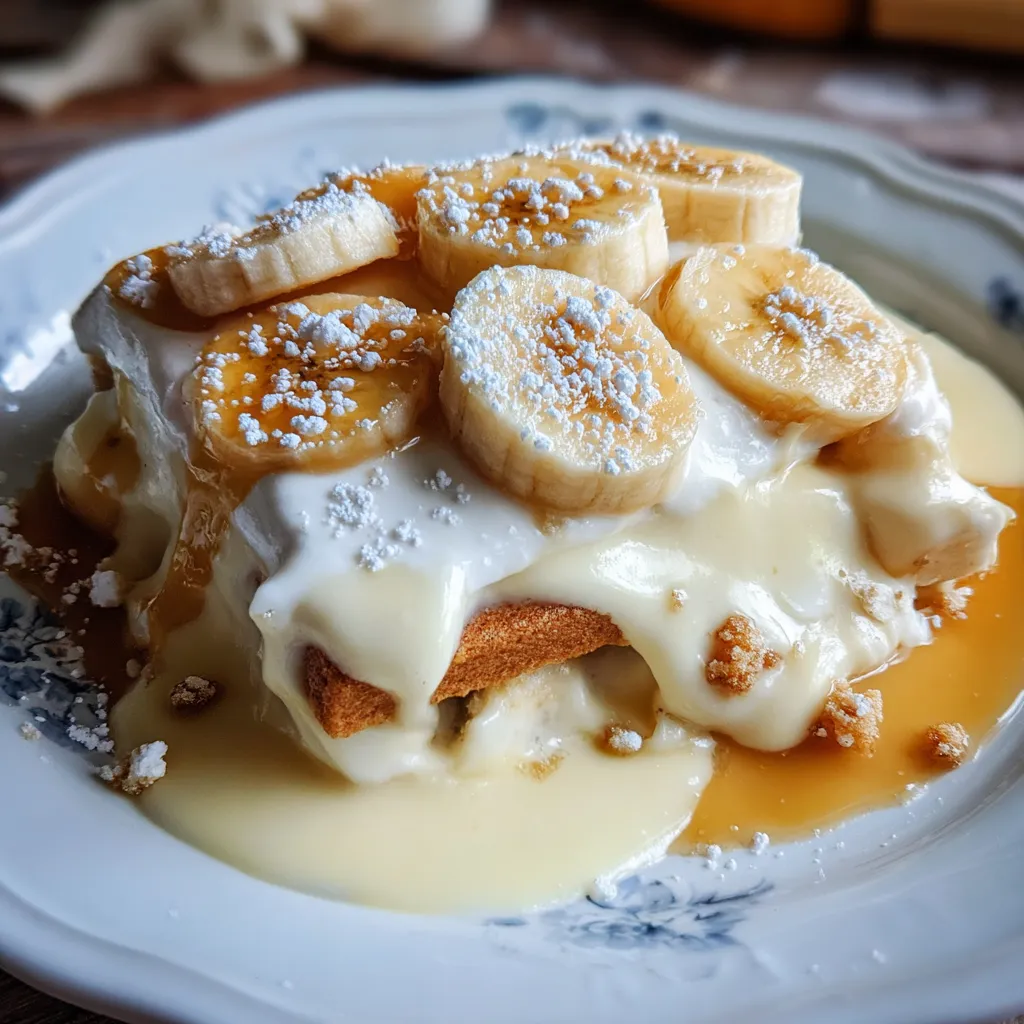

Creamy Southern Layered Banana Pudding
Description
Velvety vanilla pudding folds with cloudlike whipped cream, layered between bananas and crisp wafers. Chilled until set, every bite is a creamy, crunchy harmony that melts on the tongue.
Ingredients
Instructions
-
In a large bowl whisk together vanilla pudding mix, whole milk, and sweetened condensed milk until smooth, then stir in vanilla extract.
-
In a separate bowl beat heavy whipping cream and powdered sugar until stiff peaks form.
-
Gently fold half of the whipped cream into the pudding mixture until light and fluffy.
-
Arrange a single layer of vanilla wafers in the bottom of a 9x13-inch dish and top with half of the banana slices.
-
Spoon half of the pudding mixture over the bananas and spread evenly, then repeat with another layer of wafers, bananas, and remaining pudding.
-
Spread the remaining whipped cream over the top layer and garnish with extra wafers or banana slices, if desired.
-
Cover the dish and chill in the refrigerator for at least 4 hours or overnight to set and meld flavors.
Note
- Use ripe bananas for maximum sweetness and flavor
- Chill thoroughly before serving to achieve clean slices
- Substitute shortbread cookies for vanilla wafers for a richer crunch
- Assemble a day ahead for best texture and flavor melding

