

Crispy Pickle Cheese Bites deliver a crackling exterior that gives way to tangy pickle and gooey cheddar in each bite. Crunchy pickle rounds hug molten cheddar, fried to golden perfection and ready to dunk in ranch or marinara. If you’re craving a snack that balances zest and comfort, these little rounds of joy are calling your name—perfect for game nights, casual dinners, or whenever you need a burst of flavor.
Key Ingredients
Before you get started, let’s gather the essentials that make these bites irresistible:
- 12 slices dill pickles: Crisp, tangy rounds that provide a briny bite and hold the cheese perfectly.
- 4 ounces cheddar cheese: Sharp, melty filling that oozes when fried for gooey goodness.
- 1/2 cup all-purpose flour: Helps the coating stick and creates a base layer for crispiness.
- 2 large eggs: Act as a binding agent in the dredging station for the breadcrumbs.
- 1 cup breadcrumbs: Add golden crunch and texture to each bite when seasoned.
- 1/2 teaspoon garlic powder: Infuses savory depth into the breadcrumb coating.
- 1/2 teaspoon paprika: Gives a subtle smoky flavor and vibrant color.
- 1/2 teaspoon salt: Enhances all the flavors in the pickles, cheese, and coating.
- 1/4 teaspoon black pepper: Adds a hint of heat and spice to balance the tanginess.
- 1/2 cup vegetable oil: Provides the hot frying medium for achieving that crispy exterior.
How To Make Crispy Pickle Cheese Bites
Getting these bites golden and gooey is easier than you might think. You’ll start by prepping your pickles and cheese, then set up a proper dredging station to ensure every sandwich gets a perfect, even coat. Once your oil is shimmering, a quick fry on each side locks in the tangy flavor and creates that irresistible crunch. Follow the step-by-step guide below and soon you’ll have a platter of warm, cheesy delights ready to share.
1. Pat pickle slices dry with paper towels and slice cheddar cheese into pieces that match the pickle size, ensuring no excess moisture will interfere with the coating.
2. Assemble bites by placing a piece of cheese between two pickle slices, pressing gently to adhere and create a neat sandwich.
3. Set up a dredging station with flour in one bowl, beaten eggs in a second bowl, and breadcrumbs mixed with garlic powder, paprika, salt, and pepper in a third bowl.
4. Coat each pickle–cheese sandwich first in flour, then dip in the eggs, and finally press into the seasoned breadcrumbs to fully coat every surface.
5. Heat vegetable oil in a skillet over medium-high heat until shimmering, about 350°F, to achieve a crisp crust without greasiness.
6. Fry the coated bites in batches for about 1–2 minutes per side or until golden brown and crispy, using tongs to flip gently.
7. Transfer cooked bites to a paper towel–lined plate to drain excess oil and keep them crisp.
8. Serve warm with your favorite dipping sauce so each bite stays crispy and oozy.
Serving Suggestions
These Crispy Pickle Cheese Bites shine as the star of any gathering, but pairing them thoughtfully will take your snack game up a notch:
- Ranch Dip: A classic cool and creamy ranch complements the tangy pickles and sharp cheddar.
- Marinara Sauce: Warm tomato sauce adds a sweet-acid balance and pairs beautifully with the fried coating.
- Beverage Pairing: Serve alongside an ice-cold beer or sparkling lemonade to cut through the richness.
- Party Platter: Arrange on a wooden board with olives, sliced veggies, and cured meats for a festive appetizer spread.
Tips For Perfect Crispy Pickle Cheese Bites
To nail that perfect crunch and gooey center every time, keep these friendly tips in mind. They’re simple tweaks and swaps that let you customize based on dietary needs or cooking methods:
- For a gluten-free version, substitute gluten-free breadcrumbs and flour.
- Baking at 400°F for 12–15 minutes yields a lighter version.
- Serve with ranch dressing or marinara sauce for dipping.
- Leftovers can be stored in the fridge for up to 2 days and reheated in the oven.
How To Store It
Making a double batch? No problem—here’s how to keep those bites tasting fresh and crispy:
- Cool Completely: Let the bites reach room temperature before storing to prevent condensation.
- Refrigerate: Place in an airtight container and refrigerate for up to 2 days to maintain flavor and texture.
- Reheat in Oven: Arrange on a baking sheet and warm at 350°F for 5–7 minutes until crispy again.
Frequently Asked Questions
Here are quick answers to the queries we hear most often about Crispy Pickle Cheese Bites:
- How long does it take to prepare and cook these Crispy Pickle Cheese Bites?
It takes about 30 minutes total—around 15 minutes to pat the pickles dry, slice the cheese, assemble the pickle–cheese sandwiches, and set up the dredging station, plus roughly 10–15 minutes to fry the bites in batches until they’re golden and crispy.
- Can I make a gluten-free version of this recipe?
Yes. Simply substitute the all-purpose flour with a gluten-free flour blend and swap regular breadcrumbs for certified gluten-free breadcrumbs. The dredging and frying steps remain exactly the same, and you’ll still achieve a crispy, flavorful bite.
- What oil temperature should I use for frying?
Heat the vegetable oil over medium-high heat until it shimmers but isn’t smoking. That’s typically around 350°F. If the oil is too cool, the bites will absorb excess oil and become greasy; if it’s too hot, the coating may brown too quickly before the pickle and cheese heat through.
- Is it possible to bake these instead of frying?
Yes. Preheat your oven to 400°F and place the coated bites on a parchment-lined baking sheet. Bake for 12–15 minutes, flipping once halfway through, until they’re lightly golden. Baking yields a lighter version, though the texture is slightly less crisp compared to frying.
- How can I prevent the cheese from oozing out during cooking?
First, pat the pickle slices thoroughly dry so the cheese adheres better. Press each pickle–cheese sandwich firmly but gently before dredging. Make sure the entire surface is evenly coated in flour, egg, and breadcrumbs to create a tight seal around the cheese.
- How should I store and reheat leftovers?
Place cooled bites in an airtight container and refrigerate for up to 2 days. To reheat, arrange them on a baking sheet and warm in a 350°F oven for 5–7 minutes or until heated through and crispy again. Avoid microwaving, as this will make them soggy.
- What dipping sauces pair best with these bites?
Classic options include ranch dressing or marinara sauce, but you can also try honey mustard, spicy sriracha mayo, or a dill-garlic aioli. Each dip complements the tangy pickle and sharp cheddar in its own way.
What Makes This Special
These Crispy Pickle Cheese Bites are proof that the simplest ideas can pack the biggest flavor punch—and yes, they’re downright fun to make (and eat!). The magic lies in that crackling breadcrumb shell giving way to tangy pickle and molten cheddar, creating a snack you’ll want to save, print, and share with everyone. Try them out, then drop a comment below with your favorite dipping sauce or any questions—let’s keep the crunch conversation going!
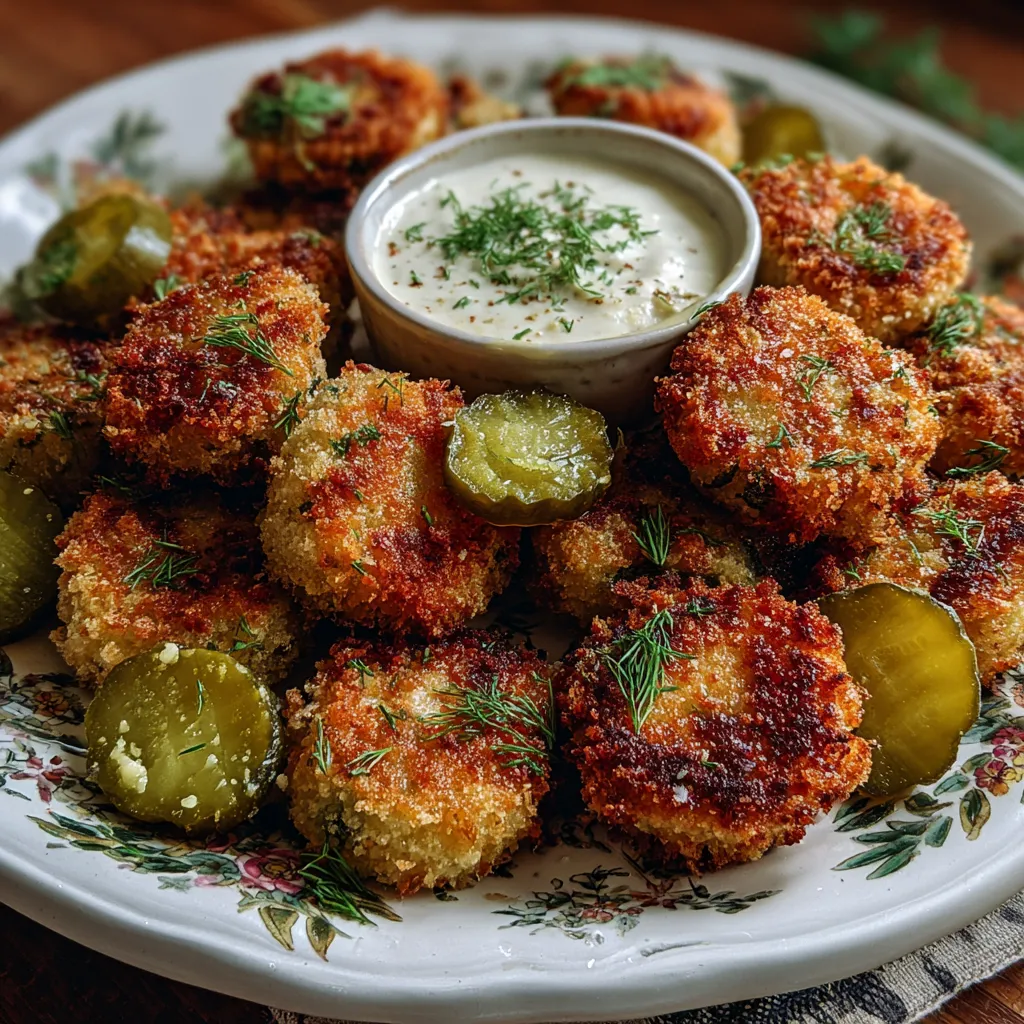

Crispy Pickle Cheese Bites
Description
Crunchy pickle rounds hug molten cheddar, fried to golden perfection. Each crispy bite bursts with tangy dill flavor and creamy cheese, ready to dunk in ranch or marinara for a snack that balances zest and comfort.
Ingredients
Instructions
-
Pat pickle slices dry with paper towels and slice cheddar cheese into pieces that match the pickle size.
-
Assemble bites by placing a piece of cheese between two pickle slices, pressing gently to adhere.
-
Set up a dredging station with flour in one bowl, beaten eggs in a second bowl, and breadcrumbs mixed with garlic powder, paprika, salt, and pepper in a third bowl.
-
Coat each pickle–cheese sandwich first in flour, then dip in the eggs, and finally press into the seasoned breadcrumbs to fully coat.
-
Heat vegetable oil in a skillet over medium-high heat until shimmering.
-
Fry the coated bites in batches for about 1–2 minutes per side or until golden brown and crispy.
-
Transfer cooked bites to a paper towel–lined plate to drain excess oil.
-
Serve warm with your favorite dipping sauce.
Note
- For a gluten-free version, substitute gluten-free breadcrumbs and flour.
- Baking at 400°F for 12–15 minutes yields a lighter version.
- Serve with ranch dressing or marinara sauce for dipping.
- Leftovers can be stored in the fridge for up to 2 days and reheated in the oven.

