

There’s nothing quite like the feeling of pulling a tray of sizzling, golden chicken thighs out of the oven, the skin crackling under the light drizzle of olive oil and smoking paprika. These Crunchy Chicken Thighs are an absolute game-changer for anyone who loves that irresistible combination of juicy, tender meat and a satisfyingly crisp exterior. When you bite in, your teeth meet a symphony of textured layers—a seasoned flour coating giving way to an airy crunch from panko breadcrumbs, and finally, the rich, juicy thigh. It’s the kind of dinner that turns a regular weeknight into a celebration, and it only takes a handful of simple ingredients to achieve restaurant-quality results right in your own kitchen.
Even if you’re new to cooking, these thighs are beginner-friendly and come together quickly, making them perfect for meal prepping or impressing friends at your next gathering. Each bite carries hints of garlic and onion powder, balanced by the smoky warmth of paprika and brightened up by a zesty squeeze of lemon at the end. The result? A mouthwatering dish that’s both comforting and exciting, versatile enough to pair with mashed potatoes, crisp coleslaw, or a fresh green salad. Get ready for compliments to roll in as you turn ordinary chicken into an extraordinary centerpiece.
KEY INGREDIENTS IN CRUNCHY CHICKEN THIGHS
Before we dive into the kitchen, let’s gather all the stars of this crunchy, flavor-packed show. Each ingredient plays a crucial role in building layers of taste and texture—from the seasoned flour that clings to the chicken to the panko breadcrumbs that deliver that coveted crunch. Here’s what you need:
- Bone-in, skin-on chicken thighs
These juicy pieces provide rich flavor and moisture. The bone helps keep the meat tender during baking, while the skin crisps up beautifully to lock in all those savory juices.
- All-purpose flour
Acts as the first coating, helping the egg wash and breadcrumbs adhere evenly. It also adds a light dusting of starch that contributes to a golden-brown finish.
- Panko breadcrumbs
Known for their extra-light, flaky texture, panko creates an irresistible crunch that outperforms regular breadcrumbs every time.
- Garlic powder
Brings a subtle, savory depth without the moisture of fresh garlic—perfect for an even flavor distribution.
- Onion powder
Adds a mild sweetness and natural umami, enhancing the savory profile of each bite.
- Smoked paprika
Imparts a warm, smoky undertone and vibrant color, taking these thighs from simple to standout.
- Salt and pepper
Essential seasonings that balance flavors, amplify aromas, and ensure each bite is perfectly seasoned.
- Large eggs
Beaten with milk, the eggs form a rich binding layer that helps the flour and panko stick to the chicken.
- Milk
Thins out the eggs slightly, ensuring a smooth coating that clings evenly to the chicken surface.
- Olive oil
A light drizzle over the top encourages maximum crispiness during baking without deep-frying.
- Fresh parsley (optional for garnish)
Adds a burst of color and fresh herbal notes when sprinkled over the finished thighs.
- Lemon wedges (for serving)
Provide a sunny, tangy contrast that cuts through the richness and brightens every mouthful.
HOW TO MAKE CRUNCHY CHICKEN THIGHS
Ready to bring everything together? Follow these detailed steps for perfectly golden, crunchy chicken thighs that will become your new weeknight obsession.
1. Preheat your oven to 400°F (200°C). Line a baking sheet with aluminum foil and position a wire rack on top. This setup allows hot air to circulate beneath and around each thigh, promoting even cooking and a uniformly crisp crust.
2. In a shallow bowl, whisk together the all-purpose flour, garlic powder, onion powder, smoked paprika, salt, and pepper until the spices are evenly distributed. This seasoned flour forms the initial dry barrier that helps everything else stick.
3. In a separate shallow bowl, beat the eggs with the milk until the mixture is smooth and pale. This egg wash will moisten the flour coating and give the breadcrumbs an ideal surface to adhere to.
4. Spread the panko breadcrumbs in a third shallow bowl. Make sure they’re fluffed up for maximum air pockets—this is where the crunch magic happens.
5. One at a time, dredge a chicken thigh in the seasoned flour, tapping off any excess. Next, immerse it in the egg wash, making sure it’s completely coated. Finally, press it into the panko breadcrumbs so they cling firmly, covering every inch. Repeat until all thighs are coated.
6. Arrange the breaded thighs on the prepared wire rack, giving each piece a little space to breathe. Drizzle a touch of olive oil evenly over the tops to encourage a golden, blistered crust.
7. Bake in the heated oven for 35–40 minutes, or until each thigh is a deep golden brown and reaches an internal temperature of 165°F (74°C) when tested with a meat thermometer.
8. Remove from the oven and let the thighs rest for a few minutes before plating. This brief downtime locks in all the juices. Finish with a sprinkle of fresh parsley and serve with bright lemon wedges.
SERVING SUGGESTIONS FOR CRUNCHY CHICKEN THIGHS
Now that your Crunchy Chicken Thighs are glistening and ready, let’s talk about turning them into a complete dining experience. With the perfect crust and juicy interior, these thighs adapt beautifully to countless pairings. Whether you’re hosting a casual family dinner or looking for a comforting solo meal, these serving ideas will elevate your plate.
- Serve alongside creamy mashed potatoes with a pat of butter melting into the fluff. The smooth potatoes provide a comforting base and let the crunch shine in contrast.
- Pair with a vibrant coleslaw tossed in a tangy vinaigrette. The cool, crisp cabbage and carrots balance the warm, seasoned chicken for a refreshing bite.
- Slide the thighs into a crunchy chicken sandwich on a toasted bun with shredded lettuce, sliced tomato, and a swipe of garlic aioli. It’s the ultimate handheld treat.
- Plated atop a fresh garden salad with cherry tomatoes, cucumber ribbons, and a lemon-herb dressing. The bright greens add lightness and color, creating a satisfyingly balanced meal.
HOW TO STORE CRUNCHY CHICKEN THIGHS
Keeping your Crunchy Chicken Thighs tasting as good as day one is all about careful storage and proper reheating. With the right techniques, you can enjoy that same crispy-tender experience even days later. Here’s how to maintain maximum crunch and flavor whether you’re refrigerating for a quick reheating or freezing for longer-term convenience.
- Refrigerator storage: Allow cooked thighs to cool completely before placing them in an airtight container. Line the bottom with a paper towel to absorb excess moisture and keep the crust crisp. They’ll stay fresh for up to 3–4 days.
- Freezer storage: Cool and individually wrap each thigh in plastic wrap, then transfer into a sealable freezer bag. Press out as much air as possible to prevent freezer burn. Thighs can be frozen for up to 2 months.
- Reheating in the oven: For best results, preheat the oven to 350°F (175°C). Place thighs on a wire rack set over a baking sheet and heat for about 10–15 minutes, or until warmed through and crisp. Avoid microwaves, which can make the coating soggy.
- Preventing sogginess: Never stack thighs on top of each other when storing or reheating. Keeping them in a single layer with air circulation preserves that signature crunch.
CONCLUSION
From the first crackle of panko meeting hot oil in the oven to the last tangy squeeze of lemon juice, these Crunchy Chicken Thighs bring excitement and comfort to the dinner table. We’ve covered everything you need—from gathering key ingredients and mastering the coating process to cooking tips that guarantee a perfectly crisp crust every time. Whether you’re a seasoned chef or a curious beginner, this recipe is designed to be approachable, foolproof, and endlessly adaptable. Don’t forget to grab a paper copy or bookmark this article so you can refer back whenever you crave that irresistible crunch and juicy tenderness.
You can also find a FAQ below to address any questions you might have about substitutions, seasoning tweaks, or troubleshooting common issues. If you give these thighs a try, I’d love to hear how they turned out! Drop your comments, questions, or suggestions below—let me know if you added a spicy twist, served them with an unexpected side, or simply want tips for achieving even more crunch. Your feedback helps everyone in this cooking community feel confident and excited to cook more delicious meals. Happy cooking!
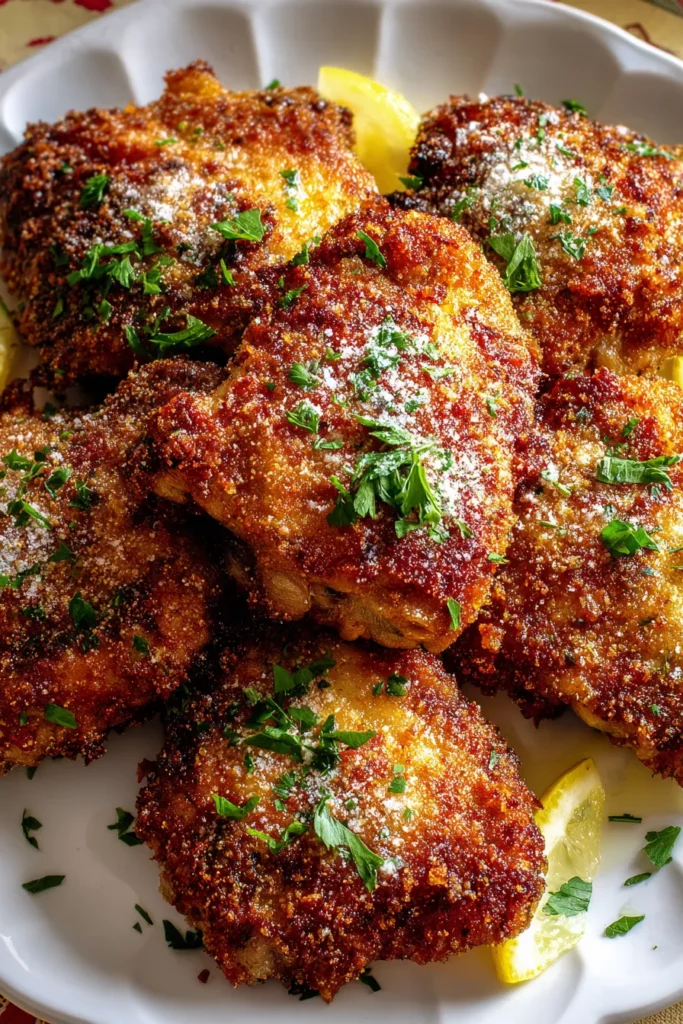

Crunchy Chicken Thighs
Description
These Crunchy Chicken Thighs are a mouthwatering delight, coated in seasoned flour and panko, baked to golden perfection for a satisfying crunch in every bite.
Ingredients
Instructions
-
Preheat your oven to 400°F (200°C). Line a baking sheet with aluminum foil and place a wire rack on top. This will allow the heat to circulate around the chicken, ensuring even cooking and crispiness.
-
In a shallow bowl, combine the flour, garlic powder, onion powder, smoked paprika, salt, and pepper. Mix well to combine.
-
In another shallow bowl, mix the eggs with the milk until well combined.
-
Place the panko breadcrumbs in a third shallow bowl.
-
Dredge a chicken thigh in the flour mixture, making sure it is completely coated. Shake off any excess flour, then dip it into the egg mixture, ensuring it is fully covered. Finally, coat the thigh in the panko, pressing gently so that the breadcrumbs adhere. Repeat with the remaining thighs.
-
Arrange the coated chicken thighs on the prepared wire rack. Drizzle a little olive oil over each thigh to help the coating become extra crispy.
-
Bake in the preheated oven for 35-40 minutes, or until the chicken is golden brown, crispy, and the internal temperature reaches 165°F (74°C).
-
Once done, remove from the oven and let rest for a few minutes before serving. Garnish with chopped fresh parsley if desired and serve with lemon wedges.
Note
- Panko breadcrumbs give the chicken an extra crunchy texture compared to regular breadcrumbs.
- For a spicier kick, add 1/2 teaspoon of cayenne pepper to the flour mixture.
- This recipe is great for meal prepping and stays crispy even when reheated in an oven.
- Drizzling olive oil ensures the chicken becomes crispy, but you can also use cooking spray for a lighter option.
- This dish pairs wonderfully with a side of mashed potatoes, coleslaw, or a fresh garden salad.

