

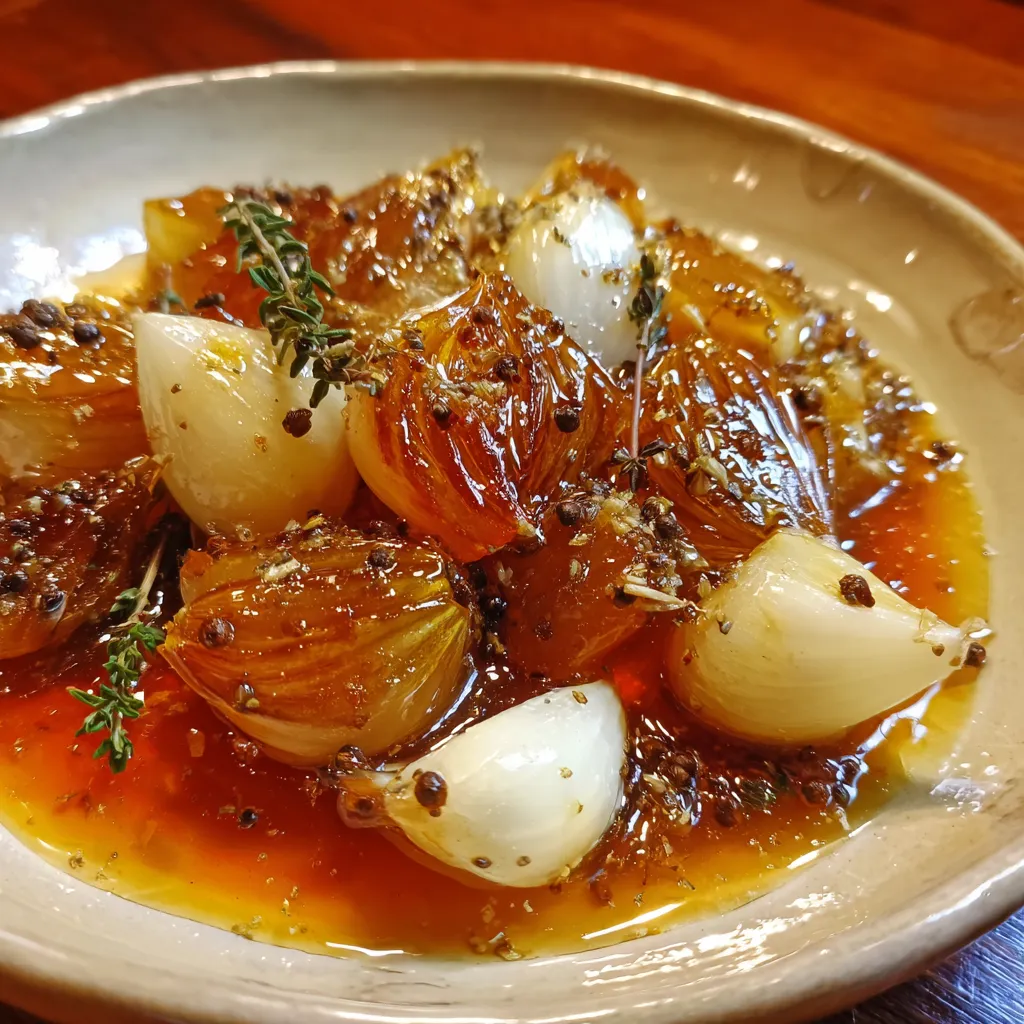
This fermented garlic honey oxymel is a delightful sweet-tart elixir that brings together raw honey, apple cider vinegar and garlic for a bubbling, syrupy concoction. With a hint of ginger, black peppercorns or your favorite herbs, it’s the perfect boost for salads, marinades or a daily wellness shot. Follow along and you’ll have your very own zesty tonic ready in just a few weeks—no fancy equipment required!
Key Ingredients
Here’s what you need to assemble your fermented garlic honey oxymel, each bringing its own magic to the mix:
- 1 cup raw honey: Natural sweetness and viscosity that balance the tang of vinegar and feed beneficial microbes.
- 1 cup apple cider vinegar (with the mother): Provides bright acidity, natural cultures for fermentation, and preservative power.
- 10 cloves fresh garlic, peeled and lightly crushed: Pungent, immune-boosting flavor that mellows and infuses the oxymel over time.
- 1 tablespoon grated fresh ginger (optional, for added spice): Adds warming zest and digestive support, lifting the overall flavor profile.
- 1 teaspoon black peppercorns (optional, for added heat): Contributes gentle heat and complex aromatics for a thrilling finish.
- 1 tablespoon fresh herbs (like thyme or rosemary, optional): Gives herbal depth and fragrant notes that complement garlic and honey.
How To Make Fermented Garlic Honey Oxymel
Ready to dive into fermentation? This process is simple, hands-off, and super rewarding. You’ll combine, ferment, taste, then strain—transforming humble ingredients into a bright, bubbly tonic.
1. Ensure all your equipment is clean and sanitized, including jars, lids, and utensils, to prevent unwanted bacteria growth.
2. In a medium bowl, combine the raw honey and apple cider vinegar and stir gently until the honey fully dissolves into the vinegar.
3. Add the peeled, lightly crushed garlic cloves along with grated ginger, peppercorns, or fresh herbs if using, into the honey-vinegar mixture.
4. Pour everything into a sterilized glass jar, making sure solids stay submerged in the liquid and leaving about an inch of headspace for gases.
5. Seal the jar with a breathable lid—a tightly woven cloth with a rubber band or a loosely fitted cap—to let carbon dioxide escape.
6. Place the jar in a cool, dark spot (60°F–75°F or 15°C–24°C) for 2–4 weeks, gently shaking it every few days to redistribute ingredients.
7. After two weeks, begin tasting for a sweet-tart balance with a garlic kick. Once it’s just right, strain out solids through a fine mesh strainer or cheesecloth into a clean bottle.
8. Store your finished oxymel in a sealed bottle in the refrigerator, where it will stay fresh for several months thanks to the vinegar’s preservative qualities.
Serving Suggestions
Once your oxymel is ready, the fun really begins. It’s versatile, flavorful, and ready to jazz up everything from salads to stews. Here are four ideas to get you started:
- Drizzle over fresh salad greens: Whisk 1 tablespoon oxymel with 3 tablespoons olive oil for a quick, zesty vinaigrette.
- Marinate chicken or tofu: Combine oxymel with soy sauce and garlic for a sweet-sour marinade that caramelizes beautifully.
- Sip as a wellness tonic: Stir a tablespoon into warm water or herbal tea to soothe your throat and boost immunity.
- Glaze roasted vegetables: Toss root veggies in oxymel before roasting to add a shiny, flavorful finish.
Tips For Perfect Fermented Garlic Honey Oxymel
Fermenting at home can feel like magic, but a few tips will ensure every batch turns out spectacular. Keep things simple, stay curious, and enjoy the process—your patience pays off in flavor and health benefits.
- This oxymel can be a delicious addition to salad dressings, marinades, or used as a wellness tonic.
- You can experiment with different herbs and spices to customize the flavor to your liking.
- Garlic not only adds taste but is also known for its numerous health benefits, making this an excellent pantry staple.
- Remember to shake the oxymel before using, as the solids may settle over time and you want that full flavor in every spoonful.
How To Store It
Proper storage preserves the bright, complex flavors you’ve developed over weeks of fermentation. Keep your oxymel cold, sealed, and labeled to enjoy its best quality month after month.
- Store in a sealed glass bottle or jar to prevent flavor loss and protect against contaminants.
- Refrigerate in the coolest part of the fridge, not the door, to maintain steady temperature and freshness.
- Label with the preparation date so you can track its age and enjoy at peak flavor.
- Use within several months, taking advantage of vinegar and honey’s natural preserving properties.
Frequently Asked Questions
Here are some quick answers to common questions about fermented garlic honey oxymel:
- What exactly is fermented garlic honey oxymel?
A: Fermented garlic honey oxymel is a traditional tonic made by combining raw honey and apple cider vinegar with fresh garlic (and optional spices or herbs) and allowing it to ferment. The result is a sweet-tangy, health-boosting elixir that can be used as a wellness tonic, in marinades, or salad dressings.
- How long should I ferment the oxymel and how do I know when it’s ready?
A: You should ferment the mixture for 2 to 4 weeks in a cool, dark place between 60°F and 75°F. Begin tasting after two weeks; the oxymel is ready when it balances sweet and tangy flavors with a gentle garlic kick. If it still tastes too sharp, continue fermenting up to four weeks, tasting every few days.
- Why is it important to use a breathable lid during fermentation?
A: Fermentation produces carbon dioxide gas that needs to escape. A tightly woven cloth secured with a rubber band or a loose-fitting lid allows gas to vent while keeping out dust and insects. An airtight lid could build pressure and risk jar breakage or off-flavors from trapped gases.
- Do I need to sanitize my equipment, and how should I do it?
A: Yes, sanitizing jars, lids, and utensils is crucial to prevent unwanted molds or bacteria. Wash everything in hot, soapy water, rinse well, and optionally sterilize jars by pouring boiling water over them or running them through a hot dishwasher cycle. Allow equipment to air-dry before use.
- How do I store the oxymel once fermentation is complete?
A: After reaching your desired flavor, strain out the garlic, ginger, peppercorns, and herbs through a fine mesh strainer or cheesecloth into a clean glass bottle. Seal it tightly and refrigerate. Properly stored, the oxymel can last for several months, as the vinegar and honey act as natural preservatives.
- Can I customize the flavor of my oxymel?
A: Absolutely. While garlic, honey, and apple cider vinegar form the base, you can add grated ginger for spice, black peppercorns for heat, or fresh herbs like thyme or rosemary for herbal notes. Adjust quantities to suit your taste and experiment with different combinations.
- What health benefits does fermented garlic honey oxymel offer?
A: This oxymel combines the antimicrobial and antioxidant properties of raw honey and garlic with the probiotic potential of fermented vinegar. It may support immune function, soothe sore throats, aid digestion, and provide anti-inflammatory benefits, making it a versatile addition to your wellness routine.
- How should I use and serve the fermented garlic honey oxymel?
A: Shake well before each use, as ingredients may settle. Take a tablespoon as a daily wellness tonic, drizzle over salads, stir into tea, mix into marinades for meat or vegetables, or use as a zesty dressing. Adjust serving size to taste and enjoy its sweet-tangy garlic flavor.
What Makes This Special
This fermented garlic honey oxymel stands out thanks to its perfect balance of sweet honey and tangy vinegar, enriched by the savory depth of garlic and the sparkle of optional ginger, peppercorns, or herbs. The gentle fermentation process not only mellows flavors into a bubbly, syrupy elixir but also unlocks probiotics and antioxidants that support overall wellness. Keep this recipe bookmarked, print it out, and stash it in your recipe binder—your future self will thank you. Have questions, tweaks, or success stories? Leave a comment below so we can swap tips and celebrate your oxymel triumphs together!

Fermented Garlic Honey Oxymel
Description
Aged in bright vinegar and mellow honey, crushed garlic and ginger transform into a bubbly, syrupy oxymel. Herbal notes and black pepper shimmer through each spoonful, infusing dressings, marinades, or daily immunity shots with vibrant warmth.
Ingredients
Instructions
-
Start by ensuring all your equipment is clean and sanitized. This includes jars, lids, and any utensils you'll be using. This helps prevent unwanted bacteria from interfering with the fermentation process.
-
In a medium mixing bowl, combine the raw honey and apple cider vinegar. Stir gently until well mixed. The honey should be fully dissolved in the vinegar.
-
Add the peeled and lightly crushed garlic cloves into the mixture. If you’re using ginger, black peppercorns, or herbs, you can add them at this stage as well.
-
Pour the mixture into a clean, sterilized glass jar. Ensure that the garlic and any other solid ingredients are submerged in the honey-vinegar mixture. Leave some space at the top of the jar to allow for fermentation gases to escape.
-
Seal the jar with a breathable lid, such as a tightly woven cloth secured with a rubber band, or a lid that isn’t completely airtight. This is crucial as the fermentation process produces carbon dioxide that needs to be released.
-
Place the jar in a cool, dark place, ideally around 60°F to 75°F (15°C to 24°C). Allow the mixture to ferment for 2 to 4 weeks. During this time, shake the jar gently every few days to mix the ingredients.
-
After 2 weeks, start tasting the oxymel to check on the flavor. It should have a sweet, tangy taste with a kick from the garlic. Once it reaches a flavor you enjoy, strain out the solids through a fine mesh strainer or cheesecloth into a clean jar or bottle.
-
Store your fermented garlic honey oxymel in a sealed bottle, ideally refrigerated. It can be used for several months, as the vinegar acts as a preservative.
Note
- This oxymel can be a delicious addition to salad dressings, marinades, or used as a wellness tonic.
- You can experiment with different herbs and spices to customize the flavor to your liking.
- Garlic not only adds flavor but is also known for its numerous health benefits, making this an excellent addition to your pantry.
- Remember to shake the oxymel before using, as ingredients may settle over time.

