

Fluffy Steamed Asian Bao Buns transform basic pantry staples into delicate, buoyant buns that steam into soft, pillow-like clouds ready to cradle your favorite savory or sweet fillings. These baos puff into smooth, billowy rounds with tender, airy interiors, offering a pillowy bite that hints at sweetness and elevates any dim sum spread. Ready to impress your family at lunch? Let’s dive in and whip up these intermediate-level bites that feel gourmet and comforting all at once.
Key Ingredients
Before you get started, gather these simple ingredients to make the dough tender, light, and perfectly fluffy:
- 250 grams all-purpose flour: Base structure that provides the gluten network for soft, yet sturdy buns.
- 2 tablespoons sugar: Feeds the yeast and adds a hint of sweetness.
- 1 teaspoon instant yeast: Leavening agent that helps the buns rise to their pillowy height.
- 1/2 teaspoon baking powder: Provides additional lift for an airy texture.
- 1/4 teaspoon salt: Enhances flavor and strengthens the dough.
- 150 milliliters warm milk: Activates the yeast gently and adds richness.
- 1 tablespoon vegetable oil: Keeps the dough moist and tender.
How To Make Fluffy Steamed Asian Bao Buns
Making these bao buns is a straightforward process of mixing, kneading, proofing, and steaming. We’ll guide you through each essential stage—from combining dry and wet ingredients to creating that characteristic soft, pillowy interior. With clear steps on dough preparation, shaping, and steaming, you’ll achieve consistent steam circulation and perfectly puffed buns every time.
1. In a large bowl, combine the 250 grams all-purpose flour with the sugar, instant yeast, baking powder, and salt, whisking until evenly blended.
2. Gradually pour in the 150 milliliters of warm milk and 1 tablespoon of vegetable oil, stirring with a spoon or spatula until a rough, shaggy dough forms.
3. Transfer the dough to a lightly floured surface and knead for 8 to 10 minutes by pushing and folding until it’s smooth, elastic, and slightly tacky.
4. Place the dough into a lightly oiled bowl, cover it with a damp cloth, and let it rise in a warm spot for about 1 hour or until doubled in size.
5. Gently punch down the risen dough, then transfer it back to a floured surface and roll it into a log about 2 cm in diameter.
6. Slice the log into 10 equal pieces, shape each into a tight ball, flatten slightly, and set each one on individual parchment paper squares.
7. Loosely cover the shaped buns with a clean kitchen cloth and let them rest for 15 minutes so they puff up slightly.
8. Set up a steamer over simmering water, making sure it’s at a gentle boil, and arrange the buns with space between them.
9. Steam the buns over medium heat for 12 to 15 minutes until they’re fully puffed and the centers are cooked through.
10. Turn off the heat and let the buns sit in the steamer with the lid on for another 2 minutes to set, then carefully remove and serve.
Serving Suggestions
These Fluffy Steamed Asian Bao Buns are a blank canvas that can take your meal to the next level. From casual lunches at home to festive gatherings with friends, their tender, pillowy texture pairs beautifully with a range of fillings and sides. Fill them with savory classics like barbecued pork or grab-and-go favorites such as crispy vegetables to please every palate. Don’t forget to have your favorite dipping sauces and garnishes on hand to complement the sweetness of the buns. With just a few extra ingredients, you can transform these baos into an unforgettable main dish or snack.
- Classic Char Siu Filling: Combine diced barbecued pork with hoisin sauce and fill warm buns for an authentic dim sum experience.
- Vegetarian Crunch: Sauté julienned shiitake mushrooms and carrots, then add sliced cucumber for a refreshing, meat-free bite.
- Spicy Chicken Twist: Shred cooked chicken and toss with spicy mayo before tucking it into the bun for a creamy, zesty flavor.
- Sweet Red Bean Dessert: Spoon a dollop of sweet red bean paste into each bun and sprinkle with toasted sesame seeds for a delightful finish.
Tips For Perfect Fluffy Steamed Asian Bao Buns
Getting these buns just right can feel like a small triumph, and a few insider tips will ensure your Fluffy Steamed Asian Bao Buns turn out perfect every time. From the moment you proof your yeast to the final seconds of steaming, these simple tweaks keep everything running smoothly in your kitchen. Pay attention to temperature, timing, and gentle handling, and you’ll be rewarded with buns that puff up evenly, hold their shape, and taste light as air.
- Make sure the milk is lukewarm to activate the yeast gently and prevent killing the microorganisms, aiming for around 37–43 °C (98–110 °F).
- Add fillings such as barbecued pork or vegetables before steaming by sealing each bun tightly to avoid leaks and maintain that perfect pocket.
- Maintain consistent steam and enough headspace in the steamer, keeping the heat at a gentle boil so buns rise uniformly without collapsing.
- Store leftover buns in an airtight container for up to 2 days to retain moisture; re-steam briefly to refresh their soft, pillowy texture.
How To Store It
Once you’ve enjoyed your freshly steamed bao buns, proper storage will keep them soft and flavorful for future meals. Whether you plan to eat them the next day or freeze them for later, following the right steps will prevent them from drying out or becoming soggy. Use airtight containers, temperature control, and gentle reheating techniques to ensure each bun tastes as delightful as the day you made it.
- Short-Term Refrigeration: Cool the buns completely, then store in an airtight container in the refrigerator for up to 2 days; re-steam for 5–7 minutes to restore softness.
- Freezing Raw Buns: Place shaped buns on parchment in a single layer, freeze for 30 minutes, then transfer to a freezer bag; steam from frozen for 15–18 minutes without thawing.
- Freezing Cooked Buns: Cool steamed buns, wrap individually in plastic wrap, and freeze in a sealed bag; reheat by thawing in the steamer and steaming for 5–7 minutes.
- Room Temperature (Short-Term): If you plan to eat within a few hours, keep buns covered with a clean, moist towel at room temperature to maintain humidity.
Frequently Asked Questions
Here are answers to common questions that come up when making bao buns at home:
- Q: How can I tell if my yeast and dough are active and proofed properly?
Ensure your milk is lukewarm (around 37–43 °C) before mixing; when mixed with sugar, active yeast will form small bubbles or foam within 5–10 minutes. After kneading, the dough should double in size in about 1 hour. A light poke should leave a slight indentation without springing back immediately.
- Q: What adjustments should I make if the dough is too sticky or too dry?
If the dough clings excessively to your hands, sprinkle in flour 1 tablespoon at a time until it’s manageable yet still soft. If the dough feels crumbly, add warm milk by teaspoonfuls until it comes together. The ideal dough is smooth, elastic, and only slightly tacky.
- Q: Can I prepare the dough the night before and refrigerate?
Yes. After the initial knead, let the dough rise for about 30 minutes, punch it down, then cover tightly with plastic wrap and refrigerate for up to 12 hours. The next day, bring it to room temperature, reshape, let rest for 15 minutes, then steam as directed. This slow ferment adds flavor.
- Q: How do I add fillings without compromising the bun structure?
After dividing and rolling into balls, gently flatten each to about 1 cm thick. Place 1–2 tablespoons of filling in the center, then bring the edges together and pinch tightly to seal. Rest sealed buns on parchment for 15 minutes before steaming to help them hold shape.
- Q: What’s the best way to prevent buns from sticking to the steamer?
Use individual parchment squares under each bun or lightly oil the steamer rack. Ensure buns have at least 2 cm of space around them so they can expand without touching each other or the steamer walls.
- Q: Can I freeze the buns, and what’s the recommended method for reheating?
To freeze raw buns, place shaped buns on parchment in a single layer, freeze for 30 minutes, then transfer to airtight bags. Steam from frozen for about 15–18 minutes. For cooked buns, thaw in the steamer and steam for 5–7 minutes until warm and fluffy.
- Q: Why did my buns collapse after steaming, and how can I avoid that?
Collapsing often happens if the lid is opened too soon or if steam is inconsistent. After steaming, turn off the heat and leave the buns with the lid on for 2 more minutes to set their structure. Keep heat at medium so steam is steady but not overly vigorous.
What Makes This Special
These Fluffy Steamed Asian Bao Buns work their magic by combining simple ingredients into a cloud-like masterpiece that’s as fun to make as it is delicious to eat. The pillowy texture comes from the perfect balance of yeast, steam, and a gentle proofing routine—no fancy equipment needed. Whether you’re filling them with savory pork or sweet bean paste, each bite is a little celebration of homemade goodness. Print this recipe, save it in your favorites, and don’t forget to let me know how your buns turned out or if you have any twists to share!
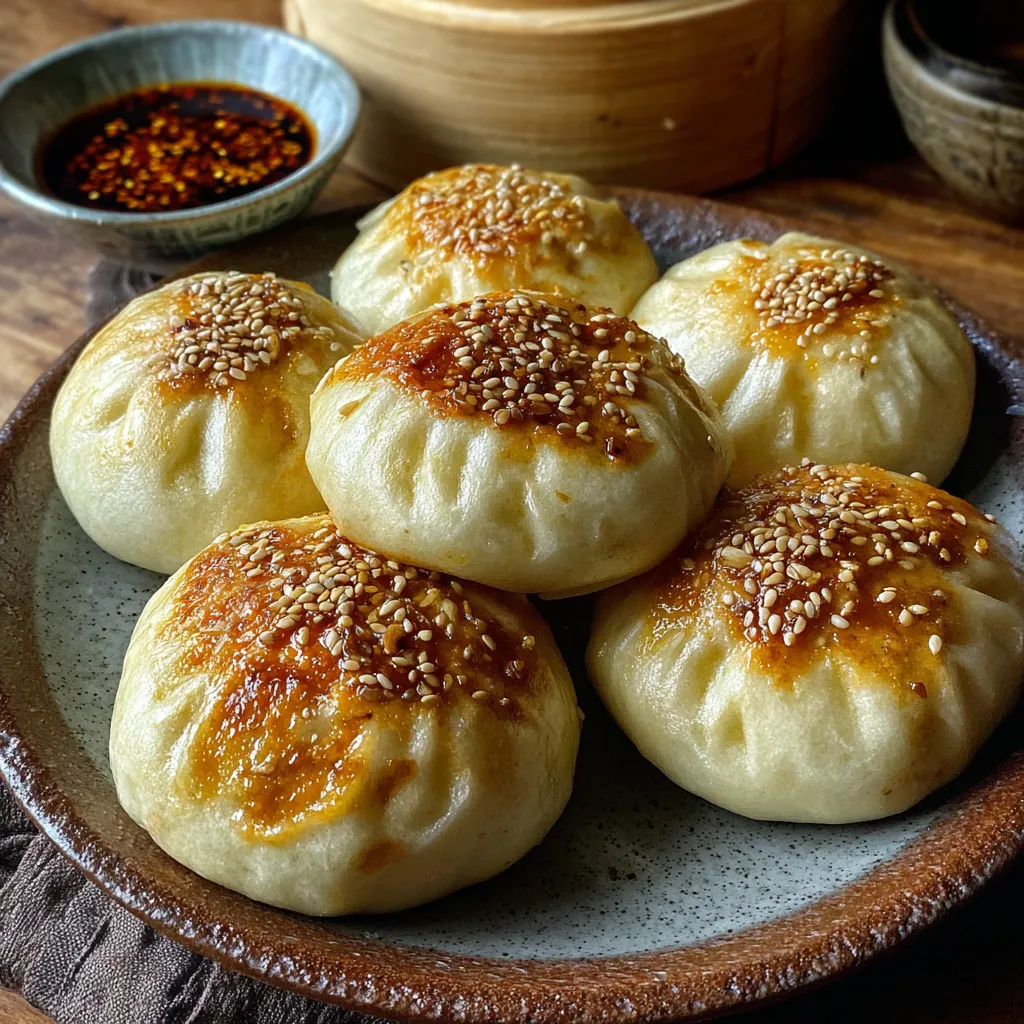

Fluffy Steamed Asian Bao Buns
Description
These baos puff up into smooth, billowy rounds with tender, airy interiors. Steaming yields a pillowy bite that hints at sweetness, making each mouthful a gentle, fluffy cloud ideal for savory pork or crisp vegetable fillings.
Ingredients
Instructions
-
In a large bowl combine the flour sugar instant yeast baking powder and salt.
-
Gradually add the warm milk and vegetable oil to the dry ingredients stirring until a shaggy dough forms.
-
Turn the dough onto a lightly floured surface and knead for about 8 to 10 minutes until smooth and elastic.
-
Place the dough in a lightly oiled bowl cover with a damp cloth and let it rise in a warm place until doubled in size about 1 hour.
-
Punch down the dough and transfer to a floured surface then roll into a log about 2 cm in diameter.
-
Divide the log into 10 equal pieces shape each piece into a ball and flatten slightly before placing on individual parchment paper squares.
-
Cover the shaped buns with a clean cloth and let them rest for 15 minutes to puff up.
-
Prepare a steamer by bringing water to a gentle boil then place the buns inside ensuring they do not touch.
-
Steam the buns over medium heat for 12 to 15 minutes until they are puffed and cooked through.
-
Turn off the heat and let the buns sit in the steamer with the lid on for 2 minutes before removing.
Note
- Make sure the milk is lukewarm to activate the yeast gently
- Add fillings such as barbecued pork or vegetables before steaming
- Maintain consistent steam and enough headspace in the steamer
- Store leftover buns in an airtight container for up to 2 days

