

Every simmering pot of Ground Beef Hillbilly Chili is like slipping into your favorite worn-in sweater—comforting, familiar, and endlessly satisfying. This recipe is all about bold, robust flavors that meld together in perfect harmony: rich beef, tender beans, vibrant veggies, and a custom spice blend that packs just the right punch. As a self-proclaimed chili enthusiast, I’ve watched friends’ eyes light up with that first forkful, exclaiming over how the earthy cumin and fiery paprika dance on the tongue. If you’re new to chili-making, fear not—this beginner-friendly dish takes just 15 minutes to prep, about an hour to cook, and only a 10-minute rest before it’s ready to serve. With around 450 calories per hearty bowl, it’s a dinner that fills you up and warms you right down to your toes.
Beyond the practical details, there’s something utterly nostalgic about this Hillbilly version. Perhaps it’s the echo of earth boots stomping into a rustic kitchen or the memory of late-night gatherings under string lights. The melody of sizzling beef and onions in a Dutch oven is like music to a home cook’s ears, promising cozy evenings and stories shared across the table. Whether you’re feeding a rowdy crowd or craving a solo night in, this chili delivers tradition and flavor in every spoonful. So grab your favorite stirring spoon, tie on that apron, and let’s celebrate comfort food at its finest!
KEY INGREDIENTS IN GROUND BEEF HILLBILLY CHILI
Before you dive into the heat and heartiness of this Hillbilly Chili, let’s meet the all-stars that make this stew sing. Each ingredient plays a crucial role in building depth, texture, and that signature kick that will have everyone coming back for seconds.
- Ground Beef
This forms the meaty backbone of the chili, offering richness and protein. As it browns, it develops flavorful brown bits that add a savory depth to every spoonful.
- Onion
Once diced and sautéed, onions bring natural sweetness and complexity. They soften up just enough to meld seamlessly with the beef and spices.
- Green Bell Pepper
Offers a crisp, slightly vegetal bite and brightens the chili’s color palette. It also balances out the richness with a hint of freshness.
- Garlic
Minced garlic infuses the pot with aromatic warmth. Just a few cloves give the chili its classic garlicky punch.
- Diced Tomatoes
Their juices create a tangy, juicy base. They help thin the chili to the perfect consistency while adding a burst of tomato goodness.
- Kidney Beans
These hearty beans absorb the spices and beefy juices, contributing creamy texture and fiber for a truly filling meal.
- Beef Broth
Adds extra savory notes and thins the chili just enough for a luscious, spoon-coating consistency. It also ties all the ingredients together.
- Chili Powder
A blend of dried chilies and seasonings, this spice is the cornerstone of any chili, contributing a warm, smoky heat.
- Ground Cumin
Offers an earthy, nutty flavor that deepens the chili’s character and complements the chili powder perfectly.
- Paprika
Brings a subtle sweetness and vibrant red hue. It layers in additional smokiness without overpowering the dish.
- Dried Oregano
Lends herbaceous, slightly peppery notes that tie in beautifully with the warm spices.
- Cayenne Pepper
An optional boost of heat—just enough to tingle the lips and elevate the overall spice level.
- Salt and Black Pepper
Essential for seasoning. They enhance every other flavor and ensure your chili tastes balanced and bold.
- Vegetable Oil
Used to heat the pot and prevent sticking. It also helps the beef brown evenly, creating those tasty caramelized bits.
HOW TO MAKE GROUND BEEF HILLBILLY CHILI
Now that your ingredients are lined up and ready to roll, it’s time to build layers of flavor step by step. This recipe walks you through each technique to transform simple pantry staples into a soul-warming bowl of chili.
1. In a large pot or Dutch oven, heat the vegetable oil over medium heat. Add the ground beef and cook until browned, using a wooden spoon to break it apart into bite-sized pieces. This takes about 5–7 minutes; those brown bits at the bottom will add incredible depth.
2. Once the beef is nicely caramelized, add the diced onion, green bell pepper, and minced garlic to the pot. Continue to cook, stirring occasionally, for about 5 minutes or until the veggies are softened and fragrant.
3. Stir in the chili powder, ground cumin, paprika, oregano, cayenne pepper (if you like it spicy), salt, and black pepper. Cook for 1 minute, allowing the spices to bloom and intensify their flavors.
4. Pour in the diced tomatoes (with all their juice), kidney beans, and beef broth. Use your spoon to stir everything together, ensuring each ingredient is well coated in that vibrant spice blend.
5. Bring the mixture to a gentle simmer, then cover the pot. Reduce the heat to low and let it cook for at least 30 minutes. For a richer, thicker final chili, simmer for up to 1 hour, giving it a stir every now and then.
6. Taste and adjust the seasoning with more salt and pepper as needed. This final tweak ensures your chili hits all the right notes.
7. Serve the chili hot, garnished with your favorite toppings like shredded cheese, sour cream, chopped green onions, or jalapeños.
SERVING SUGGESTIONS FOR GROUND BEEF HILLBILLY CHILI
When it comes to serving this Hillbilly Chili, the possibilities are endless—and that’s half the fun. Whether it’s game night, a cozy family dinner, or meal prepping for the week, these ideas will elevate your chili experience. From creamy finishes to crunchy accompaniments, you’ll find the perfect way to personalize each bowl and delight every guest.
- Loaded with Shredded Cheese and Scallions
Pile on sharp cheddar or Monterey Jack and a sprinkle of fresh scallions. The gooey cheese melting into the hot chili creates an irresistible creaminess.
- Swirl in Sour Cream and Sliced Jalapeños
A dollop of sour cream lends a cool tang that contrasts beautifully with the warm, spicy broth. Add jalapeño slices for an extra kick and vibrant color.
- Serve with Warm Cornbread
A slightly sweet, buttery cornbread is the ultimate sidekick. Tear off a chunk and use it to scoop up every last morsel—pure comfort food heaven.
- Top with Crushed Tortilla Chips or Frito Corn Chips
For a fun, crunchy texture, crumble tortilla or Frito chips on top just before serving. Each bite delivers a satisfying contrast of crunch and warmth.
HOW TO STORE GROUND BEEF HILLBILLY CHILI
Leftover chili is like a gift that keeps on giving—flavors deepen overnight, and reheating is a breeze. Whether you’re planning weeknight lunches or stocking your freezer for busy days, proper storage ensures your chili stays fresh, tasty, and safe to enjoy.
- Refrigerate in Airtight Containers
Once cooled to room temperature, transfer chili to airtight containers. Store in the fridge for up to 4 days. This method keeps the chili juicy and prevents any unwanted moisture loss.
- Freeze in Portion-Sized Bags
Divide the cooled chili into freezer-safe bags or containers, flattening bags for quicker thawing. Label with the date and freeze for up to 3 months—perfect for meal prep or busy evenings.
- Thaw Slowly in the Refrigerator
For best texture, move frozen chili to the fridge the night before you plan to serve. A slow thaw maintains the beans’ shape and the chili’s overall consistency.
- Reheat on the Stovetop or Microwave
To reheat, place chili in a saucepan over medium-low heat, stirring occasionally until warmed through. For microwave reheating, cover the bowl and heat in 1-minute intervals, stirring between each cycle for even temperature.
CONCLUSION
From gathering the key ingredients to savoring your very first spoonful, this Ground Beef Hillbilly Chili is a celebration of comfort food tradition with a modern twist. You’ve learned how to layer flavors by browning beef, toasting spices, and slow-simmering for ultimate depth. We explored creative serving suggestions, from cheesy toppings to cornbread sides, and uncovered smart storage tips to make leftovers just as irresistible as the initial feast. With only 15 minutes of prep and about an hour of hands-off simmering, this recipe is the perfect beginner-friendly dinner that effortlessly stretches to feed a crowd or provide satisfying leftovers during a busy week. At roughly 450 calories per serving, it strikes the ideal balance between hearty indulgence and home-cooked simplicity.
Be sure to print and save this article for your recipe box, and remember you can find an FAQ below if any questions arise along the way. I’d love to hear how your Hillbilly Chili turns out—drop a comment with your favorite twist, ask for troubleshooting tips, or share any feedback if you give this recipe a whirl. Happy cooking, and here’s to many cozy, flavor-packed bowls ahead!
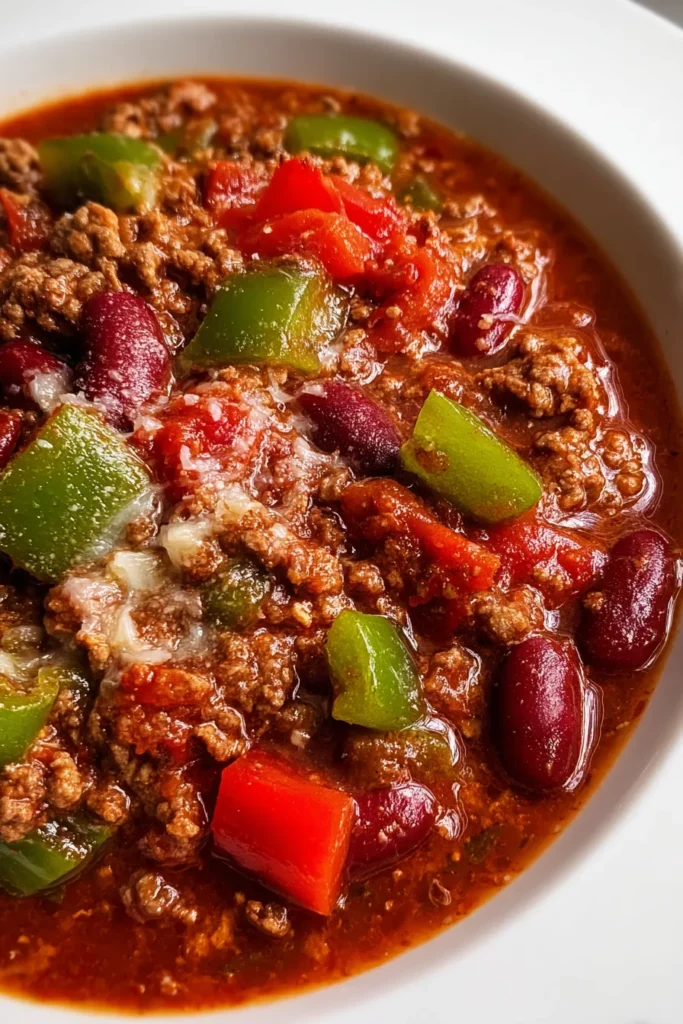

Ground Beef Hillbilly Chili
Description
Savor the robust flavors of this Ground Beef Hillbilly Chili, packed with hearty beef, vibrant veggies, and a perfect spice blend. Comfort food at its finest!
Ingredients
Instructions
-
In a large pot or Dutch oven, heat the vegetable oil over medium heat. Add the ground beef and cook until browned, breaking it apart with a wooden spoon. This should take about 5-7 minutes.
-
Once the beef is browned, add the diced onion, green bell pepper, and minced garlic to the pot. Cook for an additional 5 minutes, or until the vegetables are softened.
-
Stir in the chili powder, ground cumin, paprika, oregano, cayenne pepper (if using), salt, and black pepper. Cook for 1 minute to allow the spices to bloom.
-
Add the diced tomatoes (with their juice), kidney beans, and beef broth to the pot. Stir to combine all the ingredients.
-
Bring the mixture to a simmer. Cover the pot, reduce the heat to low, and let it cook for at least 30 minutes to allow the flavors to meld together. For a richer taste, let it simmer for up to 1 hour, stirring occasionally.
-
Adjust the seasoning with more salt and pepper if needed before serving.
-
Serve hot, garnished with your desired toppings like shredded cheese, sour cream, chopped green onions, or jalapeños.
Note
- This chili can be made a day ahead and stored in the refrigerator; flavors deepen as it sits.
- Feel free to add different beans or veggies like corn or zucchini for variety.
- This recipe is perfect for freezing – just portion it out and freeze for up to 3 months.
- Ground turkey or chicken can be used as a substitute for a lighter version.
- Cooking the chili slowly on low heat enhances the flavor and thickens the texture.

