

There’s something almost magical about rolling up your sleeves and baking fresh cookies as Halloween night draws near, isn’t there? The glow of jack-o’-lanterns dancing on window sills and the rustle of fallen leaves outside set the perfect scene for a batch of sweet, chewy treats. These aren’t just any cookies—they’re bursting with semi-sweet chocolate chips, studded with festive orange-and-black candy-coated chocolates, and perked up with crunchy nuts if you choose. Every stir of the batter brings back fond memories of childhood trick-or-treat excursions, when the promise of sugary delights fueled our imagination and filled our bellies.
As you mix, measure, and munch on stray chocolate chips, you’ll find yourself swept up in a whirlwind of autumnal aromas—warm vanilla, toasty butter, and just a hint of brown sugar caramel. This recipe is beginner-friendly, with simple steps that yield a bakery-quality result, and it delivers roughly 120 calories of pure delight per cookie. Whether you’re sharing these Boo-tiful and Delicious Halloween Chocolate Chip Cookies at a spooky soirée or keeping them all to yourself for midnight snack raids, they’re guaranteed to sweeten up your spooky season with every chewy, candy-studded bite.
KEY INGREDIENTS IN HALLOWEEN CHOCOLATE CHIP COOKIES
Before we dive into the baking extravaganza, let’s take a closer look at the star players that make these cookies irresistible. Each ingredient has been thoughtfully chosen to create that perfect balance of soft, chewy, and crunchy textures, crowned with festive colors and flavors.
- All-Purpose Flour
Provides the structural backbone for the cookies, giving them just enough heft to hold all the mix-ins while remaining tender and soft.
- Baking Soda
A leavening agent that helps cookies spread properly and develop those coveted golden-brown edges without collapsing into a puddle.
- Salt
Balances the sweetness and enhances the overall flavor profile, ensuring every chocolate chip pops with richness.
- Unsalted Butter
When softened, it creamed with sugars produces an irresistibly creamy base. It delivers flavor and keeps the cookies tender.
- Granulated Sugar
Adds sweetness and contributes to the cookie’s crisp edges, helping them caramelize just right.
- Brown Sugar
Packed with molasses, it imparts a deep, caramel-like flavor and helps maintain a moist, chewy interior.
- Vanilla Extract
Lends a warm, fragrant note that ties all the elements together, amplifying the cookie’s sweetness and complexity.
- Large Eggs
Provide structure and moisture, acting as a binding agent while yielding a soft, cake-like crumb.
- Semi-Sweet Chocolate Chips
Melting into pockets of gooey goodness, these add a rich, bittersweet contrast to the sugary dough.
- Candy-Coated Chocolate Candies
In festive orange and black hues, these bring a playful crunch and vibrant color perfect for Halloween fun.
- Chopped Pecans or Walnuts (Optional)
Introduce a toasty crunch and nutty flavor, elevating the texture and adding a sophisticated twist.
HOW TO MAKE HALLOWEEN CHOCOLATE CHIP COOKIES
Let’s roll up our sleeves and dive into the step-by-step magic that turns simple pantry staples into a tray of festive, chewy cookies. These instructions will guide you from preheating the oven to that glorious first bite.
1. Preheat your oven to 375°F (190°C) and line your baking sheets with parchment paper or lightly grease them to ensure cookies slide off easily.
2. In a medium bowl, whisk together the flour, baking soda, and salt until evenly distributed, then set the dry mixture aside.
3. In a large mixing bowl, beat the softened butter, granulated sugar, brown sugar, and vanilla extract on medium speed until the mixture is creamy and smooth, about 2–3 minutes.
4. Crack in the eggs one at a time, beating well after each addition to ensure they’re fully incorporated and the batter remains silky.
5. Gradually add the flour mixture in batches, folding it in gently until no streaks of flour remain and the dough comes together.
6. Stir in the chocolate chips, candy-coated chocolates, and chopped nuts (if using), ensuring each piece is evenly distributed throughout the dough.
7. Using a cookie scoop or rounded tablespoon, drop portions of dough about 2 inches apart on the prepared baking sheets, allowing room for spread.
8. Bake for 9 to 11 minutes, watching closely for edges that turn golden brown while the centers still look slightly underdone.
9. Let the cookies rest on the baking sheets for a few minutes before transferring them to wire racks to cool completely.
SERVING SUGGESTIONS FOR HALLOWEEN CHOCOLATE CHIP COOKIES
There’s nothing quite like the final flourish of how you present your freshly baked Halloween Chocolate Chip Cookies. Whether you’re hosting a haunted house party or indulging in a cozy night in, these serving ideas will help you showcase your cookies in style and create moments that taste as good as they look.
- Festive Cookie Platter
Arrange the cookies on a large slate or wooden board, alternating plain chocolate chip and candy-coated versions. Add sprigs of rosemary or small pumpkins for a spooky harvest vibe that invites guests to grab a treat.
- Boo Bash Gift Bags
Slip 3–4 cookies into clear cellophane bags, tie them with orange and black ribbons, and attach a handwritten tag that says “Sweeten Your Spooky Season!” This makes for an adorable party favor or neighborly gift.
- Monster Milk Dip
Place cookies around a bowl of cold milk tinted green with a drop of food coloring. Guests can dip and dunk for a playful, interactive snack station that doubles as décor.
- Dessert Table Centerpiece
Stack cookies on a tiered cake stand interspersed with candied popcorn or Halloween candy corn. Sprinkle edible glitter or powdered sugar “spider webs” for an enchanting, eerie touch.
HOW TO STORE HALLOWEEN CHOCOLATE CHIP COOKIES
Once you’ve enjoyed the warm, just-out-of-the-oven bliss, proper storage will keep these Halloween Chocolate Chip Cookies tasting fresh, chewy, and delightful for days to come. Follow these simple methods to preserve their flavor, texture, and festive charm.
- Airtight Container at Room Temperature
Place cookies in a single layer or separate layers with parchment paper inside a sealed container. Store at room temperature for up to 5 days to maintain a soft, chewy texture.
- Freezing for Longer Shelf Life
Flash-freeze cooled cookies on a baking sheet for an hour, then transfer them to a freezer-safe bag. Store for up to 3 months; thaw at room temperature when you’re ready to enjoy.
- Reheating for Fresh-Baked Warmth
Pop a cookie in the microwave for 10–15 seconds or warm in a preheated oven at 300°F (150°C) for 3–5 minutes. This revives that just-baked softness and melty chocolate center.
- Separate Candy-Coated Pieces
If you notice candy crystals begin to crack or bleed moisture, remove those portions and store them in a separate bag, keeping the main batch crisp and preventing color transfer.
CONCLUSION
Recapping our journey through these Boo-tiful and Delicious Halloween Chocolate Chip Cookies, we’ve mixed basic pantry staples—flour, sugar, butter, and eggs—with an extra dose of festive flair from chocolate chips, candy-coated chocolates, and optional nuts. In just over 15 minutes of hands-on prep and a quick 10-minute bake, you’ll have a batch of roughly 24 chewy, colorful cookies, each packing about 120 calories of autumnal indulgence. From lining your baking sheets with parchment to tasting that first warm bite, every moment is infused with excitement, sweetness, and a touch of spookiness. Don’t forget to add your personal twist—swap nuts for pumpkin seeds or try different Halloween candies for a custom flavor profile.
Feel free to print this article and tuck it into your favorite recipe binder so you can revisit it whenever the spooky season rolls around. You can also save it digitally and come back later when you’re ready to whip up a batch for your next gathering. Below, you’ll find a handy FAQ section (without writing out each question here) that addresses common queries, troubleshooting tips, and allergy-friendly substitutions. If you give this recipe a try or run into any baking conundrums, please leave your comments, questions, or feedback—I’d love to hear how your cookies turned out and troubleshoot alongside you in the delightful world of festive baking!
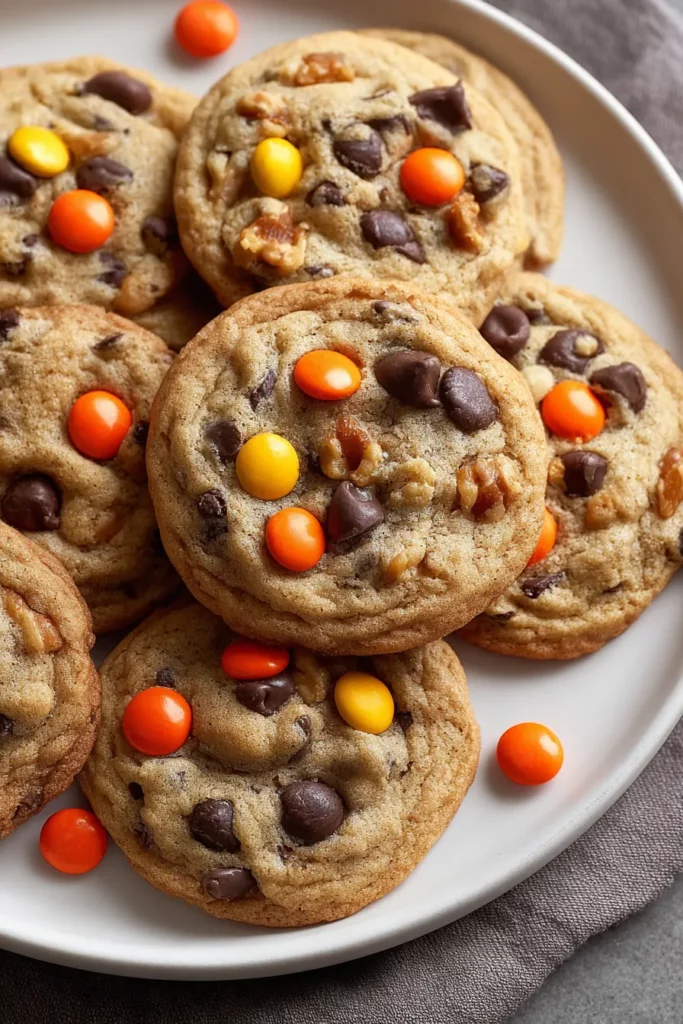

Halloween Chocolate Chip Cookies
Description
Experience the ultimate Halloween treat with these delightful chocolate chip cookies, loaded with festive candy and the perfect chewy texture for ghoulish fun.
Ingredients
Instructions
-
Preheat your oven to 375°F (190°C) and prepare baking sheets with parchment paper or lightly grease them to prevent sticking.
-
In a medium bowl, mix together the flour, baking soda, and salt and set aside.
-
In a large mixing bowl, beat the softened butter, granulated sugar, brown sugar, and vanilla extract until creamy and smooth.
-
Add the eggs one at a time, beating well after each addition to fully incorporate them into the batter.
-
Gradually blend in the flour mixture, a little at a time, making sure everything is well combined.
-
Stir in the chocolate chips, candy-coated chocolates, and nuts, mixing them evenly throughout the dough.
-
Drop rounded tablespoons of dough onto the prepared baking sheets, spacing them about 2 inches apart.
-
Bake the cookies for 9 to 11 minutes or until they are golden brown at the edges. Keep a close eye on them to prevent overbaking.
-
Allow the cookies to cool on the baking sheets for a few minutes before transferring them to wire racks to cool completely.
Note
- Make sure your butter is at room temperature for optimal blending.
- You can use spooky Halloween-themed candy for added fun and color.
- Substitute nuts with pumpkin seeds for a seasonal twist.
- Store cookies in an airtight container to retain their chewy texture.
- These cookies are great for Halloween parties and make for a wonderfully festive treat.

