

Healthier No Bake Cheesecake brings you all the joy of a classic dessert with a fraction of the fuss. A creamy, lighter cheesecake that sets in the fridge, with rolled oats and almonds forming a crunchy base under a tangy Greek yogurt and honey filling. Each forkful delivers a sweet-tart bite crowned with juicy mixed berries, making it perfect for busy weeknights or weekend treats. Give it a try—you’ll love how this healthier version still hits all the right notes!
Key Ingredients
To whip up this Healthier No Bake Cheesecake, you only need simple pantry staples and fresh berries. Here’s what you’ll need for both the crunchy crust and the creamy filling:
- 1 cup rolled oats: Forms the hearty, fiber-rich base for the crust.
- 1/2 cup almonds: Adds crunch and nutty flavor to the crust.
- 10 pitted dates: Natural sweetener and binder to help the crust hold together.
- 8 ounce low-fat cream cheese: Provides a rich, creamy foundation for the filling.
- 1 cup plain Greek yogurt: Offers tanginess and lightness while boosting protein.
- 1/4 cup honey: Sweetens the filling with natural floral notes.
- 1 teaspoon vanilla extract: Enhances overall flavor with warm, sweet aroma.
- 2 tablespoons lemon juice: Brightens the filling and helps set it.
- 1 cup mixed berries: Fresh topping that adds color, sweetness, and a burst of juiciness.
How To Make Healthier No Bake Cheesecake
Creating this no bake cheesecake is surprisingly simple, yet the results look like you spent hours in the kitchen. You’ll first blend ingredients for a sturdy crust, press it into your pan, whip up a silky filling, then chill until firm. Follow these steps closely to achieve a perfect set and a smooth texture every time.
1. In a food processor, combine the rolled oats, almonds, and dates; pulse until the mixture is sticky and crumbly, scraping down the sides as needed to ensure everything is evenly blended.
2. Transfer the crust mixture into an 8-inch springform pan and use the back of a spoon or measuring cup to press it firmly and evenly across the bottom; this creates a solid base that won’t fall apart.
3. In a large bowl, beat the low-fat cream cheese with an electric mixer until smooth and free of lumps, then add the Greek yogurt, honey, vanilla extract, and lemon juice; mix on medium speed until the filling is fully combined and silky.
4. Pour the cheesecake filling over the prepared crust and use a spatula to smooth the top, making sure the filling reaches all edges for an even set.
5. Cover the pan with plastic wrap and refrigerate for at least 4 hours or until the cheesecake is firm to the touch; this chilling step is crucial for that perfect sliceability.
6. Just before serving, arrange the mixed berries on top in an even layer or decorative pattern for a fresh, colorful finish.
Serving Suggestions
Whether you’re sharing this cheesecake at a gathering or enjoying a cozy night in, these serving ideas will make each bite feel extra special. Let your creativity shine with these simple but impactful touches:
- Chilled Slices: Serve straight from the fridge on cool dessert plates to keep slices intact and refreshing.
- Berry Splash: Add an extra handful of mixed berries on each slice for a burst of sweetness and color contrast.
- Honey Drizzle: Warm a teaspoon of honey and lightly drizzle over the top just before serving for a glossy finish and added sweetness.
- Mint Garnish: Tuck a few fresh mint leaves around the berries to elevate aroma and add a pop of green.
Tips For Perfect Healthier No Bake Cheesecake
I’ve found that a few simple tweaks can take this cheesecake from great to outstanding without any extra work. Keep these friendly pointers in mind next time you mix up this creamy delight:
- For a gluten-free crust use certified gluten-free oats.
- Swap honey for maple syrup to make it vegan.
- Chill time can be extended overnight for a firmer texture.
- Store leftovers in the refrigerator for up to 3 days.
How To Store It
Once you’ve savored a slice (or two), proper storage will help maintain that creamy filling and crunchy crust. Keep your cheesecake at its best with these easy methods:
- Refrigerate in Pan: Cover the springform pan tightly with plastic wrap, then store in the fridge for up to 3 days to keep the texture intact.
- Airtight Containers: Transfer individual slices to an airtight container to prevent absorbing other fridge odors and to maintain moisture balance.
- Separate Berries: Store fresh mixed berries in a separate container to avoid excess moisture softening the crust.
- Freezing Option: Wrap the fully set cheesecake (without berries) in plastic wrap and foil, freeze for up to one month, then thaw overnight in the refrigerator before topping with berries.
Frequently Asked Questions
Have questions about this no bake cheesecake? You’re not alone—check out these quick answers:
- Q: How long does it take to prepare this recipe?
A: Active preparation takes about 20–25 minutes, including blending the crust ingredients, pressing the crust into the pan, and mixing the cheesecake filling. After assembly, refrigerate for at least 4 hours (or overnight) to allow the cheesecake to set firmly.
- Q: Can I make this recipe gluten-free?
A: Yes. Simply use certified gluten-free rolled oats in place of regular oats and ensure any other packaged ingredients (like vanilla extract) are labeled gluten-free. The almonds, dates, and dairy ingredients are naturally gluten-free.
- Q: How can I adapt this recipe to be vegan?
A: Replace the low-fat cream cheese with a dairy-free or nut-based vegan cream cheese and swap plain Greek yogurt for a plant-based yogurt (such as coconut or almond yogurt). Use maple syrup instead of honey to keep it fully vegan, and follow the rest of the instructions as written.
- Q: My crust is too dry and crumbly. How can I fix it?
A: If the crust mixture isn’t sticking together, add one or two extra dates or a teaspoon of honey to increase the stickiness, and process again until the mixture clumps when pressed. Then press it firmly into the pan, using the back of a spoon or measuring cup to compact it so it holds its shape.
- Q: The cheesecake filling seems too soft or runny after chilling. What should I do?
A: Ensure the cream cheese and yogurt are well chilled before mixing; room-temperature dairy can yield a looser filling. If the filling is still soft, extend the refrigeration time to overnight. For an extra-firm texture, you can briefly freeze the cheesecake (covered) for 30–60 minutes before serving.
- Q: What’s the best way to store leftovers?
A: Cover the cheesecake pan tightly with plastic wrap or transfer slices to an airtight container and refrigerate for up to 3 days. Keep the mixed berries separate until just before serving to prevent excess moisture from softening the crust.
- Q: Can I freeze this cheesecake for later?
A: Yes. After the cheesecake has fully set, remove the springform pan sides, wrap the entire cake (without berries) in plastic wrap and aluminum foil, and freeze for up to one month. Thaw overnight in the refrigerator, then top with fresh berries before serving.
What Makes This Special
There’s something almost magical about blending everyday ingredients—rolled oats, almonds, low-fat cream cheese, and tangy Greek yogurt—into a cheesecake that feels indulgent yet light. The no bake method means minimal hands-on time, and the make-ahead chilling lets you prep it whenever you like. It works beautifully because the crust stays sturdy, the filling stays creamy, and the berries bring the perfect pop of freshness. Feel free to print and save this recipe for any occasion, and drop a comment below if you give it a whirl or have any questions!
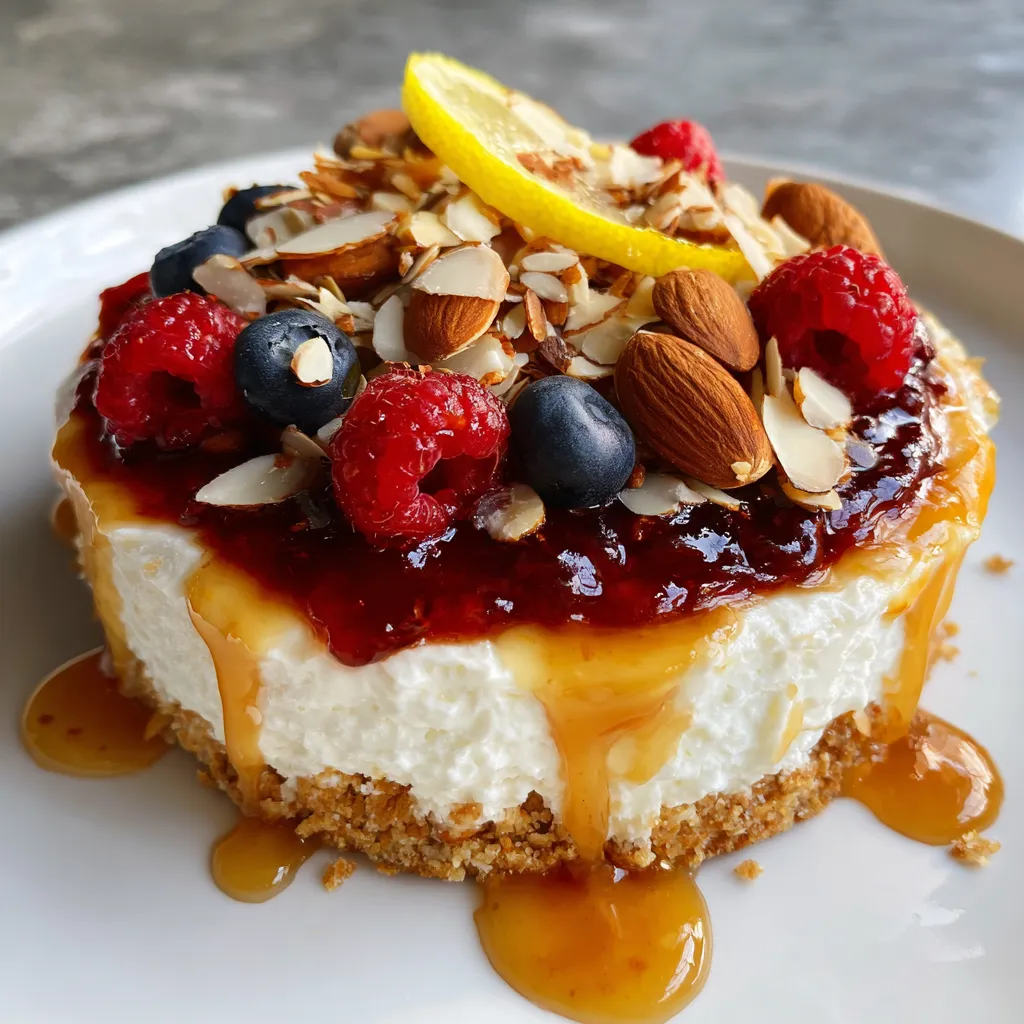

Healthier No Bake Cheesecake
Description
Creamy low-fat cream cheese blends with honey and lemon for a luscious filling, nestled on a nutty oat-almond crust. After chilling, each forkful delivers a sweet-tart bite crowned with juicy mixed berries.
Ingredients
Instructions
-
Place rolled oats, almonds, and dates in a food processor and blend until a sticky, crumbly mixture forms.
-
Press the crust mixture firmly into the bottom of an 8-inch springform pan and set aside.
-
In a bowl, beat cream cheese until smooth, then add Greek yogurt, honey, vanilla extract, and lemon juice; mix until fully combined.
-
Pour the cheesecake filling over the crust and smooth the top with a spatula.
-
Cover and refrigerate for at least 4 hours or until firm.
-
Top with mixed berries before serving.
Note
- For a gluten-free crust use certified gluten-free oats.
- Swap honey for maple syrup to make it vegan.
- Chill time can be extended overnight for a firmer texture.
- Store leftovers in the refrigerator for up to 3 days.

