

There’s something truly special about biting into a dense, fudgy brownie that’s kissed with the sweetness of pumpkin and the richness of cocoa. These Healthy Pumpkin Brownies aren’t just another dessert recipe—they’re a celebration of flavors and textures that feel utterly indulgent while still keeping things wholesome. The pumpkin puree lends a silky moisture that makes every bite melt in your mouth, and the almond butter brings in a subtle nuttiness that deepens the flavor profile. With just the right amount of maple syrup (or honey) to add natural sweetness, these brownies satisfy your chocolate cravings without sending your blood sugar on a rollercoaster.
As a dedicated home cook who loves experimenting in the kitchen, I can’t tell you how many times this recipe has rescued a last-minute gathering or answered that nagging post-dinner dessert call. It’s beginner-friendly, with a straightforward prep time of just 10 minutes, followed by 30 minutes in the oven and a brief 10-minute rest. Best of all, each brownie clocks in at around 150 calories (based on 16 servings), making them a guilt-free treat that you can confidently serve as a dessert or healthy snack. Whether you’re craving a pumpkin dessert in the fall or dreaming of chocolate treats year-round, these brownies have your back—gluten-free, low sugar, and supremely easy to whip up!
KEY INGREDIENTS IN HEALTHY PUMPKIN BROWNIES
Before we dive into the step-by-step magic of mixing, baking, and indulging, let’s take a quick look at the heart and soul of this recipe: the ingredients that bring flavor, texture, and nutrition together in perfect harmony.
- canned pumpkin puree
Provides the signature moist texture and subtle sweetness, while packing in fiber, vitamins, and that lovely autumnal flavor.
- almond butter (or peanut butter)
Adds healthy fats and a creamy richness that binds the batter, giving these brownies a satisfying density and depth.
- maple syrup or honey
Offers natural sweetness and a touch of floral or caramel notes, replacing refined sugar with a more wholesome option.
- unsweetened cocoa powder
Delivers the deep chocolate intensity you crave, balancing the pumpkin’s sweetness without overwhelming the palate.
- vanilla extract
Enhances all the other flavors with warm, aromatic undertones that make the brownie experience feel truly special.
- salt
Brings out the sweetness and cocoa flavors, creating a fuller, more rounded taste.
- baking soda
Provides gentle lift and a perfectly tender crumb, ensuring your brownies aren’t too dense.
- whole wheat flour or almond flour
Offers structure and a nutty base—use whole wheat for extra fiber or almond flour for a gluten-free version.
- dark chocolate chips or chopped nuts (optional)
Elevates texture and adds bursts of flavor, lending a delightful contrast to the smooth, pumpkin-chocolate batter.
HOW TO MAKE HEALTHY PUMPKIN BROWNIES
Now that we’ve gathered all our wholesome ingredients, let’s turn them into a batch of irresistibly fudgy, chocolatey brownies. This method is simple, straightforward, and perfect for every home cook.
1. Preheat your oven to 350°F (175°C) and lightly grease an 8×8 inch baking dish or line it with parchment paper for easy removal. Ensuring the pan is properly prepared will help your brownies release cleanly once baked.
2. In a large mixing bowl, combine the canned pumpkin puree, almond butter, maple syrup (or honey), cocoa powder, vanilla extract, and salt. Use a whisk or sturdy spatula to mix until smooth, scraping down the sides to incorporate every bit of flavor.
3. Add the baking soda and your chosen flour to the wet mixture. Stir gently until just combined—over-mixing can toughen brownies, so aim for a thick batter that’s evenly mixed without any streaks.
4. If you’d like a little extra textural fun, gently fold in the dark chocolate chips or chopped nuts. These optional add-ins give each bite a surprise crunch or molten chocolate moment.
5. Pour the batter into your prepared baking dish, using a spatula to spread it evenly into the corners. A level surface ensures uniform baking and that perfect fudgy center.
6. Bake for 25–30 minutes, or until a toothpick inserted into the center comes out clean or with just a few moist crumbs attached. This timing yields brownies that are set on the edges but still decadently gooey inside.
7. Once the timer dings, remove the pan from the oven and let the brownies cool in the pan for about 10 minutes. This resting period helps them firm up for cleaner cuts.
8. Transfer the cooled brownies to a wire rack and allow them to cool completely before slicing into squares and serving.
SERVING SUGGESTIONS FOR HEALTHY PUMPKIN BROWNIES
Serving these brownies is half the fun—there are so many ways to elevate their visual appeal and flavor combination, whether you’re hosting friends or enjoying a solo snack moment.
- With a dollop of Greek yogurt and a sprinkle of cinnamon
The tangy creaminess of the yogurt contrasts beautifully with the rich chocolate, while cinnamon enhances the pumpkin spice feel.
- Warm with a scoop of vanilla ice cream
Embrace the classic hot-meets-cold dessert pairing. Pop a brownie in the microwave for 10 seconds, then top with premium vanilla ice cream for an indulgent treat.
- Drizzled with melted dark chocolate and sea salt
Melt extra dark chocolate, drizzle it over cooled brownies, and finish with a hint of flaky sea salt to make those flavors pop even more.
- Paired with a hot mug of spiced chai or coffee
The warm spices in a chai latte or the bold edge of coffee create a cozy pairing that brings out every note of pumpkin and cocoa.
HOW TO STORE HEALTHY PUMPKIN BROWNIES
Proper storage keeps your brownies tasting just-baked, ensuring you can enjoy their soft, moist texture days (or weeks) later.
Store your brownies at room temperature for up to five days. Wrap them tightly in plastic wrap or transfer to an airtight container to protect against air and moisture loss—this method preserves that signature fudgy texture.
- Refrigeration (up to 7 days)
Place brownies in an airtight container and pop them into the fridge. Chilling firms them up nicely, and you can enjoy a slightly more cake-like bite. Let them sit at room temperature for a few minutes before serving for maximum flavor.
- Freezing (up to 3 months)
Slice brownies into individual squares and freeze them in a single layer on a baking sheet until solid. Then transfer to a zip-top bag or airtight container, placing parchment paper between layers to prevent sticking. Thaw overnight in the refrigerator or for an hour at room temperature.
- Single-serve freezer packs
Wrap each brownie square in plastic wrap and freeze. When a chocolate craving hits, unwrap one and microwave for 10–15 seconds for a quick warm dessert.
- Mason jar storage for gifting
Layer brownie squares in a sterilized glass jar, alternating with parchment paper or decorative tissue. Seal tightly and gift as a thoughtful homemade treat that keeps fresh for several days.
CONCLUSION
Thank you for joining me on this delicious journey through the world of Healthy Pumpkin Brownies! From the rich cocoa undertones to the wholesome warmth of pumpkin puree, these brownies strike the perfect balance between indulgence and nutrition. With a total prep time of just 10 minutes, 30 minutes in the oven, and a brief 10-minute cool-down, you’ll have 16 decadent squares that clock in at only 150 calories each—ideal for satisfying your sweet tooth without the guilt. Whether you’re a beginner in the kitchen or a seasoned baker, this recipe’s simple steps and versatile ingredients make it a go-to option for gatherings, after-school treats, or cozy nights in. Feel free to swap out almond butter for peanut butter, use whole wheat or almond flour for a gluten-free twist, and fold in dark chocolate chips or chopped nuts to customize the texture.
You can easily print this article and save it to your recipe binder or digital collection—keep it handy for those moments when chocolate cravings strike! Below this recipe, you’ll also find a helpful FAQ section addressing common questions about ingredient swaps, storage tips, and baking tricks. If you give this recipe a try or have any questions, I’d love to hear from you. Leave a comment, share your feedback, or ask for help if you encounter any hiccups along the way. Enjoy every fudgy, pumpkin-infused bite!
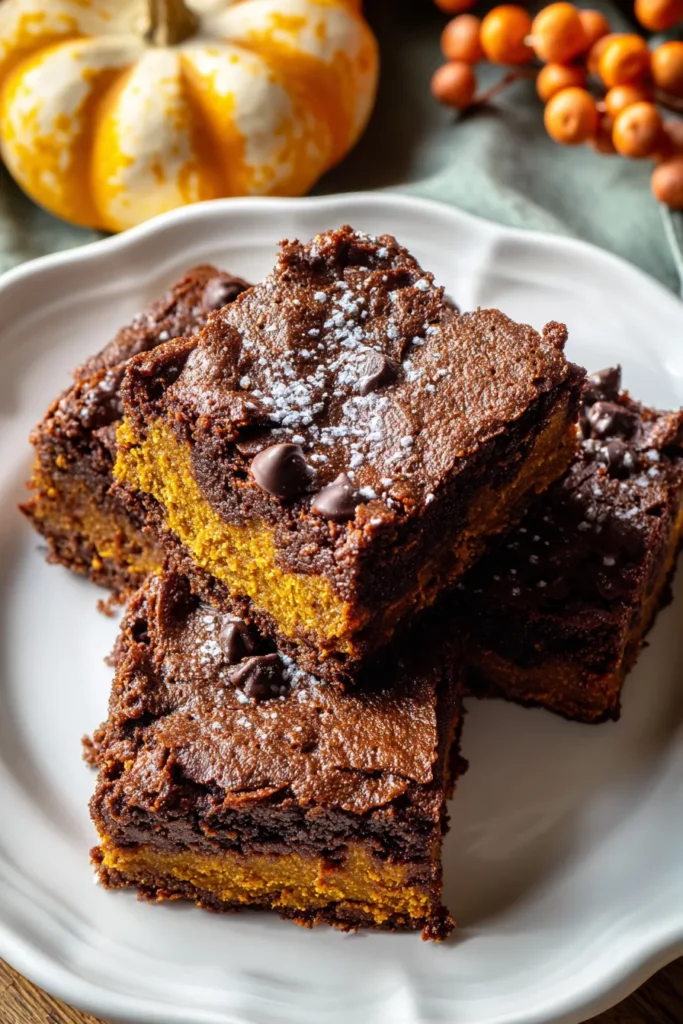

Healthy Pumpkin Brownies
Description
These rich and fudgy brownies blend the goodness of pumpkin with the richness of cocoa, creating a guilt-free dessert that’s both satisfying and nutritious. Enjoy their delightful taste and texture!
Ingredients
Instructions
-
Preheat your oven to 350°F (175°C) and lightly grease an 8x8 inch baking dish or line it with parchment paper for easy removal.
-
In a large mixing bowl, combine the canned pumpkin puree, almond butter, maple syrup (or honey), cocoa powder, vanilla extract, and salt. Mix until all ingredients are well incorporated and the batter is smooth.
-
Add the baking soda and flour to the wet mixture. Stir gently until just combined. Be careful not to over-mix; the batter should be thick but evenly mixed.
-
If desired, fold in the dark chocolate chips or chopped nuts to the batter for an added texture and flavor.
-
Pour the batter into the prepared baking dish, spreading it evenly with a spatula.
-
Bake in the preheated oven for about 25-30 minutes, or until a toothpick inserted in the center comes out clean or with a few moist crumbs.
-
Once done, remove the brownies from the oven and let them cool in the pan for about 10 minutes before transferring to a wire rack to cool completely.
-
After cooling, cut into squares and serve.
Note
- These brownies have a rich chocolate flavor while being lower in sugar and packed with healthy nutrients.
- You can substitute the almond butter with any nut or seed butter as per your preference.
- The brownies can be stored in an airtight container for up to 5 days or frozen for longer storage.
- Add a pinch of cinnamon or a dash of espresso powder for a flavor twist!
- Enjoy them as a guilt-free dessert or a healthy snack option!

