

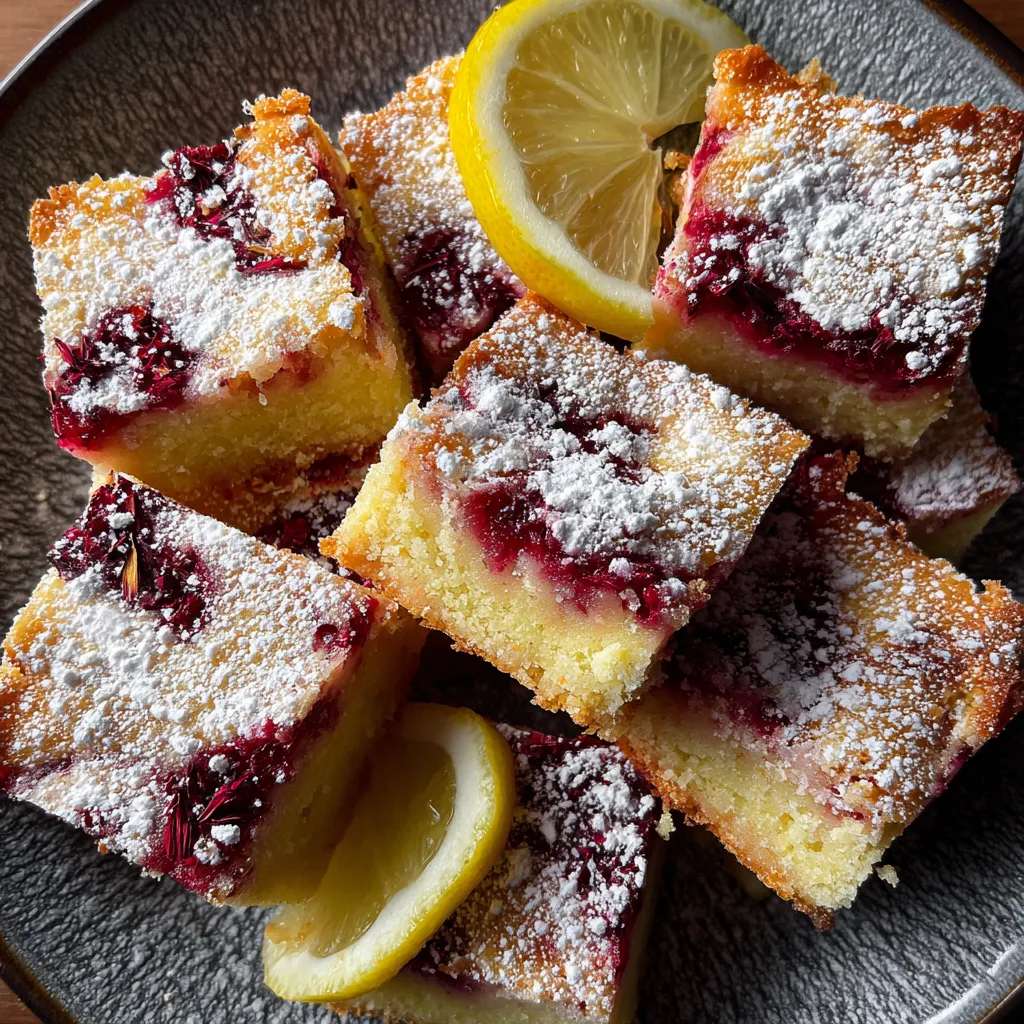
Hibiscus Lemon Bars blend vibrant floral notes with bright citrus zing in a crisp, buttery shortbread crust. A silky, pink-hued hibiscus infusion meets tart lemon in each bite, finished with a cloud of powdered sugar for the perfect sweet-tart balance. These bars are an intermediate-level twist on a classic dessert, ideal for adding a pop of color to afternoon tea, brunch gatherings, or any time you’re craving something a little unexpected on your dessert table.
Key Ingredients
Gather these essentials to build your floral-tart layers from scratch:
- 1 1/2 cups all purpose flour: Provides the crisp and tender shortbread foundation for the crust.
- 1/4 cup powdered sugar: Adds a delicate sweetness to the crust and helps it brown evenly.
- 1/4 teaspoon salt: Balances flavors in the crust and enhances overall taste.
- 1/2 cup unsalted butter cold, cubed: Creates a rich, flaky texture when cut into the dry ingredients.
- 1 cup dried edible hibiscus flowers: Delivers bold floral color and tang for the pink filling.
- 1 1/4 cups water: Steeps the hibiscus to extract its vibrant hue and flavor.
- 1 cup granulated sugar: Sweetens the filling to balance the zest of lemon.
- 2 tablespoons cornstarch: Thickens the hibiscus-lemon mixture into a smooth custard.
- 3 large eggs: Set the filling into a silky, firm layer as it bakes.
- 1/2 cup fresh lemon juice: Provides bright, tart lemon flavor that cuts through the sweetness.
- 1 tablespoon lemon zest: Adds fresh citrus aroma and an extra punch of flavor.
- 1/4 teaspoon salt: Enhances the filling’s depth and balances the sweetness.
- Powdered sugar for dusting: Gives a snowy, sweet finish and a pretty presentation.
How To Make Hibiscus Lemon Bars
Baking these bars is a rewarding process that marries a flaky shortbread crust with a vibrant hibiscus-lemon filling. You’ll first prep and bake the crust, then steep and strain the hibiscus infusion, whisk together your filling ingredients, and bake until the center sets just right. Follow these detailed steps for picture-perfect bars with that signature floral-pink hue and silky texture.
1. Preheat your oven to 350°F and line an 8×8-inch baking pan with parchment paper, leaving a generous overhang on two sides for easy removal.
2. In a medium bowl, whisk together the flour, powdered sugar, and salt for the crust. Cut in the cold, cubed butter using a pastry cutter or your fingertips until the mixture resembles coarse crumbs. Press evenly into the prepared pan and bake for 18 minutes until the edges are lightly golden.
3. While the crust bakes, combine the hibiscus flowers and water in a small saucepan. Bring to a gentle simmer, then remove from heat and let steep for 10 minutes. Strain through a fine-mesh sieve, discarding the solids to achieve a smooth, vibrant infusion.
4. In a large bowl, whisk together the granulated sugar and cornstarch until no lumps remain. Gradually whisk in the warm hibiscus infusion, lemon juice, eggs, lemon zest, and salt until the mixture is completely smooth and homogenous.
5. Pour the filling over the hot baked crust, then return the pan to the oven and bake for 18–20 minutes, or until the center is just set with a slight wobble when gently shaken.
6. Allow the bars to cool completely at room temperature on a wire rack. Refrigerate for at least 2 hours before lifting out via the parchment overhang. Dust generously with powdered sugar and slice into squares.
Serving Suggestions
These Hibiscus Lemon Bars are eye-catching on their own, but a thoughtful presentation takes them over the top. Try these serving ideas to highlight their floral-tart magic:
- Serve chilled straight from the fridge to intensify the tang and keep the silky filling firm.
- Garnish each square with a sprig of fresh mint for a cool herbal contrast and pop of green.
- Add a dollop of unsweetened whipped cream or tangy Greek yogurt on the side to round out the flavors.
- Pair with a warm mug of Earl Grey tea or a delicate green tea to echo the hibiscus’s floral notes.
Tips For Perfect Hibiscus Lemon Bars
These simple pointers will help you hit every note—from silky pink filling to crisp shortbread—so your Hibiscus Lemon Bars come out flawless every time.
- Hibiscus infusion can be prepared up to two days ahead and stored in the refrigerator for quick assembly.
- Strain the hibiscus through a fine sieve to ensure a smooth, petal-free filling with no gritty bits.
- For extra citrus brightness, stir in 1 teaspoon of fresh lime zest along with the lemon zest.
- Store the bars in an airtight container in the refrigerator for up to five days to maintain freshness.
How To Store It
Keeping these bars fresh and vibrant is a breeze when you store them correctly. Here are some easy methods to maintain that crisp crust and silky filling for as long as possible:
- Refrigerate: Place bars in a single layer in an airtight container and chill for up to five days, preserving texture and flavor.
- Freeze: Wrap individual squares tightly in plastic wrap or parchment, then store in a freezer-safe bag for up to one month. Thaw in the fridge before serving.
- Preserve the infusion: If you prepped the hibiscus ahead, keep it in a sealed container in the refrigerator for up to 48 hours; bring to room temperature before using.
- Keep containers dry: Wipe any condensation from the lid or container edges to prevent sogginess and maintain the crust’s crispness.
Frequently Asked Questions
Here are answers to some common questions about these vibrant bars:
- How long does it take to prepare and chill these Hibiscus Lemon Bars?
Active prep and baking time is about 45 minutes—15 minutes to make and bake the crust, 10 minutes to steep and strain the hibiscus, 10 minutes to whisk together the filling, and 18–20 minutes to bake the filling. After baking, you’ll need at least 2 hours of refrigeration before slicing for best texture.
- Can I substitute fresh hibiscus flowers or hibiscus tea bags for the dried edible hibiscus?
If using fresh hibiscus (ensure it’s edible and pesticide-free), you’ll still steep 1 cup loosely packed petals in 1¼ cups water. Hibiscus tea bags may vary in strength; use 2–3 bags and taste the infusion before proceeding, adjusting steep time so it’s vibrant but not overly tart.
- How do I ensure the filling is perfectly smooth and free of petals or grit?
After steeping, strain the hibiscus infusion through a fine-mesh sieve or cheesecloth to remove all solids. Whisk the warm infusion into the sugar-cornstarch mixture gradually to dissolve any lumps, then add eggs and juice slowly. This double filtration and gentle whisking prevents grit and ensures a silky filling.
- What’s the best way to tell when the bars are done baking?
The edges should look set and slightly pulling away from the pan, and the center will still jiggle gently when you shake the pan. If the center is completely firm, the bars may be overbaked and could crack when cooling. Aim for a slight wobble that firms up during the 2-hour chill.
- Can I make the hibiscus infusion a day or two in advance?
Yes. You can steep and strain the infusion up to 48 hours ahead. Store it in a sealed container in the refrigerator. Bring it back to room temperature or warm gently before whisking into the filling to prevent cooking the eggs prematurely.
- How should I store leftover Hibiscus Lemon Bars, and how long will they stay fresh?
Once cooled and dusted, place the bars in an airtight container and refrigerate. They’ll stay fresh for up to five days. For longer storage, individually wrap squares in plastic wrap and freeze for up to one month; thaw in the fridge before serving.
- Can I make a gluten-free version of the crust?
Substitute a 1:1 gluten-free flour blend for the all-purpose flour and ensure it contains xanthan gum for structure. Press and bake exactly as directed. The texture may be slightly more crumbly, so handle the crust gently when lifting and slicing.
What Makes This Special
With its dazzling pink hue and the perfect dance between floral hibiscus and zesty lemon, these Hibiscus Lemon Bars turn a familiar dessert into an unforgettable treat. The buttery shortbread crust provides the ideal canvas for that silky, tangy filling, while the powdered sugar top keeps things festive. Feel free to print this recipe and tuck it into your binder for sunny afternoons or special celebrations. Give it a try, then drop a comment or question below—I can’t wait to hear how your bars turned out!

Hibiscus Lemon Bars
Description
Floral hibiscus infusion blends with tart lemon, poured over a warm buttery crust that sets into a vibrant pink layer. Each bite offers a crisp shortbread base followed by a silky, tangy filling and a dusting of sweet powdered sugar.
Ingredients
Instructions
-
Preheat the oven to 350°F and line an 8x8-inch baking pan with parchment paper, leaving an overhang for easy removal.
-
In a medium bowl, whisk together the flour, powdered sugar, and salt for the crust, then cut in the cold cubed butter until the mixture resembles coarse crumbs; press evenly into the prepared pan and bake for 18 minutes.
-
While the crust bakes, combine the hibiscus flowers and water in a small saucepan, bring to a gentle simmer, remove from heat, and steep for 10 minutes; strain through a fine mesh sieve, discarding the solids.
-
In a large bowl, whisk together the granulated sugar and cornstarch, then gradually whisk in the warm hibiscus infusion, lemon juice, eggs, lemon zest, and salt until smooth.
-
Pour the filling over the hot baked crust and return to the oven for 18 to 20 minutes, or until the center is just set and no longer jiggles.
-
Allow the bars to cool completely at room temperature, then refrigerate for at least 2 hours before lifting from the pan, dusting with powdered sugar, and slicing into squares.
Note
- Hibiscus infusion can be prepared up to two days ahead and stored in the refrigerator.
- Strain the hibiscus through a fine sieve to ensure a smooth, petal-free filling.
- For extra citrus brightness, stir in 1 teaspoon of fresh lime zest with the lemon zest.
- Store the bars in an airtight container in the refrigerator for up to five days.

