

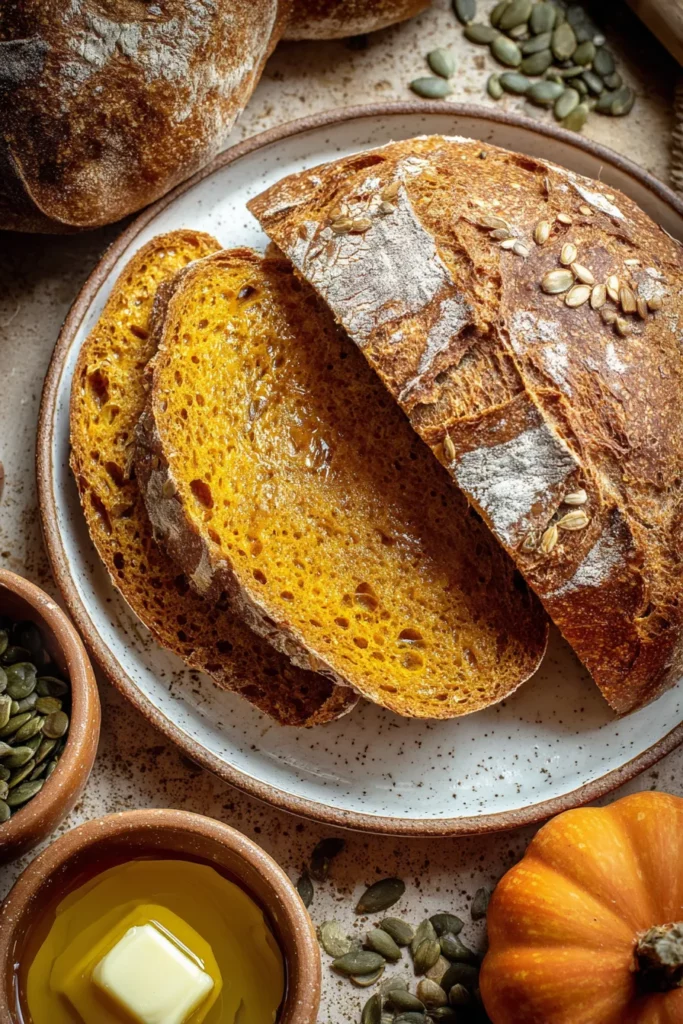
There’s something so heartwarming about watching your sourdough starter bubble away, ready to bring life into a loaf that’s brimming with fall flavors. This Homemade Pumpkin Sourdough Bread is the perfect way to marry the tangy depth of a well-fed starter with the cozy, comforting essence of pumpkin and warm spices. As the autumn leaves drift down outside your window, you’ll find yourself drawn to the kitchen, eager to embark on this baking adventure. The soft orange hue of the dough, flecked with cinnamon and nutmeg, hints at the delicious journey to come—and trust me, it’s a journey worth taking.
Not only does this artisan-style loaf deliver on taste, but it also checks all the boxes for a versatile kitchen staple. With an intermediate difficulty level, it’s a great project for home bakers seeking to level up their skills. You’ll spend about 30 minutes mixing and prepping, let the dough rest and rise for 6–8 hours, then shape and proof for another hour or two before a 35-minute bake transforms it into golden perfection. Each slice clocks in at roughly 200 calories, making it a sensible choice for breakfast toast, sandwich bread at lunch, or a rustic appetizer alongside your favorite soup or salad. Whether you’re deep into fall recipes or simply craving some comfort food, this pumpkin sourdough loaf is bound to become a seasonal favorite.
KEY INGREDIENTS IN HOMEMADE PUMPKIN SOURDOUGH BREAD
Before we dive into the fun of mixing and baking, let’s get acquainted with the star players that make this loaf shine:
- Sourdough Starter
This fermented blend of flour and water is the engine behind our bread’s rise and distinctive tang. An active, bubbly starter ensures a lively crumb and that signature sourdough flavor.
- Pumpkin Puree
Whether you’ve made it from fresh-roasted squash or reached for a quality canned option, pumpkin puree adds moistness, subtle sweetness, and that gorgeous autumnal color.
- Bread Flour
With its higher protein content, bread flour gives structure and chew to the loaf, helping to trap the gas bubbles produced during fermentation for an open, airy crumb.
- Whole Wheat Flour
A touch of whole wheat introduces a nutty depth and extra fiber, enriching both flavor and nutrition without overpowering the other ingredients.
- Warm Water
Perfectly warmed water helps activate the starter and ensures the dough comes together smoothly, creating the ideal environment for yeast development.
- Honey or Maple Syrup
A drizzle of natural sweetener not only enhances the pumpkin’s flavor but also feeds the yeast for a gentle, sustained rise.
- Olive Oil
Just a tablespoon adds tenderness to the crust and a hint of rich mouthfeel, rounding out the loaf’s texture.
- Salt
Essential for flavor balance and to strengthen the gluten network, ensuring a well-developed dough.
- Ground Cinnamon, Nutmeg, Ginger & Cloves
This quartet of warm spices transforms the bread into a festive treat, infusing every bite with cozy, aromatic warmth.
- Seeds (Optional)
Pumpkin seeds, sunflower seeds, or flaxseeds make for a beautiful, crunchy topping, adding extra texture and visual appeal.
HOW TO MAKE HOMEMADE PUMPKIN SOURDOUGH BREAD
Here’s where the magic happens. We’ll walk through each step of bringing our ingredients together, nurturing the dough with time and patience, and finally baking a stunning loaf that embodies all the best of autumn.
1. In a large mixing bowl, combine the active starter and warm water. Stir until the mixture is homogenous and the starter begins to dissolve, creating a liquid base that’s easy to work with.
2. Add the pumpkin puree, honey (or maple syrup), and olive oil to the bowl. Mix until fully incorporated, ensuring the puree distributes evenly for consistent color and flavor.
3. In a separate bowl, whisk together the bread flour, whole wheat flour, salt, cinnamon, nutmeg, ginger, and cloves. This dry mix guarantees even spice distribution throughout the loaf.
4. Gradually add the dry ingredients to the wet ingredients, mixing with a wooden spoon until a rough dough forms. You’ll notice the dough coming together but still feeling a bit shaggy.
5. Turn the dough onto a lightly floured work surface and knead briefly—about 3 to 5 minutes—just enough to bring it into a cohesive ball. A stand mixer with a dough hook works beautifully here, keeping your hands clean and the process easy.
6. Place the dough in a lightly oiled bowl, cover with a damp cloth, and let it rest at room temperature for 6–8 hours, or until it has doubled in size. This slow fermentation builds flavor and develops the crumb.
7. Once the dough has risen, gently turn it out onto a floured surface and shape it into a round or oval loaf by folding the edges in and creating surface tension on top.
8. Transfer the shaped dough onto a parchment-lined baking sheet or into a greased loaf pan. Cover it loosely and allow it to rise for another 1–2 hours, until it appears visibly puffed.
9. Preheat your oven to 450°F (230°C) with a baking stone or cast iron inside. This ensures a burst of heat for optimal oven spring.
10. Before baking, score the top of the loaf with a sharp knife or bread lame. If you like, sprinkle seeds on top to create an eye-catching finish.
11. Bake the bread for 30–35 minutes, until the crust is a deep golden brown and the loaf sounds hollow when tapped on the bottom.
12. Remove from the oven and cool on a wire rack. Patience here is key—letting the loaf rest ensures a firm, well-set crumb when you slice into it.
SERVING SUGGESTIONS FOR HOMEMADE PUMPKIN SOURDOUGH BREAD
After all that baking joy, it’s time to enjoy the fruits of your labor. This pumpkin sourdough loaf is as versatile as it is flavorful, blending tangy depth with cozy spice. Whether you’re hosting a fall gathering or simply treating yourself to a special snack, here are some delightful ways to serve your fresh-baked bread:
- Open-Faced Autumn Avocado Toast
Spread a layer of mashed avocado on a warm slice, then top with roasted pumpkin seeds, a drizzle of honey, and a sprinkle of chili flakes for a perfect blend of savory, sweet, and spicy textures.
- Sweet Cinnamon Butter Slather
Whip together softened butter, a pinch of cinnamon, and a drizzle of maple syrup for an indulgent spread that highlights the loaf’s warm spice profile—ideal for breakfast or an afternoon pick-me-up.
- Hearty Fall Sandwich
Layer thin slices with roasted turkey, crisp apple slivers, fresh arugula, and a smear of grainy mustard for a lunch that celebrates seasonal produce and comforting flavors.
- Rustic Soup Companion
Serve thick slices alongside a bowl of butternut squash soup or roasted tomato bisque. Use the bread as a dipping powerhouse to soak up every bit of that velvety, spiced goodness.
HOW TO STORE HOMEMADE PUMPKIN SOURDOUGH BREAD
Proper storage ensures that your artisan loaf maintains its delightful crust and tender crumb for days. Because sourdough’s natural acidity helps slow down spoilage, you have a few excellent options to keep this pumpkin bread tasting fresh:
- Room Temperature Wrap
Once fully cooled, store the loaf in a paper bag or loosely wrapped in a clean kitchen towel. This allows the crust to stay crisp while keeping the interior moist. Consume within 2–3 days for the best texture.
- Plastic Bag Sealing
For a softer crust, place the cooled bread in a resealable plastic bag, squeezing out excess air. This method locks in moisture but can soften the crust—perfect if you prefer a tender slice.
- Freezer Storage
Slice the loaf, wrap individual slices or the entire loaf tightly in plastic wrap, and place in a freezer bag. Freeze for up to 3 months. To use, thaw at room temperature or gently warm in the oven.
- Refrigeration Caution
While refrigeration can extend shelf life by a few days, it tends to accelerate staling due to starch retrogradation. If you choose the fridge, keep the bread in an airtight container and plan to enjoy within 3–4 days, reheating slices in a toaster or oven to revive softness.
CONCLUSION
Baking this Homemade Pumpkin Sourdough Bread is more than just following a recipe—it’s an immersive, rewarding experience. From nurturing your starter to patiently waiting for that final rise, every moment in the kitchen builds toward that triumphant crackle when you tap the bottom of a fully baked loaf. You’ve harnessed the tang of sourdough, the sweetness of pumpkin puree, and the cozy embrace of cinnamon, nutmeg, ginger, and cloves to create a loaf that’s perfect for dinner spreads, lunchtime sandwiches, or as an appetizer alongside soups and salads. With intermediate difficulty, a total rest time of up to 10 hours, and a manageable prep and bake schedule, this recipe fits beautifully into a busy home cook’s routine. At about 200 calories per slice, it’s a delightful way to enjoy artisan baking while honoring the flavors of fall.
Feel free to print this article and save it for future cozy baking sessions—or tuck it into your seasonal recipe binder. Below this conclusion, you’ll find a FAQ section to answer any lingering questions you might have. If you give this pumpkin sourdough a try, I’d love to hear how it turns out! Leave your comments, ask questions, or share any tweaks and feedback. Your experiences help make this recipe even better for everyone. Happy baking, and here’s to many warm, spiced slices in your future!

Homemade Pumpkin Sourdough Bread
Description
This beautifully spiced pumpkin sourdough bread combines the tang of sourdough with the cozy flavors of pumpkin and warm spices, perfect for any occasion.
Ingredients
Instructions
-
In a large mixing bowl, combine the active sourdough starter and warm water. Stir to combine.
-
Add the pumpkin puree, honey (or maple syrup), and olive oil to the bowl. Mix until well incorporated.
-
In a separate bowl, mix the bread flour, whole wheat flour, salt, cinnamon, nutmeg, ginger, and cloves.
-
Gradually add the dry ingredients to the wet ingredients, mixing with a wooden spoon until a rough dough forms.
-
Turn the dough onto a floured surface and knead briefly to bring it together. You may use a stand mixer with a dough hook if you prefer.
-
Place the dough in a lightly oiled bowl, cover with a damp cloth, and let rest at room temperature for 6-8 hours or until doubled in size.
-
Once the dough has risen, turn it out onto a floured surface and gently shape it into a round or oval loaf.
-
Place the shaped dough onto a parchment-lined baking sheet or into a greased loaf pan. Cover it loosely and let it rise for another 1-2 hours or until visibly puffed.
-
Preheat your oven to 450°F (230°C) with a baking stone or cast iron inside for even heating.
-
Before baking, score the top of the loaf with a sharp knife or bread lame. If desired, sprinkle seeds on top for added texture.
-
Bake the bread in the preheated oven for 30-35 minutes or until the crust is golden brown and the loaf sounds hollow when tapped on the bottom.
-
Allow the bread to cool on a wire rack before slicing for the best texture.
Note
- Using fresh pumpkin puree can enhance the flavor, but canned pumpkin works great for convenience.
- Make sure your sourdough starter is active and bubbly for the best results.
- Adjust spices according to your taste preference for a more or less spiced bread.
- This bread pairs wonderfully with savory meals as well as sweet spreads like cinnamon butter or honey.

