

Golden-hued slices bursting with juicy strawberry pockets, this homemade pound cake offers tender, buttery bites that practically melt in your mouth. Fresh berries fold into a rich vanilla-scented batter, delivering moist, fragrant slices with just the right balance of sweet and tangy. Whether you’re celebrating a special moment or craving an everyday treat, this simple recipe is guaranteed to thrill. Ready to bake your own slice of sunshine? Let’s get started!
Key Ingredients
Before we dive into mixing bowls and ovens, let’s gather everything we need for our Homemade Strawberry Pound Cake. Each item plays a crucial role in creating tender, flavorful slices.
- 1 cup unsalted butter, softened: Provides a rich, creamy base that lends moisture and a silky crumb to the cake.
- 2 cups granulated sugar: Sweetens the batter while helping to create light, fluffy texture through proper creaming.
- 4 large eggs: Contribute structure, stability, and natural leavening to achieve a tender yet sturdy cake.
- 1 teaspoon vanilla extract: Adds warm, aromatic flavor to enhance the buttery richness.
- 3 cups all-purpose flour: Forms the body of the cake, giving it substance and supporting the rise.
- 1 teaspoon baking powder: Acts as a leavening agent to help the cake achieve a light texture.
- 1/2 teaspoon salt: Balances the sweetness and brings out the depth of the butter and berries.
- 1 cup whole milk: Adds moisture and helps create a smooth, tender crumb.
- 2 cups fresh strawberries, hulled and chopped: Provide juicy bursts of berry flavor throughout the cake.
- 1 tablespoon all-purpose flour (for coating strawberries): Prevents the strawberries from sinking by absorbing excess moisture.
How To Make Homemade Strawberry Pound Cake
Baking this strawberry pound cake is a straightforward process that rewards you with tender, golden slices dotted with juicy berry pockets. Below, you’ll find step-by-step guidance on preparing the batter, handling your strawberries, and baking to perfection. Keep your spatula at hand, follow these steps closely, and before you know it, you’ll be slicing into a melt-in-your-mouth dessert.
1. Preheat your oven to 350°F (175°C). Grease and flour a 10-inch bundt pan or tube pan thoroughly to prevent sticking and ensure an even release.
2. In a large mixing bowl, use an electric mixer on medium speed to cream the softened butter and granulated sugar until light and fluffy, about 5–7 minutes.
3. Add the eggs to the creamed mixture one at a time, beating well after each addition. Stir in the vanilla extract until fully incorporated.
4. In a separate bowl, whisk together 3 cups of all-purpose flour, baking powder, and salt to ensure the leavening agent is evenly distributed.
5. Gradually add the dry ingredients to the wet mixture, alternating with the milk: begin and end with the dry ingredients. Mix on low speed just until combined, being careful not to over-mix.
6. Toss the chopped strawberries in 1 tablespoon of all-purpose flour to coat them evenly. This prevents sinking and distributes berries throughout the batter.
7. Gently fold the coated strawberries into the batter using a spatula, taking care to retain as much air as possible.
8. Pour the batter into the prepared bundt pan and smooth the top with a spatula for an even surface.
9. Bake in the preheated oven for 60–70 minutes, or until a toothpick inserted into the center comes out clean. Start checking for doneness around the 60-minute mark.
10. Once baked, remove the cake from the oven and allow it to cool in the pan for 10–15 minutes. Carefully invert the cake onto a wire rack and let it cool completely before slicing.
Serving Suggestions
This strawberry pound cake is versatile and perfect for different occasions—whether it’s a casual afternoon treat or the centerpiece of a celebratory spread. Here are some fun ways to dress up your slices and wow your guests or family with simple finishing touches.
- Top each slice with a dollop of whipped cream and a few extra fresh strawberries for a light, elegant presentation.
- Dust the cake lightly with powdered sugar just before serving to highlight its golden exterior and add a touch of sweetness.
- Serve alongside a scoop of vanilla ice cream to balance warm cake slices with a creamy, cold contrast.
- Drizzle a simple strawberry syrup made from cooked-down strawberry purée and sugar for an extra burst of berry flavor.
Tips For Perfect Homemade Strawberry Pound Cake
Getting every slice of this strawberry pound cake just right is all about attention to detail and a few insider tricks. From brightening the flavor to storing the leftover slices, these tips will help you bake with confidence and put a smile on everyone’s face.
- For extra flavor, consider adding a teaspoon of lemon zest to the batter to brighten the berry notes.
- This cake is perfect for serving with whipped cream and additional fresh strawberries on top to enhance its freshness.
- Store the cake in an airtight container at room temperature for up to 3 days to maintain its soft crumb.
- You can freeze the cake for up to 3 months; wrap it tightly in plastic wrap and then in aluminum foil before freezing.
How To Store It
Proper storage ensures your strawberry pound cake stays moist and flavorful long after baking day. Whether you plan to serve it over the next few days or save a few slices for later, follow these methods to maintain its quality.
- Keep the cooled cake in an airtight container at room temperature for up to 3 days, avoiding direct sunlight and heat.
- For longer freshness, store the cake in the refrigerator; wrap loosely with plastic wrap to prevent drying out.
- To freeze slices or whole cake, wrap tightly in plastic wrap, then cover with aluminum foil. Thaw at room temperature before serving.
Frequently Asked Questions
Here are some common questions about making and baking this strawberry pound cake. Let’s clear up your doubts so you can bake with confidence.
- How long does it take to prepare and bake this Homemade Strawberry Pound Cake?
Preparation takes about 20–25 minutes, which includes creaming the butter and sugar, mixing ingredients, and coating the strawberries. Baking requires 60–70 minutes at 350°F (175°C), plus 10–15 minutes of cooling in the pan before inverting. In total, plan for around 1 hour 40 minutes from start to finish.
- Why do I toss the chopped strawberries in flour before folding them into the batter?
Coating the strawberries in a tablespoon of flour helps absorb excess moisture and prevents them from sinking to the bottom of the cake during baking. This ensures even distribution and maintains the cake’s tender crumb.
- How can I tell when the pound cake is fully baked?
Insert a clean toothpick or cake tester into the center of the cake at about 60 minutes. If it comes out clean or with a few moist crumbs (but no wet batter), the cake is done. If batter clings to the tester, bake for another 5–10 minutes and test again.
- Can I substitute any ingredients, such as milk or eggs, in this recipe?
Whole milk provides richness and moisture; you can substitute with buttermilk or a non-dairy milk of similar consistency, but the texture may vary slightly. Eggs contribute structure and leavening—replacing them will affect the cake’s rise and crumb, so it’s best to use the specified four large eggs.
- What if I don’t have a 10-inch bundt or tube pan—can I use a different pan?
You can use two 9×5-inch loaf pans instead. Adjust the baking time: check for doneness around 50–60 minutes. The cakes may bake a bit faster due to the smaller volume in each pan. Always test with a toothpick.
- How should I store leftover cake, and how long will it stay fresh?
Store the cooled cake in an airtight container at room temperature for up to 3 days. For longer freshness, refrigerate for up to one week. To freeze, wrap tightly in plastic wrap and aluminum foil; it will keep for up to 3 months. Thaw at room temperature before serving.
- Can I enhance the flavor of the cake in any other way?
Yes—fold in a teaspoon of lemon zest when you add vanilla extract to brighten the flavor. You can also serve slices with whipped cream and extra fresh strawberries drizzled with a little strawberry syrup for an extra burst of berry taste.
What Makes This Special
This Homemade Strawberry Pound Cake stands out because it strikes the perfect balance between buttery richness and fresh berry sweetness. The simple process—creaming, alternating ingredients, and folding in flour-coated strawberries—ensures every slice is moist and studded with juicy pockets. Whether you’re a baking newbie or seasoned home cook, this recipe delivers reliable results and endless smiles. Feel free to print and save this article for your collection, and drop a comment if you give it a try or have any questions!
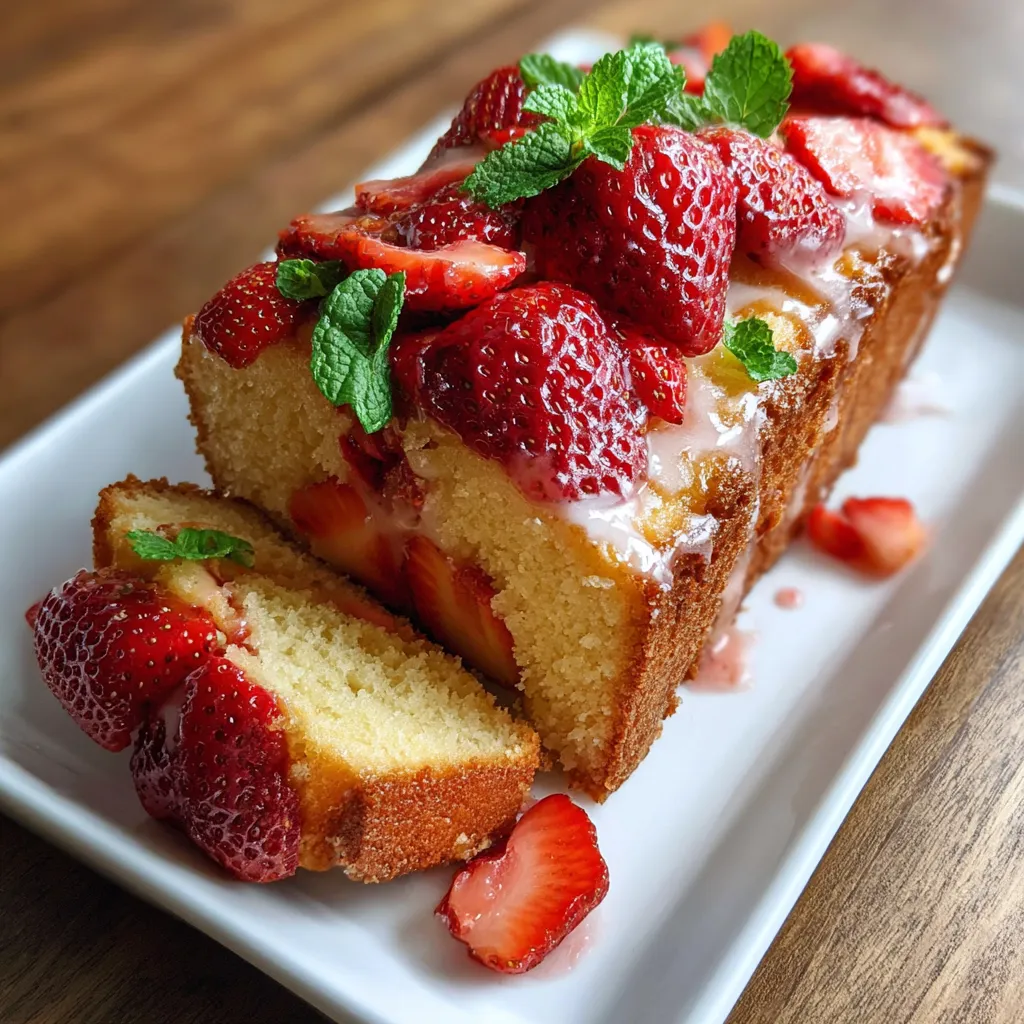

Homemade Strawberry Pound Cake
Description
Fresh strawberries fold into a rich, buttery batter, creating moist, fragrant slices that balance sweet vanilla and tangy berry in every mouthful.
Ingredients
Instructions
-
Preheat your oven to 350°F (175°C). Grease and flour a 10-inch bundt pan or tube pan to prevent sticking.
-
In a large mixing bowl, cream the softened butter and granulated sugar together until light and fluffy using an electric mixer on medium speed, about 5-7 minutes.
-
Add the eggs to the creamed mixture, one at a time, mixing well after each addition. Then mix in the vanilla extract until fully incorporated.
-
In a separate bowl, combine 3 cups of all-purpose flour, baking powder, and salt. Mix well to ensure the leavening agent is evenly distributed.
-
Gradually add the dry ingredients to the wet mixture, alternating with the milk. Start and end with the dry ingredients, mixing just until combined. Be careful not to over-mix.
-
Toss the chopped strawberries in 1 tablespoon of all-purpose flour to coat them. This will help prevent them from sinking in the batter.
-
Gently fold the coated strawberries into the batter using a spatula, being cautious to keep the batter airy.
-
Pour the batter into the prepared bundt pan and smooth the top with a spatula.
-
Bake in the preheated oven for 60-70 minutes, or until a toothpick inserted into the center comes out clean. Check for doneness around the 60-minute mark.
-
Once baked, remove the cake from the oven and allow it to cool in the pan for about 10-15 minutes. Then, carefully invert the cake onto a wire rack to cool completely.
Note
- For extra flavor, consider adding a teaspoon of lemon zest to the batter.
- This cake is perfect for serving with whipped cream and additional fresh strawberries on top.
- Store the cake in an airtight container at room temperature for up to 3 days, or refrigerate for longer freshness.
- You can freeze the cake for up to 3 months; wrap it tightly in plastic wrap and then in aluminum foil before freezing.

