

There’s something undeniably charming about biting into a perfectly golden little pie, the flakiest pastry giving way to a burst of warmly spiced, tender apple filling. These Mini Apple Pies are like a hug in dessert form—tiny treats bursting with flavor, each one carefully cradling juicy apple pieces coated in cinnamon and nutmeg. Whether you’re whipping them up for a cozy afternoon coffee date with yourself or hauling a batch to brighten someone else’s day, they offer versatility and comfort in every bite. Their delicate size makes serving effortless, but don’t let their small appearance fool you: they’re bursting with sweet-tart apple goodness, thanks to the bright kick of lemon juice and the touch of flour that keeps the filling perfectly cohesive. I love how they radiate warmth the moment they emerge from the oven, and their aroma lingers, inviting you back for just one more.
These mini marvels have a way of turning everyday moments into celebrations. I still remember the first time I made them: the way my kitchen filled with whispers of cinnamon and the satisfying “pop” as I pressed the pie crust into each muffin cup. It felt like crafting tiny gifts one by one, and sharing them with family and friends turned an ordinary Wednesday into something memorable. Over the years, I’ve listened to all kinds of kitchen confessions and sprinkled in advice about rolling crusts thinner or experimenting with lattice tops. No matter how many times I return to this recipe, it never fails to deliver that sweet nostalgia and comforting crunch. So grab your apron and let’s savor the magic of these bite-sized apple pies together. I’ll walk you through every step, from selecting crisp Granny Smith or Honeycrisp apples to brushing on that glossy egg wash, ensuring your own batch is nothing short of sensational.
KEY INGREDIENTS IN MINI APPLE PIES
Before you dive in, let’s gather the essentials that make these mini apple pies so irresistible. Each ingredient plays a key role, combining to create that flaky crust and warm, cozy filling that’s hard to resist.
- Refrigerated pie crusts
These ready-made crusts are a real time-saver, offering a tender, buttery base without the fuss of making dough from scratch. They press easily into muffin tins to form the little cups that cradle the apple filling.
- Apples
Crisp varieties like Granny Smith or sweet-tart Honeycrisp bring both texture and flavor. Peeled, cored, and diced, they become tender as they bake while maintaining their shape and bite.
- Granulated sugar
This classic sweetener not only balances the tartness of the apples but also helps the filling caramelize slightly as it bakes, deepening the flavor.
- Ground cinnamon
A warming spice that infuses each bite with comfort and complexity, cinnamon is the hallmark of apple desserts everywhere.
- Ground nutmeg
Just a hint of nutmeg adds a subtle earthy depth and a gentle aromatic note that compliments the cinnamon perfectly.
- Lemon juice
A splash of citrus brightens the entire filling, keeping the apples vibrant and preventing them from turning brown before baking.
- All-purpose flour
Acting as a thickening agent, it ensures that the apple juices don’t run all over your pan, creating a silky, cohesive filling.
- Egg
Beaten into a wash, it gives each pie crust a gorgeous, golden sheen, making these minis almost too pretty to eat (almost!).
- Water
Mixed with the egg to thin out the wash, water helps you achieve smooth, even coverage over every crust surface.
HOW TO MAKE MINI APPLE PIES
Ready to roll? These instructions will guide you through creating perfect little pies, step by step.
1. Preheat your oven to 425°F (220°C). Ensuring the oven reaches the right temperature before you bake helps the crust start puffing up immediately, leading to that ideal flakiness.
2. Roll out the pie crusts on a lightly floured surface. Gently dust your countertop or pastry board with flour so the dough doesn’t stick. Use a rolling pin to smooth out any folds, then cut out circles with a 4-inch round cookie cutter or the rim of a glass. Aim for about 12 circles to fill your muffin tin.
3. Place the cut-out circles into a muffin tin. Carefully lay each circle into a well, pressing softly on the bottom and sides to form neat little cups—this is your mini pie shell.
4. In a medium bowl, combine the diced apples, granulated sugar, ground cinnamon, ground nutmeg, lemon juice, and flour. Toss everything until the apples are evenly coated. This spice mixture guarantees every bite is bursting with sweet, tangy, and warm flavors.
5. Spoon the apple mixture evenly into each pie crust. Fill the cups almost to the top but leave a bit of room for the pie filling to bubble and expand.
6. Cut out additional circles from the second pie crust for the tops. You can place simple circle lids or get creative with a lattice pattern—a beautiful way to show off the filling.
7. Carefully place each top crust over the apple filling, pressing the edges to seal. Crimp the edges gently with a fork or your fingers. Then make a few small steam vents by slicing tiny slits in the top of each pie.
8. In a small bowl, whisk together the egg and water to create an egg wash. Brush this mixture over each pie top—this little touch transforms golden brown into glistening perfection.
9. Bake in the preheated oven for 15–20 minutes. Watch for the crusts to turn a rich golden color and the filling to begin bubbling up through the vents.
10. Remove from the oven and let them cool in the tin for about 5 minutes. Transfer the minis carefully to a wire rack to finish cooling. This short rest helps the filling set so that your pies keep their shape when you take that first delightful bite.
SERVING SUGGESTIONS FOR MINI APPLE PIES
After you’ve baked these mini wonders, it’s time to make them shine on your dessert table. These serving ideas elevate the simple charm of your pies and transform them into a memorable experience that guests will rave about.
- Warm with Vanilla Ice Cream
Serve the minis while they’re still slightly warm and top each one with a generous scoop of creamy vanilla ice cream. As the ice cream melts into the pie’s edges, you’ll enjoy a luscious contrast of hot and cold, crisp crust and soft filling.
- Drizzled with Caramel Sauce
For an extra layer of indulgence, pour some rich caramel sauce in a zigzag pattern across the tops. The sweet, buttery caramel complements the spiced apples perfectly, creating a dessert that looks as stunning as it tastes.
- Garnished with Fresh Mint
Add a pop of color and a hint of freshness by topping each mini pie with a small sprig of fresh mint. The mint’s bright herbal notes provide a lovely contrast to the rich sweetness.
- Packaged as Party Favors
Wrap individual pies in clear cellophane bags tied with a rustic ribbon or twine. These darling parcels make such thoughtful party favors or giftable treats for holiday gatherings or bridal showers.
HOW TO STORE MINI APPLE PIES
Whether you’re planning ahead or simply looking to save leftovers, proper storage keeps these mini apple pies tasting just as wonderful as the day you baked them. With a few simple tricks, you can maintain their flaky crusts and flavorful filling for days—or even weeks.
- Room Temperature Short-Term
If you plan to enjoy your pies within a day, store them in an airtight container on the countertop. This preserves the crust’s initial crispness and keeps the filling from drying out. Just make sure they’re completely cooled before sealing.
- Refrigeration
For storage up to 3–4 days, line a container with parchment paper and place the pies in a single layer. Seal tightly and refrigerate. Before serving, let them come to room temperature or warm them in a low oven (about 300°F) for 5–7 minutes to revive that freshly-baked texture.
- Freezing Before Baking
Assemble the mini pies on your muffin tin, cover them well with plastic wrap, and freeze for up to one month. When you’re ready, bake them directly from frozen, adding a couple of extra minutes to the baking time. No thawing required!
- Freezing After Baking
Once cooled, flash-freeze the pies on a baking sheet, then transfer them to freezer bags. They’ll keep for up to two months. Reheat in a 350°F oven for about 10–12 minutes, and they’ll taste as if you just pulled them from your own oven.
CONCLUSION
These Mini Apple Pies have a knack for bringing joy to any table, whether you’re savoring them on a quiet afternoon or sharing them with a crowd. From the satisfying press of the crust into the tin to that first forkful of spiced apples nestled in golden pastry, this recipe is a celebration of simple ingredients transforming into something extraordinary. You’ve seen how easy it is to gather basic pantry staples—pie crusts, crisp apples, sugar, cinnamon, nutmeg, and a bit of lemon juice—and turn them into individual delights that feel both homey and special. The step-by-step instructions ensure you’ll breeze through the process, whether you’re an absolute beginner or a seasoned baker looking for a fun twist on classic apple pie. Remember to roll out your crusts on a lightly floured surface, press each circle into muffin cups, fill with that perfectly spiced apple mixture, seal with lids or lattices, and brush on an egg wash for that signature golden finish.
Feel free to print and save this article for your recipe collection and know that you can come back anytime for a quick refresher. We’ve covered serving tips that elevate your presentation, from pairing with ice cream to wrapping them as sweet favors, as well as smart storage methods to enjoy these treats days or even weeks later. Below, you’ll find a FAQ section to answer common questions and troubleshooting tips—so you’re fully supported as you bake. If you try this recipe or have any questions, comments, or feedback, I’d love to hear about your experience. Did your first batch turn out perfectly? Any creative twists you experimented with? Let me know how it went—I’m here to help and can’t wait to cheer on your baking adventures!
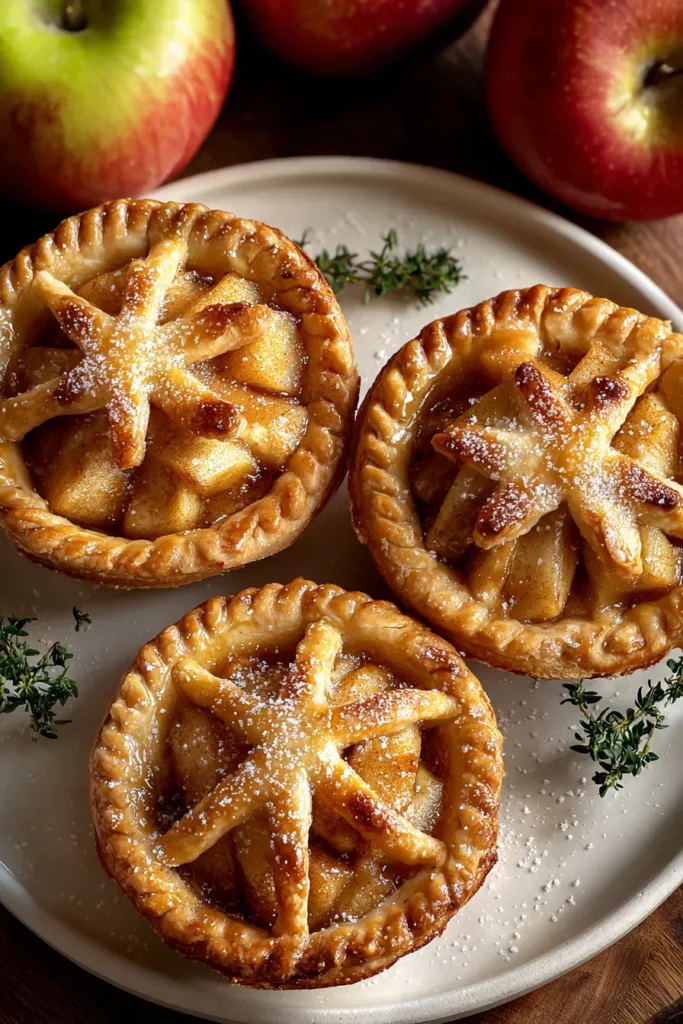

Mini Apple Pies
Description
Packed with juicy apples and warm spices, these adorable mini pies are easy to make and perfect for sharing. A golden crust cradles a sweet filling, making them irresistible!
Ingredients
Instructions
-
Preheat your oven to 425°F (220°C).
-
Roll out the pie crusts on a lightly floured surface. Cut out circles using a round cookie cutter or the rim of a glass (about 4 inches in diameter) to form the bottom crusts for the mini pies. You will need about 12 circles.
-
Place the cut-out circles into a muffin tin, pressing gently into the bottom and sides to form small cups.
-
In a medium bowl, combine the diced apples, granulated sugar, ground cinnamon, ground nutmeg, lemon juice, and flour. Mix well until the apples are coated in the mixture.
-
Spoon the apple mixture evenly into each pie crust in the muffin tin, filling each cup nearly to the top.
-
Cut out additional circles from the second pie crust to use as tops for the mini pies. You can also use a lattice pattern if desired.
-
Carefully place each top crust over the apple filling, pressing the edges to seal. Make a few small slits in the top crust to allow steam to escape.
-
In a small bowl, whisk together the egg and water to create an egg wash. Brush the egg wash over each pie to give it a golden-brown color during baking.
-
Bake in the preheated oven for 15-20 minutes, or until the crusts are golden brown, and the filling is bubbly.
-
Remove from the oven and allow to cool in the tin for about 5 minutes before carefully transferring them to a wire rack to cool completely.
Note
- These mini apple pies can be served warm or at room temperature.
- You can customize the filling by adding raisins, cranberries, or nuts for extra texture.
- Leftover pie crust scraps can be rolled out and baked as mini pie crust cookies.
- Serve with a scoop of vanilla ice cream or whipped cream for a delightful dessert.
- They are perfect for parties and can be made ahead and frozen before baking.

