

No-Bake Cheesecake Cups are the perfect blend of a light graham cracker crust and an airy cream cheese filling, crowned with vibrant mixed berries. These individual treats deliver a creamy, dreamy bite balanced by a crunchy base—all without firing up your oven. In just minutes of prep and a little chill time, you’ll have elegant mini cheesecakes that feel fancy but are surprisingly easy to whip up. Give them a try and watch everyone’s faces light up!
Key Ingredients
Here’s what you’ll need to build these delightful No-Bake Cheesecake Cups:
- 1 cup graham cracker crumbs: Crunchy base that provides a buttery, sweet foundation for each mini cheesecake.
- 3 tbsp melted butter: Binds the crumbs into a firm crust and adds rich, buttery flavor.
- 8 oz cream cheese, softened: Creamy central component that forms the luscious filling; beat until smooth.
- 1/4 cup granulated sugar: Sweetens the cream cheese filling without overpowering its tangy notes.
- 1 tsp vanilla extract: Adds warm, aromatic flavor to the cheesecake filling.
- 1 cup heavy cream: Whipped to stiff peaks to lighten the filling and create an irresistibly airy texture.
- 1/2 cup mixed berries for topping: Provides a burst of freshness and vibrant color to finish each cup.
How To Make No-Bake Cheesecake Cups
Let’s walk through the simple steps to assemble these cute cups. From creating the perfect crust to folding in fluffy whipped cream, each move is designed to guarantee a smooth, stable cheesecake filling and an impressive final look. Gather your bowls, mixers, and serving cups—then follow these six easy steps to dessert bliss!
1. In a bowl, combine the graham cracker crumbs and melted butter until the crumbs are evenly coated. Divide this mixture among your serving cups, then press down firmly with the back of a spoon or a small glass to form a compact crust layer.
2. In a separate bowl, beat the softened cream cheese, granulated sugar, and vanilla extract on medium speed until the mixture is completely smooth and free of lumps.
3. In another chilled bowl, use an electric mixer to whip the heavy cream until it holds stiff peaks, meaning the cream stands straight up when the beaters are lifted.
4. Gently fold the whipped cream into the cream cheese mixture using a spatula and a sweeping motion. Continue folding until no streaks remain and the filling is light and uniform.
5. Spoon or pipe the cheesecake filling over the prepared crust in each cup, smoothing the tops for a neat appearance.
6. Refrigerate the cups for at least 2 hours, allowing the filling to set firmly. Just before serving, top each cup with the mixed berries.
Serving Suggestions
These No-Bake Cheesecake Cups shine in every setting—whether you’re hosting a backyard barbecue, planning a romantic dinner, or simply craving a sweet treat after dinner. Their portable size makes them perfect for parties, and the elegant presentation means you can skip any fancy plating. Ready to elevate your servings? Here are four fun ideas to get you started:
- Fresh Mint Leaves: Garnish with a sprig of mint for a pop of color and a refreshing herbal note.
- Chocolate Drizzle: Warm some chocolate and drizzle it over the berries for a decadent swirl.
- Citrus Zest: Sprinkle finely grated lemon or orange zest atop the cups to add a bright, zesty finish.
- Nutty Crunch: Top with a handful of chopped nuts like pistachios or almonds for extra texture and flavor contrast.
Tips For Perfect No-Bake Cheesecake Cups
Let’s dive into a few friendly pointers to ensure your No-Bake Cheesecake Cups turn out flawless every time. From achieving a silky-smooth filling to customizing your crust and flavors, these tips will boost your confidence and the dessert’s deliciousness. Keep these in mind as you prep, and feel free to put your own spin on the recipe!
- Ensure cream cheese is fully softened to avoid lumps.
- For extra flavor add lemon zest to the filling.
- Store cups in the refrigerator for up to 2 days.
- You can substitute graham crackers with digestive biscuits for the crust.
How To Store It
Proper storage keeps your No-Bake Cheesecake Cups tasting fresh and creamy whenever you grab one. Whether you’re prepping ahead for a gathering or stashing leftovers, these simple steps will preserve both texture and flavor for optimal enjoyment.
- Refrigerator Storage: Place assembled cups in the fridge and cover with plastic wrap or store in an airtight container to lock in moisture.
- Separate Toppings: Keep berries or any fresh garnishes in a separate container and add them just before serving to prevent sogginess.
- Consume within 2 Days: For the best texture and flavor, enjoy your cheesecake cups within two days of making them.
- Avoid Freezing: The creamy filling can lose its smoothness when frozen and thawed, so stick with chilled storage for best results.
Frequently Asked Questions
Wondering about timing, technique, or variations? Here are answers to the most common questions about these No-Bake Cheesecake Cups:
- How long does it take to prepare these no-bake cheesecake cups?
A: It takes about 10–15 minutes to prepare the crust and filling, plus at least 2 hours of refrigeration time for the cheesecake to set before serving.
- How can I ensure the crust holds together firmly?
A: Combine the graham cracker crumbs and melted butter until the mixture resembles wet sand, then press down firmly and evenly into each cup to compact the crumbs. Chilling the crust for 5–10 minutes before adding the filling also helps it set more securely.
- What should I do if my cream cheese is still lumpy after softening?
A: Make sure the cream cheese sits at room temperature for at least 30 minutes, then beat it on medium speed for 2–3 minutes until completely smooth and creamy. You can also use a rubber spatula to scrape the sides of the bowl and break up any remaining lumps.
- How do I know when the whipped cream has reached stiff peaks?
A: When you lift the whisk or beaters from the cream, the peaks should stand straight up without drooping. If the cream still falls over at the tip, continue whipping in short bursts while keeping an eye on it to avoid overwhipping.
- How can I add extra flavor like lemon zest to the filling?
A: Finely grate the outer peel of a lemon, avoiding the bitter white pith, and fold 1–2 teaspoons of zest into the cream cheese mixture after beating in the sugar and vanilla for a bright citrus note.
- Can I make these cheesecake cups ahead of time and how should I store them?
A: Yes, you can assemble the cups up to two days in advance. Cover them in the refrigerator to prevent drying out and add the mixed berries just before serving to keep them fresh.
- Is there an alternative to graham cracker crumbs for the crust?
A: Yes, you can substitute crushed digestive biscuits in the same amount as the graham cracker crumbs and proceed with the recipe as written for a similar texture and flavor.
What Makes This Special
What makes No-Bake Cheesecake Cups truly stand out is their effortless elegance—a buttery, crunchy crust paired with a light, airy filling that sets up in the fridge, no baking required. The bright mixed berries add that final flourish, making these mini desserts look like they belong in a pastry shop window. This beginner-friendly recipe is almost foolproof, endlessly customizable, and perfect for print-and-save convenience. Give it a whirl, then drop a comment or question below—I’d love to hear how your cheesecake cups turned out or help with any tips you need!
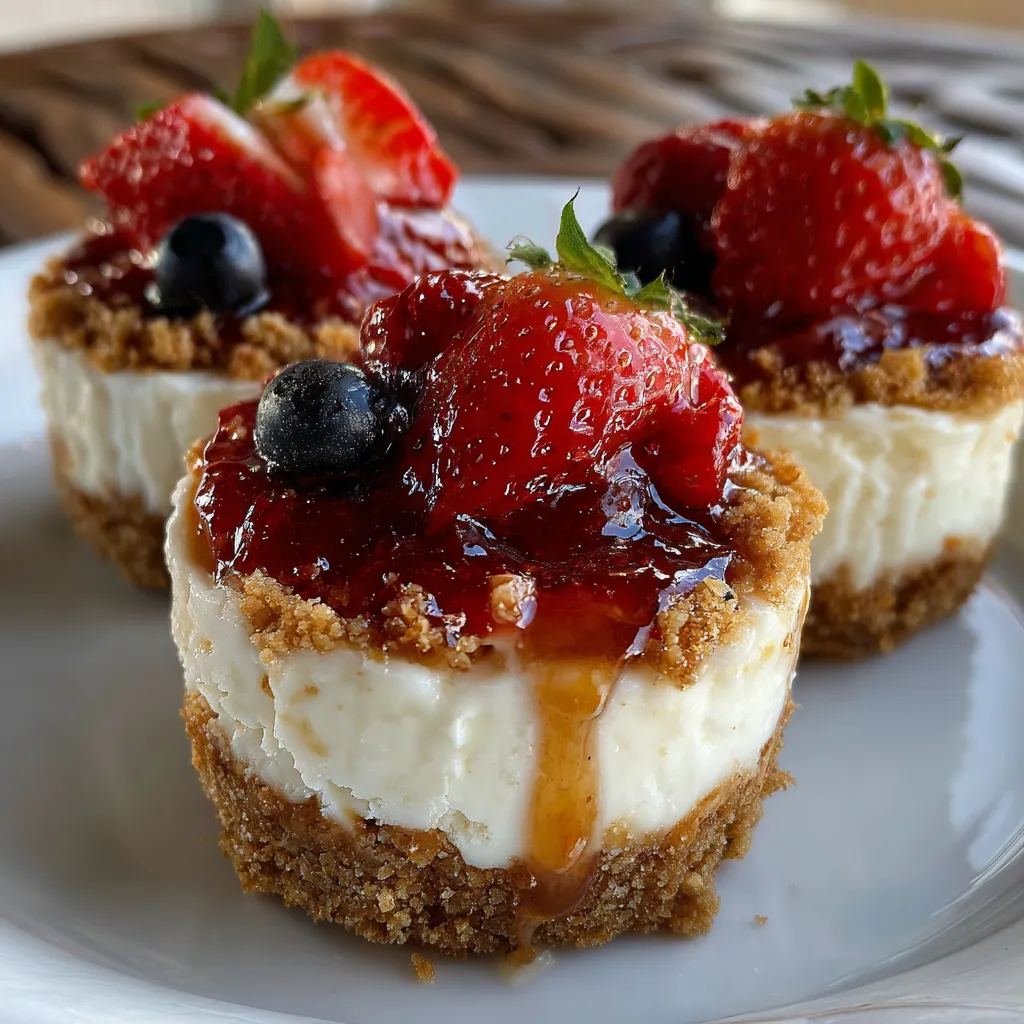

No-Bake Cheesecake Cups
Description
Creamy, dreamy filling balanced by a crunchy graham cracker base, crowned with juicy berries. These individual cups come together without turning on the oven and chill into a refreshing summer treat.
Ingredients
Instructions
-
In a bowl combine graham cracker crumbs and melted butter, then divide the mixture among serving cups and press down firmly to form a crust.
-
In a separate bowl beat the softened cream cheese, sugar, and vanilla extract until smooth and creamy.
-
In another chilled bowl whip the heavy cream to stiff peaks.
-
Gently fold the whipped cream into the cream cheese mixture until fully incorporated.
-
Spoon or pipe the cheesecake filling over the crust in each cup.
-
Refrigerate the cups for at least 2 hours before topping with mixed berries and serving.
Note
- Ensure cream cheese is fully softened to avoid lumps.
- For extra flavor add lemon zest to the filling.
- Store cups in the refrigerator for up to 2 days.
- You can substitute graham crackers with digestive biscuits for the crust.

