

There’s something almost magical about the first spoonful of a no-bake chocolate chip cheesecake. It’s cool against your tongue, rich in creamy goodness, and studded with those tiny bursts of chocolate that feel like little surprises with every bite. I still remember the first time I whipped one of these up for a family gathering: I was nervous that it wouldn’t set, but as soon as I lifted that springform pan’s latch, out slid the perfect, velvety circle of bliss. The gentle snap of the graham cracker crust under my fork, followed by that smooth, tangy cream cheese filling dotted with mini chocolate chips… it was love at first taste. Over the years, I’ve tweaked ingredients, swapped chocolate chip varieties, and added my own twist of salt to the crust, but at its core, this dessert remains a comforting, crowd-pleasing classic that never fails to bring smiles around the table.
This creamy, dreamy no-bake cheesecake loaded with chocolate chips is perfect for any occasion! With a buttery graham cracker crust beneath a rich, velvety cream cheese filling, studded with crunchy mini chocolate chips, it’s the ultimate chocolate chip dessert that even baking beginners can master. You’ll need just about 20 minutes of hands-on prep time, virtually 0 minutes of oven-cooking, and a patient 4 hours of chilling (trust me, it’s worth the wait). Each slice clocks in around 350 calories, making it a delightful Dessert that feels indulgent without the fuss of traditional baking. Whether you’re celebrating a birthday, hosting a potluck, or simply craving a refreshing, no-bake treat on a warm afternoon, this beginner-friendly cheesecake has got your back. Let’s dive into the details so you can whip up this gorgeous, no-fail dessert in no time!
KEY INGREDIENTS IN NO BAKE CHOCOLATE CHIP CHEESECAKE
Every great recipe starts with quality ingredients, and this no-bake cheesecake is no exception. These simple staples work together to create a perfect balance of buttery crunch, smooth tang, and sweet chocolate bursts. Here’s what you’ll need:
- Graham cracker crumbs
These fine crumbs form the foundation of the crust. When combined with butter, they bind together to create a sturdy, golden-brown base that adds both flavor and texture.
- Unsalted butter
Melted and mixed into the crumbs, it helps the crust hold its shape. Using unsalted butter lets you control the salt content to suit your taste.
- Cream cheese
The star of the filling! Softened cream cheese provides that signature tang and ultra-creamy texture. Make sure it’s at room temperature for the smoothest mix.
- Granulated sugar
This sweetener brightens the cream cheese and rounds out its tanginess. It also helps achieve a silky filling without graininess.
- Vanilla extract
A splash of pure vanilla transforms the cheesecake from good to unforgettable by adding depth and warmth to the flavor profile.
- Heavy whipping cream
Whipped into stiff peaks, it lightens the dense cream cheese mixture, giving the cheesecake an airy, mousse-like consistency.
- Mini chocolate chips
These tiny chocolate morsels bring pockets of cocoa delight in every forkful. Their small size distributes sweetness evenly throughout the filling.
HOW TO MAKE NO BAKE CHOCOLATE CHIP CHEESECAKE
Let’s walk through the process of turning these ingredients into a show-stopping dessert. From crafting that buttery crust to folding in whipped cream and chocolate chips, each step is designed for ease and delicious results. Take your time, follow the tips, and you’ll end up with a flawlessly smooth, richly flavored cheesecake that’s set and ready to impress.
1. In a medium-sized bowl, combine the graham cracker crumbs and melted butter until the mixture resembles wet sand. This visual cue ensures the crumbs are evenly coated and will bind neatly when pressed into the pan.
2. Press the crumb mixture evenly into the bottom of a 9-inch springform pan to create the crust. Use the bottom of a measuring cup or a glass to firmly compact the crumbs. Place the pan in the refrigerator to firm up while you prepare the filling.
3. In a large mixing bowl, beat the softened cream cheese, granulated sugar, and vanilla extract together until smooth and creamy. Scrape down the sides of the bowl occasionally to ensure a lump-free texture.
4. In a separate bowl, whip the heavy cream with an electric mixer until stiff peaks form. This step is crucial for a light, airy filling.
5. Gently fold the whipped cream into the cream cheese mixture until fully incorporated. Use a spatula and a slow, under-and-over motion to keep the mixture fluffy.
6. Stir in the mini chocolate chips until evenly distributed throughout the filling, ensuring each bite has a delightful chocolate crunch.
7. Pour the cheesecake filling over the chilled crust in the springform pan, smoothing the top with a spatula for an even finish.
8. Cover the pan with plastic wrap and refrigerate for at least 4 hours or until fully set. Patience here pays off with a firmer, sliceable cheesecake.
9. Once set, run a knife around the edge of the cheesecake to loosen it, then carefully release the springform pan’s latch.
10. Serve chilled and enjoy each luscious, creamy slice studded with chocolate chips!
SERVING SUGGESTIONS FOR NO BAKE CHOCOLATE CHIP CHEESECAKE
When it comes time to bring your no-bake chocolate chip cheesecake to the table, presentation and complementing flavors can elevate it from simply delicious to utterly unforgettable. Whether you’re aiming for a casual family gathering or an elegant dinner party, these serving ideas will help you showcase your cheesecake in style. Each suggestion adds a touch of flair without overshadowing the creamy, chocolate-loaded star of the show. Feel free to mix and match these ideas to fit your occasion and personal taste!
- Fresh Berry Garnish & Mint Sprig
Top each slice with a handful of fresh berries—like raspberries or strawberries—for a pop of color and tangy contrast. Finish with a delicate mint sprig for a refreshing aroma and visual elegance.
- Warm Chocolate Drizzle
Gently heat some dark chocolate and drizzle it in a zigzag pattern over each slice just before serving. The contrast of warm chocolate against the chilled cheesecake creates a luxurious bite.
- Coffee or Espresso Pairing
Serve with a small cup of espresso or strong coffee. The bitterness of the coffee cuts through the cheesecake’s richness, balancing sweetness and enhancing the chocolate flavors.
- Whipped Cream & Crushed Cookies
Pipe a swirl of fresh whipped cream around the edge of each slice, then sprinkle with crushed graham crackers or chocolate cookie crumbs. It adds texture and an extra hint of flavor.
HOW TO STORE NO BAKE CHOCOLATE CHIP CHEESECAKE
Keeping your cheesecake in peak condition requires a bit of know-how, especially since it’s wonderfully delicate and prone to absorbing other flavors if not stored properly. Proper storage ensures your slices stay creamy, fresh, and chocolate-studded as intended. Whether you’re saving leftovers for a few days or preparing in advance for a special event, these tips will help maintain the cake’s texture and flavor integrity.
- Refrigerator Storage
Cover the top of the springform pan securely with plastic wrap or transfer slices to an airtight container. Store in the coldest part of the fridge to prevent any unwanted temperature swings. Properly wrapped, the cheesecake will stay fresh for up to 5 days.
- Freezing Whole Cheesecake
Once fully set, freeze the entire cheesecake uncovered for about 1 hour to harden the surface. Then wrap tightly in plastic wrap followed by a layer of foil. Store for up to 1 month. Thaw in the refrigerator overnight before serving.
- Freezing Individual Slices
Place slices on a baking sheet, flash-freeze for 1–2 hours, then wrap each piece in plastic wrap and tuck into a freezer bag. This makes grabbing a single, perfectly portioned slice easy. Thaw in the fridge for a few hours.
- Layer Protection
If your cheesecake has toppings (like drizzles or berries), store those separately in small containers and add them just before serving. This prevents any moisture from compromising the crust or making the filling soggy.
CONCLUSION
This no-bake chocolate chip cheesecake has everything a delightful dessert should offer: a crisp, buttery graham cracker crust that holds its own against a velvety cream cheese filling, and pockets of mini chocolate chips for those little moments of extra sweetness. Throughout this article, we’ve covered every single detail—from the importance of room-temperature cream cheese to the art of folding in whipped cream just so, and from creative serving suggestions to foolproof storage methods. Whether you’re a baking novice or a seasoned home cook, this recipe’s simplicity and adaptability make it an ideal choice for celebrating birthdays, hosting potlucks, or just treating yourself to a homemade indulgence on a lazy weekend afternoon.
Feel free to print this article and save it in your recipe binder or bookmark it for those times you need a quick, impressive dessert that requires zero oven time. You’ll even find a handy FAQ section below to answer common questions about variations, troubleshooting, and how to achieve the perfect set every time. If you give this cheesecake a try, I’d love to hear how it turns out—drop your comments, questions, or feedback below. Whether you’ve added a swirl of strawberry sauce, experimented with white chocolate chips, or discovered your own signature twist, sharing your experiences can help fellow home cooks achieve cheesecake success. Happy chilling and even happier indulging!
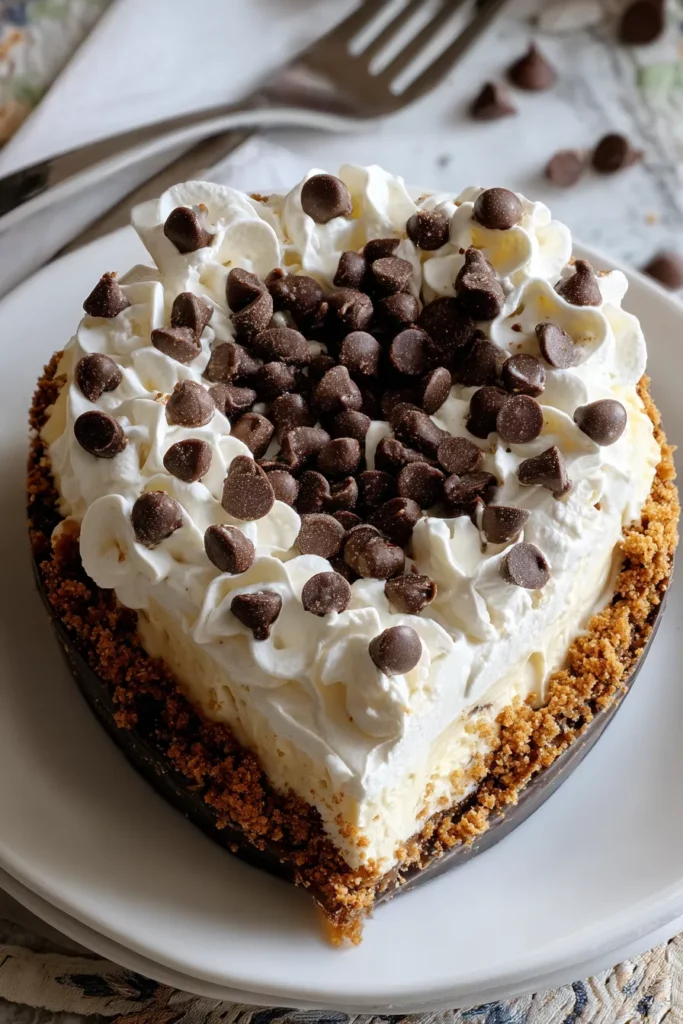

No Bake Chocolate Chip Cheesecake
Description
This no bake chocolate chip cheesecake features a buttery graham cracker crust and a rich, velvety cream cheese filling, studded with mini chocolate chips for a delightful crunch. It's a chilled treat that satisfies every sweet tooth!
Ingredients
Instructions
-
In a medium-sized bowl, combine the graham cracker crumbs and melted butter until the mixture resembles wet sand.
-
Press the crumb mixture evenly into the bottom of a 9-inch springform pan to create the crust. Place the pan in the refrigerator to firm up while you prepare the filling.
-
In a large mixing bowl, beat the softened cream cheese, granulated sugar, and vanilla extract together until smooth and creamy.
-
In a separate bowl, whip the heavy cream until stiff peaks form.
-
Gently fold the whipped cream into the cream cheese mixture until fully incorporated.
-
Stir in the mini chocolate chips until evenly distributed throughout the filling.
-
Pour the cheesecake filling over the chilled crust in the springform pan, smoothing the top with a spatula.
-
Cover the pan with plastic wrap and refrigerate for at least 4 hours or until fully set.
-
Once set, run a knife around the edge of the cheesecake and release it from the springform pan.
-
Serve chilled and enjoy!
Note
- For added flavor, consider adding a pinch of salt to the graham cracker crust mixture.
- This cheesecake can be customized by adding different types of chocolate chips or even a swirl of chocolate syrup.
- Ensure that the cream cheese is at room temperature for easier mixing.
- The longer the cheesecake chills, the firmer it will be, making it easier to slice.

