

Get ready to celebrate with Patriotic No-Bake Flag Cheesecake Bars! These star-spangled layers of creamy cheesecake, vibrant berries, and buttery graham crust come together without turning on the oven. A silky cream cheese filling rests on a crisp graham base, then stripes of red-hued cheesecake and juicy berries add pop and freshness in every bite. Trust me, once chilled to perfection, these bars will steal the show—and your heart!
Key Ingredients
Before diving into the fun assembly, let’s round up the essentials that give these bars their signature taste and texture.
- 1 cup graham cracker crumbs: Forms a crisp, buttery base that supports the creamy filling.
- 2 tablespoons granulated sugar: Sweetens and balances the graham crust.
- 4 tablespoons unsalted butter, melted: Binds crumbs together and adds rich flavor.
- 8 ounces cream cheese, softened: Creates the smooth, tangy cheesecake layer.
- 1/2 cup powdered sugar: Sweetens the cheesecake filling without grit.
- 1 cup heavy whipping cream: Whipped into stiff peaks to lighten the filling.
- 1 teaspoon vanilla extract: Infuses a warm, aromatic note.
- 1/2 cup blueberries, washed: Makes the “star field” for a burst of color.
- 1/2 cup strawberries, sliced: Forms the bright red stripes with natural sweetness.
- Red food coloring (optional): Intensifies the cheesecake’s red stripes.
How To Make Patriotic No-Bake Flag Cheesecake Bars
Getting every layer just right is part of the fun! This no-bake recipe relies on simple prep, chilling, and creative assembly. You’ll start by creating a sturdy graham crust, whip up the fluffy cheesecake filling, split and color part of it, then artfully layer and top it all off before a long chill.
1. In a medium bowl, stir together graham cracker crumbs, granulated sugar, and melted butter until fully coated, then press firmly into the bottom of an 8×8-inch pan to form an even crust.
2. In another bowl, beat softened cream cheese, powdered sugar, and vanilla extract until the mixture is completely smooth and lump-free.
3. In a separate bowl, whip heavy whipping cream until stiff peaks form, then fold gently into the cream cheese mixture to maintain airiness.
4. Spread half of the cheesecake filling evenly over the prepared crust, smoothing the top with a spatula.
5. Add red food coloring to the remaining filling and mix until the color is uniform.
6. Pipe or spoon the red filling into three parallel stripes on top of the white layer, maintaining even spacing.
7. Arrange blueberries in the top left corner to create the iconic star field.
8. Chill in the refrigerator for at least 4 hours until firm, then cut into bars with a sharp knife.
Serving Suggestions
When it’s time to serve these Patriotic No-Bake Flag Cheesecake Bars, the vibrant red, white, and blue presentation deserves a moment in the spotlight. Whether you’re hosting a backyard barbecue, a Fourth of July gathering, or simply craving a festive snack, these bars shine when plated with a few thoughtful touches. Below are some fun ideas to make every bite even more special, from garnish tricks to pairing tips that will have your guests cheering for more.
- Serve on a platter lined with parchment paper for easy removal and cleanup, then garnish with extra fresh berries.
- Drizzle with a homemade berry compote for added juiciness and a swirl of extra color.
- Pair each bar with a glass of iced tea or fresh lemonade to balance the creamy richness.
- Present on flag-themed napkins or festive plates to amplify the patriotic vibe and delight your guests.
Tips For Perfect Patriotic No-Bake Flag Cheesecake Bars
A few smart tweaks will have your cheesecake bars looking and tasting their best. Follow these insider notes to nail the texture, flavor, and presentation every time:
- Use a pan with removable bottom for easy slicing
- Chill bars overnight for best texture
- Swap strawberries for raspberries if preferred
- Serve cold to maintain shape and flavor
How To Store It
Keeping these bars fresh and visually appealing is a breeze with proper storage. The key is to prevent moisture loss, maintain the firm texture, and protect the delicate layers from sticking or smudging.
- Refrigerate in an airtight container for up to 4 days, placing parchment paper between layers to prevent sticking.
- Freeze in a single layer on a baking sheet until solid, then transfer to a freezer bag or container for up to one month.
- Cover edges with plastic wrap before sealing in a container to preserve moisture and prevent fridge odors from seeping in.
- Thaw frozen bars overnight in the refrigerator before serving to retain their creamy consistency.
Frequently Asked Questions
Ready to troubleshoot or plan ahead? Here are answers to your top questions:
- Q: How long does it take to prepare this recipe?
A: It takes about 20 minutes to prepare the crust and cheesecake filling, plus at least 4 hours of chilling time until firm. For best texture, chill overnight before slicing into bars.
- Q: What type of pan should I use to make these cheesecake bars?
A: An 8×8-inch pan with a removable bottom or a springform pan insert works best for easy removal and clean edges. If you only have a solid pan, line it with parchment paper overhanging the sides so you can lift the bars out after chilling.
- Q: How do I know when the whipped cream has reached stiff peaks?
A: When you lift the beaters straight up from the cream, the peaks should stand upright without collapsing. Properly chilled cream and a cold bowl help achieve stiff peaks more quickly. Stop beating as soon as stiff peaks form to prevent overwhipping and graininess.
- Q: Can I substitute other fruits or colors for the decoration?
A: Yes, you can swap strawberries for raspberries to maintain a red hue or use blackberries in place of blueberries for a darker “star field.” If you skip red food coloring, use extra raspberries sliced or mashed into the filling to create the red stripes.
- Q: Why is it important to press the crust firmly into the pan?
A: Pressing the graham cracker mixture firmly ensures a compact, sturdy base that won’t crumble when you slice the bars. A solid crust also prevents gaps between crust and filling, keeping each bar intact when serving.
- Q: How should I store any leftover cheesecake bars?
A: Store leftovers covered in the refrigerator for up to 4 days. For longer storage, freeze the bars in a single layer on a baking sheet until solid, then transfer to an airtight container or freezer bag for up to one month. Thaw in the fridge before serving.
- Q: What can I do if my filling looks grainy after mixing?
A: Ensure the cream cheese is fully softened to room temperature before beating and sift the powdered sugar to remove any lumps. Beat the cream cheese and sugar until smooth before folding in the whipped cream gently to maintain a creamy, uniform texture.
What Makes This Special
These Patriotic No-Bake Flag Cheesecake Bars work because they blend ease, flavor, and eye-catching flair into one unforgettable dessert. The no-bake approach means you’ll keep your kitchen cool and stress low, while the creamy filling and crisp crust deliver that perfect textural contrast. Best of all, the star-spangled design is as fun to assemble as it is to devour—so print out this recipe, save it for your next celebration, and let me know how your flag bars turn out or if you have any questions!
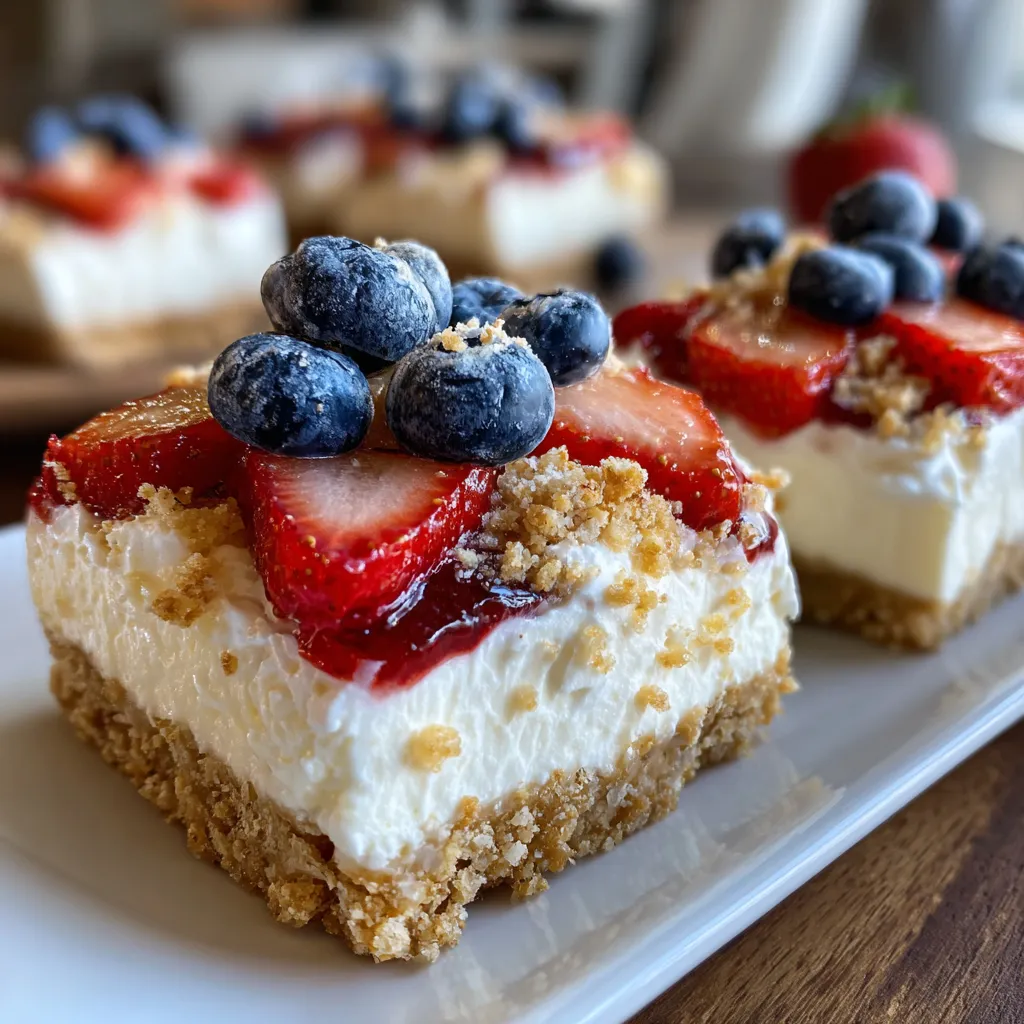

Patriotic No-Bake Flag Cheesecake Bars
Description
A silky cream cheese filling rests on a crisp graham base, then stripes of red-hued cheesecake and juicy berries add pop and freshness in every bite.
Ingredients
Instructions
-
In a medium bowl stir together graham cracker crumbs sugar and melted butter then press firmly into the bottom of an 8x8-inch pan
-
In another bowl beat cream cheese powdered sugar and vanilla extract until mixture is smooth
-
In a separate bowl whip heavy whipping cream until stiff peaks form then fold gently into the cream cheese mixture
-
Spread half of the cheesecake filling evenly over the prepared crust
-
Add red food coloring to the remaining filling and mix until color is uniform
-
Pipe or spoon the red filling into three parallel stripes on top of the white layer
-
Arrange blueberries in the top left corner to create the star field
-
Chill in the refrigerator for at least 4 hours until firm then cut into bars
Note
- Use a pan with removable bottom for easy slicing
- Chill bars overnight for best texture
- Swap strawberries for raspberries if preferred
- Serve cold to maintain shape and flavor

