

Every time I whip up a batch of Pico de Gallo, it feels like inviting sunshine into my kitchen. The vibrant reds of the tomatoes, the zing of fresh lime juice, and the gentle heat of jalapeño come together in this beginner-friendly recipe that takes just 15 minutes of prep time. No cooking required—just pure, fresh flavors mingling in harmony. This dish clocks in at around 80 calories per serving, making it a guilt-free addition to your appetizer or lunch spread. Whether you’re planning a casual taco night or simply craving a healthy snack with your favorite tortilla chips, this salsa fresca delivers a fiesta of bright, tangy, and slightly spicy notes that will have everyone reaching for second helpings.
I still remember the first time I made Pico de Gallo for a backyard barbecue. My friends kept asking for the recipe, marveling at how such simple ingredients could create an explosion of flavor. The secret lies in letting the mixture rest for at least 15 minutes—this little patience hack allows the flavors to meld and intensify. You’ll find that the bite of the red onion softens just enough, the cilantro aroma shines through, and the tomatoes release their juicy sweetness. Serve it fresh as a topping for grilled meats or as a vibrant side dish, and watch how quickly it disappears off the table. Trust me, once you master this easy salsa fresca, it’ll become a staple in your recipe rotation.
KEY INGREDIENTS IN PICO DE GALLO
Every great Pico de Gallo starts with fresh, high-quality ingredients that each play an essential role in building layers of flavor and texture. From the juicy burst of tomatoes to the punch of cilantro, here’s what you need and why it matters:
- Roma tomatoes
These firm, meaty tomatoes bring a natural sweetness and vibrant color to your salsa. When diced evenly, they ensure every spoonful is juicy without becoming runny.
- Red onion
Finely chopped red onion adds a sharp, slightly sweet bite. Its crunchy texture contrasts beautifully with the softer tomatoes, creating a more interesting mouthfeel.
- Fresh cilantro
Chopped cilantro leaves introduce a bright, citrusy herbaceousness. This signature Mexican herb ties all the flavors together and adds a fresh aromatic note.
- Jalapeño pepper
Seeding and finely dicing this pepper gives your salsa a controlled kick of heat. If you’re timid about spice, using just half the jalapeño still adds flavor without overpowering.
- Fresh lime juice
The acidity of lime juice not only balances the sweetness of the tomatoes but also helps preserve the vivid colors and freshness of the mixture.
- Salt
A simple seasoning that heightens all the natural flavors. Salt draws out moisture from the tomatoes and onions, encouraging them to mingle and develop deeper tastes.
HOW TO MAKE PICO DE GALLO
Bringing together this fresh salsa is as easy as chopping, mixing, and waiting for magic to happen. These detailed steps will guide you through each technique so your Pico de Gallo turns out perfectly every time:
1. Prepare the vegetables
Dice the Roma tomatoes into evenly sized pieces using a sharp knife. Consistent dice ensures you get a perfect balance of tomato in every bite without any giant chunks.
2. Chop onion and cilantro
Use a rocking motion with your chef’s knife to finely chop the red onion. Repeat with the cilantro, removing any thick stems. Keeping these pieces small helps them blend seamlessly.
3. Seed and dice the jalapeño
Slice the jalapeño in half lengthwise, scoop out the seeds and ribs, then finely dice. For a milder salsa, use only half of the pepper, leaving you in control of the heat level.
4. Combine in a mixing bowl
In a large mixing bowl, add the diced tomatoes, chopped red onion, cilantro, and jalapeño. Stir gently so you don’t crush the tomato pieces.
5. Add lime juice
Pour in the fresh lime juice, which brightens every ingredient and prevents browning. Lime not only enhances taste but also acts as a natural preservative.
6. Season with salt
Sprinkle salt to taste over the mixture. Start with a small pinch, then adjust until the flavors pop. Remember, you can always add more but you can’t take it away!
7. Stir and let rest
Give everything a final stir until well coated. Cover the bowl and let the Pico de Gallo sit at room temperature for at least 15 minutes. This resting period is key for flavor melding.
8. Serve fresh
Spoon your vibrant Pico de Gallo onto tacos, nachos, or grilled meats, or simply set it out with tortilla chips. Enjoy immediately for the crispiest, most flavorful experience.
SERVING SUGGESTIONS FOR PICO DE GALLO
When it comes to serving Pico de Gallo, the possibilities are endless. This salsa fresca isn’t just a dip—it’s a versatile flavor booster that can uplift tacos, grilled dishes, and even breakfast bowls. Let’s explore some creative ways to showcase its bright combination of juicy tomatoes, zesty lime, and a hint of jalapeño:
- Taco topper
Pile a generous spoonful of Pico de Gallo onto soft corn or flour tortillas. The contrast between warm tortillas and cold salsa creates an irresistible textural play.
- Nacho layer
Spread your nachos on a baking sheet, bake till the cheese melts, then finish with chilled Pico de Gallo. This ensures the salsa stays crisp while the nachos are piping hot.
- Grilled meat garnish
Serve alongside grilled chicken, steak, or fish. The acidity of the lime juice cuts through rich meat fats, making each bite feel lighter and more refreshing.
- Chip and dip
For a classic snack, scoop your Pico de Gallo with stone-ground tortilla chips. The robust crunch of the chips accentuates the fresh, juicy vegetables in every bite.
HOW TO STORE PICO DE GALLO
Preserving the fresh, vibrant qualities of Pico de Gallo requires just a little know-how. While it’s best enjoyed immediately, these storage tips will help you maintain flavor and texture if you need to prepare ahead or save leftovers:
- Airtight container
Transfer your Pico de Gallo into a sealed, airtight container. This prevents air from dulling the bright flavors and keeps the ingredients crisp.
- Refrigeration
Store in the coldest part of your fridge for up to two days. The lime juice helps preserve the color and slows oxidation of the tomatoes and onions.
- Use shallow layers
If you have a large batch, divide the salsa into smaller containers or shallow dishes. This ensures quicker, more even cooling, which helps maintain that crunchy texture.
- Avoid freezing
Freezing isn’t recommended, as the cell structure of the tomatoes will break down when thawed, resulting in a mushy texture. Stick to fresh or refrigerated consumption for best results.
CONCLUSION
We’ve journeyed through every aspect of making the ultimate Pico de Gallo, from selecting the ripest Roma tomatoes and finely chopping red onions, to mastering the perfect spice level with jalapeño and understanding why that 15-minute rest is so crucial. Along the way, we explored creative serving ideas—taco toppings, nacho layers, grilled meat garnishes, and the quintessential chip-and-dip scenario—and learned storage tricks to ensure your salsa fresca stays bright and flavorful for up to two days in the refrigerator. With just 15 minutes of prep time, zero cooking, and only six simple ingredients, this recipe proves that beginner-friendly dishes can still deliver big, bold flavors.
Feel free to print this article and save it for later reference in your recipe binder, or bookmark it on your device for quick access during meal prep. You’ll also find a handy FAQ section below to address any common questions that might pop up as you make this salsa at home. I’d love to hear how your Pico de Gallo turns out! Leave a comment, ask questions, or share your feedback—did you tweak the heat? Add garlic or cumin? Let me know, so we can keep the conversation—and flavor fiesta—going. Happy cooking!
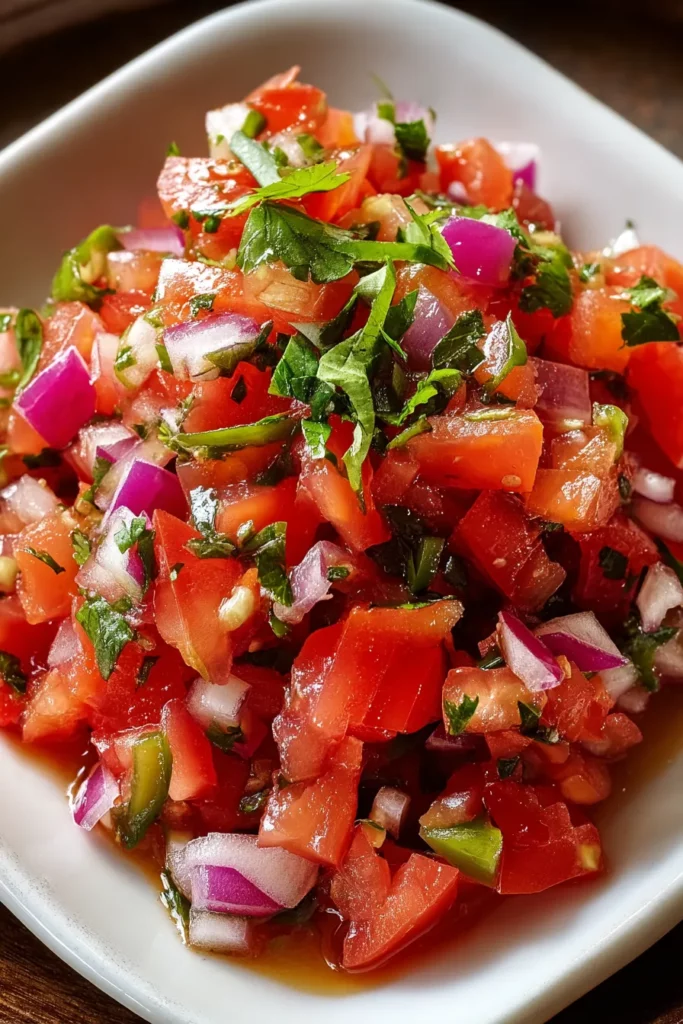

Pico de Gallo
Description
This vibrant Pico de Gallo bursts with fresh tomatoes, zesty lime, and a kick from jalapeño, making it the perfect companion for chips or tacos. Experience a fiesta of flavors!
Ingredients
Instructions
-
Begin by preparing the vegetables. Dice the Roma tomatoes and ensure they are evenly sized for uniform mixing.
-
Finely chop the red onion and fresh cilantro, keeping the pieces small to integrate well with the other ingredients.
-
Carefully seed the jalapeño pepper, remove the ribs, and finely dice it. If you prefer a milder Pico de Gallo, consider using half of the jalapeño.
-
In a mixing bowl, combine the diced tomatoes, red onion, cilantro, and jalapeño pepper.
-
Add the fresh lime juice to the mixture, which will enhance the flavors and keep the ingredients fresh.
-
Season the mixture with salt to taste, considering personal preference.
-
Stir all the ingredients together until they are well combined. Allow the Pico de Gallo to sit for at least 15 minutes to allow the flavors to meld.
-
Serve fresh as a topping or side dish with tacos, nachos, grilled meats, or enjoy it with tortilla chips.
Note
- Pico de Gallo is also known as salsa fresca or fresh salsa.
- For added flavor, you can include a minced clove of garlic or a pinch of ground cumin.
- This dish is best consumed fresh but can be stored in an airtight container in the refrigerator for up to two days.
- Adjust the level of spiciness by using different types of peppers, such as Serrano for more heat.
- Lime juice not only adds flavor but also helps to preserve the freshness of the ingredients.

