

If you’re craving a crunchy, tangy snack, these Refrigerator Pickled Vegetables are your new best friend. Bright cucumbers, carrots, cauliflower, radishes, and peppers soak up a zesty garlic-and-dill brine, delivering that irresistible crunch in every bite. Ready in just one day and perfect for spicing up sandwiches, salads, or a colorful charcuterie spread, this easy pickle recipe turns simple garden veggies into a vibrant, flavorful treat.
Key Ingredients
Let’s gather the fresh and pantry staples that make these refrigerator pickles irresistibly crunchy and flavorful.
- 1 cup water: the liquid base that dilutes the vinegar and helps maintain a crisp texture.
- 1 cup white vinegar: provides the tangy acidity needed for safe, flavor-packed pickling.
- 1 tablespoon granulated sugar: balances the sourness of vinegar with a hint of sweetness.
- 1 tablespoon kosher salt: enhances flavors and helps draw moisture out of the vegetables.
- 2 cloves garlic, sliced: infuses a robust garlic aroma throughout the brine.
- 1 teaspoon black peppercorns: adds a subtle peppery bite to each jar.
- 1 teaspoon mustard seeds: contributes a mild mustardy warmth to the flavor profile.
- 1/2 teaspoon red pepper flakes: brings a gentle heat for a lively kick.
- 1 cup cucumber slices: classic crunchy base that soaks up the zesty brine.
- 1 cup carrot slices: adds sweetness and a satisfying snap.
- 1 cup cauliflower florets: provides a firm texture that holds up well in brine.
- 1 cup radish slices: delivers a peppery edge and vibrant color.
- 1 cup bell pepper strips: offers sweet, crunchy bursts in every bite.
- 2 sprigs fresh dill: aromatic herb that imparts classic dill pickle flavor.
How To Make Refrigerator Pickled Vegetables
Pickling your own veggies in the fridge is straightforward and super satisfying. With just a quick homemade brine and clean jars, these tangy treats come together in minutes and transform everyday vegetables into flavorful snacks you’ll reach for again and again. Follow these detailed steps to pack each jar with flavor and ensure your pickles are perfectly crisp.
1. In a medium saucepan, combine 1 cup water, 1 cup white vinegar, 1 tablespoon granulated sugar, and 1 tablespoon kosher salt, then bring to a gentle boil, stirring until the sugar and salt dissolve completely.
2. Remove the saucepan from heat and allow the brine to cool slightly while you sanitize and prepare the glass jars.
3. Pack cucumber slices, carrot slices, cauliflower florets, radish slices, bell pepper strips, sliced garlic, black peppercorns, mustard seeds, red pepper flakes, and fresh dill tightly into each clean jar.
4. Carefully pour the warm brine over the vegetables, ensuring they are fully covered and leaving about 1/2 inch of headspace at the top.
5. Seal the jars tightly with their lids and set them aside to cool to room temperature on the counter.
6. Transfer the cooled jars to the refrigerator and let the vegetables pickle for at least 24 hours before serving.
7. Keep the pickles refrigerated and consume within 2 weeks for the best flavor and crunchy texture.
Serving Suggestions
Once you’ve got these vibrant Refrigerator Pickled Vegetables at the ready, there’s so much you can do beyond eating them straight from the jar. Their crisp texture and zesty garlic-and-dill flavor make them a versatile addition to countless meals. Throw them on a sandwich, toss them into a salad, or arrange them on a charcuterie board to add a burst of color and tang. Here are a few serving ideas to help you enjoy every crunchy bite:
- Sandwich topper: Layer slices of pickled veggies on your favorite sandwiches or wraps for an extra tangy crunch.
- Salad booster: Chop and toss into salads to add bright pops of color and zesty flavor.
- Charcuterie companion: Serve alongside cheeses, cured meats, and crackers for a delightful contrast in texture and taste.
- Snack straight from the jar: Keep a jar in the fridge and grab a handful for a quick, healthy bite whenever you need it.
Tips For Perfect Refrigerator Pickled Vegetables
Creating perfectly crisp and flavorful Refrigerator Pickled Vegetables is all about balancing acidity, texture, and seasoning. You’ll want a brine that’s tangy but not overpowering, veggies that stay crunchy, and flavors that develop just right as they rest in the fridge. Whether you’re a pickling newbie or a seasoned pro, these pointers will guide you to dreamy, snackable pickles every time. From swapping in your favorite seasonal produce to ensuring every piece is submerged for safety and flavor, you’ll be snacking on irresistibly crunchy, zesty vegetables in no time. Give your jars a gentle swirl after the first 24 hours to redistribute the spices, and watch how the flavors deepen over the next day.
- Use equal parts water and vinegar for a balanced tang and crisp texture.
- Feel free to substitute or add seasonal vegetables like green beans or cherry tomatoes.
- Ensure all vegetables are fully submerged in brine to prevent spoilage.
- These pickles develop more flavor over the first 48 hours in the fridge.
How To Store It
One of the joys of refrigerator pickles is how simple they are to store and enjoy. With no canning required, these crunchy veggies keep safe in your fridge, ready for snacking or meal-enhancing at a moment’s notice. Follow these storage tips to preserve peak flavor and texture so every jar stays as zesty as the day you made it.
- Refrigerate promptly: Store the sealed jars in the coldest part of your fridge (not the door) to maintain a steady temperature.
- Keep sealed: Always ensure lids are tightly closed to prevent air exposure and moisture loss.
- Label and date: Mark your jars with the preparation date so you can track freshness and aim to enjoy them within 2 weeks.
- Check brine levels: If the vegetables rise above the liquid, add a little extra vinegar-water brine or use a clean weight to keep them submerged.
Frequently Asked Questions
Here are some quick answers to common queries about making and enjoying these Refrigerator Pickled Vegetables:
- Q: How long does it take to prepare and pickle these vegetables?
A: Active preparation takes about 15–20 minutes, including washing, slicing the vegetables, and simmering the brine until the sugar and salt dissolve. After packing the jars and pouring in the warm brine, you need to let the jars cool to room temperature and then refrigerate them for at least 24 hours before serving.
- Q: Can I use other vegetables or adjust the quantities?
A: Yes, you can substitute or add seasonal vegetables like green beans, cherry tomatoes, or asparagus. Try to slice new veggies to a similar thickness for even pickling, and pack the jars so all vegetables are submerged. If you increase the overall volume, prepare extra brine in the same 1:1 water-to-vinegar ratio to cover them fully.
- Q: Why do I need equal parts water and white vinegar?
A: Using a 1:1 ratio gives a balanced tangy flavor while maintaining a crisp texture. Vinegar provides the acidity needed for safe pickling, and diluting it with water prevents the vegetables from becoming overly sour or softened.
- Q: How can I ensure the vegetables stay fully submerged to prevent spoilage?
A: Pack the vegetables tightly in the jar and leave about ½ inch of headspace at the top. If needed, use a small fermentation weight or a clean glass disk to keep everything underwater. Any exposed pieces may develop mold or off-flavors, so consistent submersion is key.
- Q: How long will these pickled vegetables stay fresh in the refrigerator?
A: For best flavor and texture, consume your refrigerator pickles within two weeks. They will taste best after 48 hours when the spices and brine have fully penetrated the vegetables, but you can enjoy them as early as 24 hours after pickling.
- Q: How do I adjust the spice level or flavor profile?
A: To increase heat, add more red pepper flakes or a dash of hot paprika. For milder pickles, reduce or omit the red pepper flakes. You can also experiment with other whole spices—try adding a few coriander seeds, a bay leaf, or slices of fresh ginger for a different aromatic twist.
What Makes This Special
These Refrigerator Pickled Vegetables shine because they require no canning, deliver big flavor with minimal effort, and let you enjoy fresh, crunchy veggies all week long. The balanced 1:1 brine, aromatic garlic and dill, plus a hint of spice make every bite zesty and satisfying—and they’re endlessly customizable! Print this article and save it so you can revisit the recipe anytime. Have you tried these quick pickles? Drop your comments, questions, or feedback below—I’d love to hear how your pickling adventure turned out!
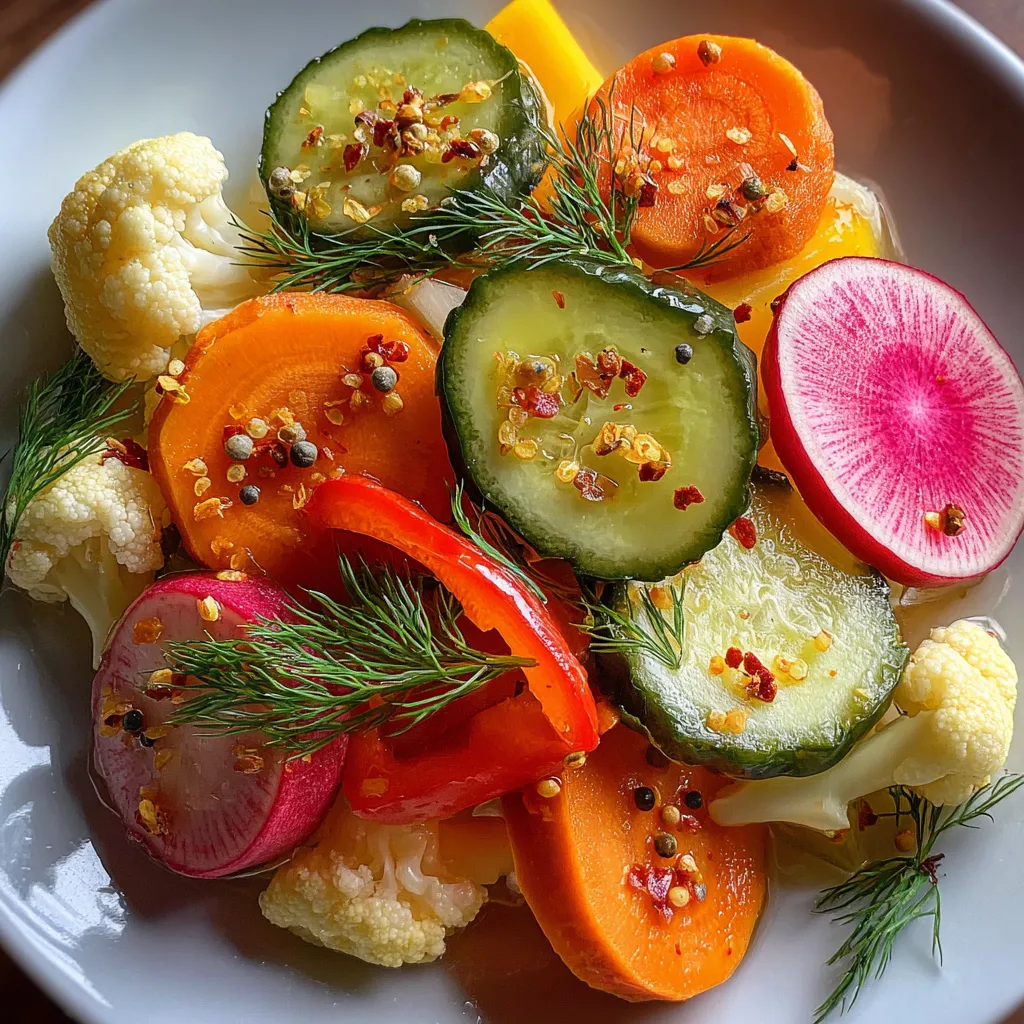

Refrigerator Pickled Vegetables
Description
Bright cucumbers, carrots, cauliflower and peppers soak up a zesty garlic-and-dill brine, offering a refreshing crunch in every bite. Ready in just one day and perfect for spicing up sandwiches, salads, or charcuterie.
Ingredients
Instructions
-
In a saucepan combine water, white vinegar, granulated sugar, and kosher salt and bring to a boil, stirring until sugar and salt dissolve.
-
Remove the brine from heat and let it cool slightly while you prepare the jars.
-
Pack cucumber slices, carrot slices, cauliflower florets, radish slices, bell pepper strips, sliced garlic, black peppercorns, mustard seeds, red pepper flakes, and fresh dill into clean glass jars.
-
Pour the warm brine over the vegetables, leaving about 1/2 inch of headspace at the top of each jar.
-
Seal the jars tightly with lids and let them cool to room temperature.
-
Transfer the jars to the refrigerator and let the vegetables pickle for at least 24 hours before serving.
-
Keep refrigerated and consume within 2 weeks for best flavor and texture.
Note
- Use equal parts water and vinegar for a balanced tang and crisp texture.
- Feel free to substitute or add seasonal vegetables like green beans or cherry tomatoes.
- Ensure all vegetables are fully submerged in brine to prevent spoilage.
- These pickles develop more flavor over the first 48 hours in the fridge.

