

Rose Pistachio Cheesecake Ice Cream is a creamy fusion of tangy cheesecake, delicate rose water, and crunchy pistachios swirled into dreamy homemade ice cream. This luscious frozen treat melts on your tongue, delivering floral elegance and nutty crunch in every scoop. Whether you’re hosting a fancy gathering or craving a special weekend snack, you’ll love how simple it is to churn up this delectable dessert—your taste buds will thank you!
Key Ingredients
Let’s gather everything you need to create this irresistible Rose Pistachio Cheesecake Ice Cream.
- 8 ounces cream cheese, softened: Provides the rich, tangy base that mimics cheesecake’s signature creaminess.
- 1 cup heavy cream: Whipped to stiff peaks for a light, airy texture that keeps the ice cream fluffy.
- 1 cup whole milk: Balances richness and helps achieve a smooth, scoopable consistency.
- 1/2 cup granulated sugar: Sweetens the base and contributes to a silky mouthfeel.
- 1/4 cup sweetened condensed milk: Adds extra creaminess and sweetness for that luscious cheesecake vibe.
- 2 tablespoons powdered sugar: Lightens the texture and boosts sweetness without weighing down the mixture.
- 1 teaspoon rose water: Infuses delicate floral notes that elevate this dessert to gourmet status.
- 1/2 teaspoon vanilla extract: Enhances depth of flavor and complements both floral and nutty elements.
- 1/2 cup pistachios, chopped: Offers a satisfying crunch and toasty nuttiness that contrasts the creamy base.
- 1/2 cup graham cracker crumbs: Echoes classic cheesecake crust, adding a buttery, crunchy layer in every spoonful.
- Pinch salt: Balances sweetness and brings out all the nuanced flavors.
How To Make Rose Pistachio Cheesecake Ice Cream
Creating this dreamy ice cream is all about building layers of flavor and texture, then letting your ice cream maker work its magic. You’ll start by whipping up a smooth cheesecake base, fold in billowy whipped cream for airiness, swirl in pistachios and graham crumbs for crunch, then churn until perfectly frozen. Follow these detailed steps to ensure every batch turns out luxuriously creamy with just the right floral kick.
1. Beat cream cheese and granulated sugar in a bowl until smooth and creamy.
2. Add sweetened condensed milk, powdered sugar, rose water, vanilla extract, and salt, then mix until fully combined and no streaks remain.
3. In a separate bowl whip heavy cream to stiff peaks using an electric mixer for a light, airy structure.
4. Gently fold the whipped cream into the cream cheese mixture until uniform in color and texture, taking care not to deflate the airiness.
5. Stir in chopped pistachios and graham cracker crumbs until evenly distributed throughout the mixture.
6. Pour the mixture into an ice cream maker and churn according to the manufacturer’s instructions for about 20–25 minutes.
7. Transfer the churned ice cream into a freezer-safe container and freeze for at least 4 hours or until firm.
Serving Suggestions
Once your Rose Pistachio Cheesecake Ice Cream is perfectly firm, it’s time to plate up and impress. These serving ideas add color, texture, and an extra touch of elegance to every scoop.
- Drizzle of Rose Syrup: Warm a little rose-scented syrup and lightly drizzle over each scoop to amplify that floral flair.
- Pistachio Garnish: Sprinkle extra chopped pistachios on top for added crunch and a vibrant green pop.
- Mini Cheesecake Bites: Serve alongside bite-sized cheesecake squares to echo the dessert’s signature flavors.
- Fresh Berries: Add a handful of raspberries or strawberries for a bright, tart contrast that balances the richness.
Tips For Perfect Rose Pistachio Cheesecake Ice Cream
Nailing this recipe is all about precision and quality ingredients. Here are some friendly pointers to make your life easier and your ice cream even more fabulous:
- Use high-quality rose water for the most authentic floral flavor.
- Taste and adjust sugar according to your preference for perfect sweetness.
- Store ice cream in an airtight container to minimize ice crystal formation.
- Let the ice cream sit at room temperature for 5 minutes before scooping for easier serving.
How To Store It
Proper storage keeps your ice cream fresh, creamy, and ready whenever a craving hits. Follow these simple methods to preserve its texture and flavor:
- Airtight Container: Transfer into a clean, airtight container and press plastic wrap directly on the surface before sealing to block air and prevent ice crystals.
- Stable Freezer Spot: Place in the coldest part of the freezer, away from the door, to maintain a consistent temperature.
- Label and Date: Write the date on the container so you enjoy it at peak quality within two weeks.
- Minimize Opening: Limit freezer door openings to avoid temperature swings that lead to crystal formation.
Frequently Asked Questions
Here are quick answers to the most common questions about making and storing this ice cream:
- How do I ensure the cream cheese mixture is smooth before folding in the whipped cream?
Make sure the cream cheese is at room temperature and beat it with the granulated sugar for several minutes until it turns silky and lump-free. Scrape down the sides of the bowl periodically to catch any pockets of unmixed cheese, then proceed to add the remaining ingredients for a fully smooth base.
- Can I make this recipe without an ice cream maker, and if so, what’s the best method?
Yes, pour the combined mixture into a shallow, freezer-safe dish, cover it tightly, and freeze for about 45 minutes. Then vigorously stir or whisk to break up ice crystals, return to the freezer, and repeat every 30 minutes two to three times until the ice cream is firm and creamy.
- What adjustments can I make if I prefer a stronger rose flavor?
Increase the rose water by ¼ teaspoon at a time, tasting after each addition. High-quality rose water is potent, so small increments are best to avoid overpowering the delicate cheesecake and pistachio notes.
- How do I prevent ice crystals from forming during storage?
Press a piece of plastic wrap directly onto the ice cream surface to block air exposure, then seal the container with an airtight lid. Store in the coldest part of the freezer and minimize temperature fluctuations by avoiding frequent openings.
- Is it possible to use low-fat dairy in this recipe, and what are the trade-offs?
You can substitute half-and-half for the heavy cream, but expect a softer texture and less rich mouthfeel. Low-fat dairy yields more ice crystals and a less indulgent consistency, so freezing time may be shorter but the final scoop won’t be as creamy.
- How long can I store the ice cream, and does it change in flavor over time?
Properly sealed, it stays best for up to two weeks. After that, subtle flavor and texture deterioration can occur—rose notes may fade and crystals may develop—so consume within this window for peak quality.
- What is the purpose of adding graham cracker crumbs, and can I use another crumb?
The crumbs add a slight crunch and a hint of buttery sweetness, echoing cheesecake crust. You can substitute digestive biscuit or vanilla wafer crumbs, but keep the total crumb amount at ½ cup to maintain the right texture balance.
What Makes This Special
This Rose Pistachio Cheesecake Ice Cream is special because it marries the tang of cheesecake with the romantic whisper of rose petals and the satisfying crunch of pistachios in one delightful scoop. It’s the kind of dessert that looks fancy but is surprisingly simple to whip up, perfect for impressing guests or treating yourself on a cozy night in. Feel free to print this recipe and save it for whenever you need a gourmet-inspired pick-me-up. If you give it a whirl, I’d love to hear how it turned out—drop a comment or question below!
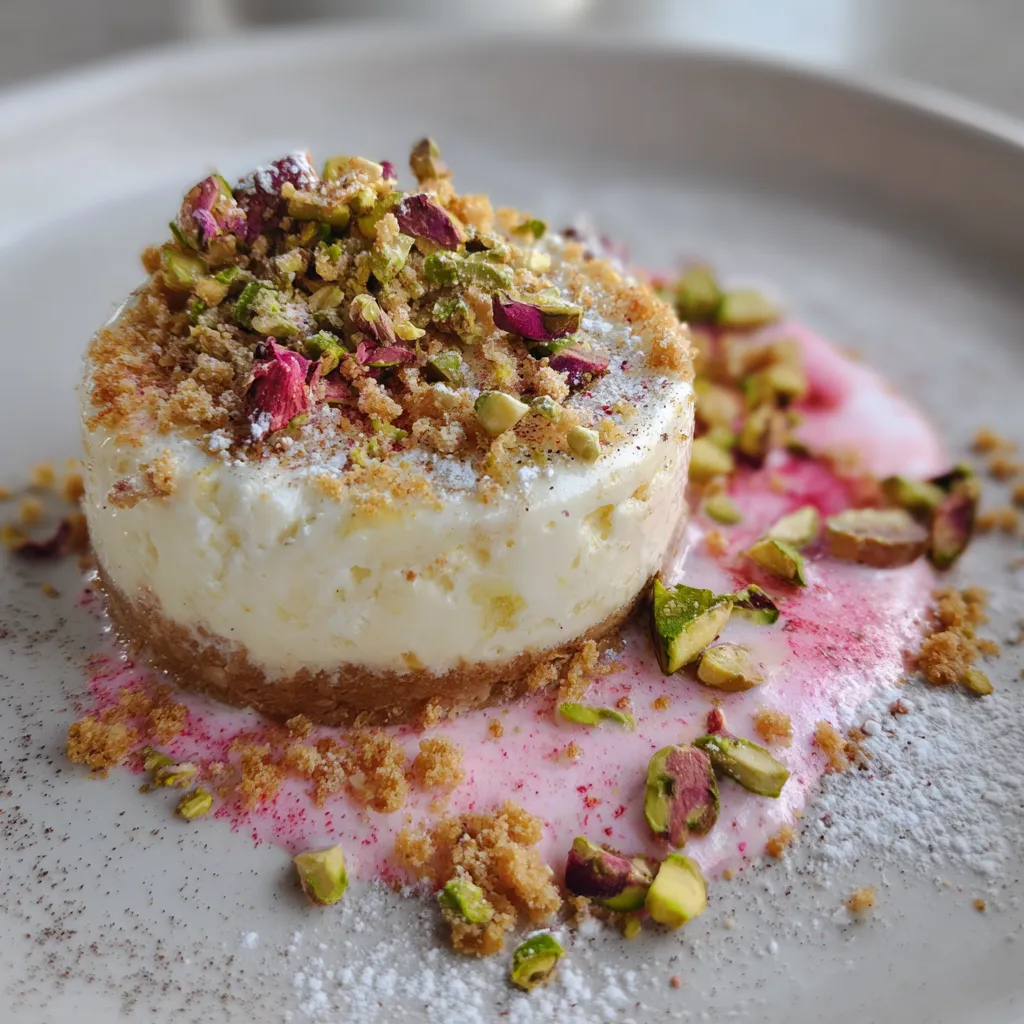

Rose Pistachio Cheesecake Ice Cream
Description
This ice cream blends velvety cream cheese, floral rose water, and nutty pistachios into a luscious frozen treat that melts on your tongue with every bite.
Ingredients
Instructions
-
Beat cream cheese and granulated sugar in a bowl until smooth and creamy.
-
Add sweetened condensed milk, powdered sugar, rose water, vanilla extract, and salt, then mix until fully combined.
-
In a separate bowl whip heavy cream to stiff peaks.
-
Gently fold the whipped cream into the cream cheese mixture until uniform in color and texture.
-
Stir in chopped pistachios and graham cracker crumbs until evenly distributed.
-
Pour the mixture into an ice cream maker and churn according to the manufacturer’s instructions.
-
Transfer the churned ice cream into a freezer-safe container and freeze for at least 4 hours or until firm.
Note
- Use high-quality rose water for the most authentic floral flavor.
- Taste and adjust sugar according to your preference.
- Store ice cream in an airtight container to minimize ice crystal formation.
- Let the ice cream sit at room temperature for 5 minutes before scooping for easier serving.

