

Nothing says cozy comfort quite like a batch of homemade bars that marry the sweetness of caramel with the crisp bite of tart apples. These Salted Caramel Apple Bars are like a warm hug for your taste buds, inviting you to dig in with abandon. Each square is a delightful mosaic of flavors—sweet brown sugar melds seamlessly with melted butter to create a tender crust, while crisp apple pieces provide pops of freshness. And just when you think it couldn’t get any better, a generous drizzle of gooey caramel sauce and a sprinkle of sea salt flakes elevate these bars into something truly unforgettable.
As the autumn air turns cooler, the scent of vanilla and cinnamon wafting through the kitchen becomes a daily ritual. Even if you’re brand new to baking, these bars are effortlessly accessible: you get to assemble a simple oat-and-flour dough, layer it with perfectly tossed apples, and let the oven do the rest of the work. In under an hour (20 minutes of prep, 35 minutes in the oven, and a quick 10-minute rest), you’ll have a tray of golden goodness that’s perfect for dessert, snack time, or even a midday pick-me-up. At around 320 calories per bar, they feel like a treat without tipping the scale into dessert-overload territory. Whether you’re feeding a crowd or savoring a quiet moment with a cup of tea, these bars deliver the perfect blend of sweet and salty in every bite.
KEY INGREDIENTS IN SALTED CARAMEL APPLE BARS
Every component in these bars plays a special role, layering flavor and texture to create a balanced dessert that’s as easy to make as it is to devour. From the foundation of a buttery crust to the finishing touch of flaky sea salt, here’s a closer look at what makes each ingredient shine.
- Unsalted butter
Provides a rich, tender base for the dough without any competing flavors. Melting the butter ensures a uniform mixture and helps bind the dry ingredients.
- Brown sugar
Contributes deep molasses notes and moisture, resulting in bars that are soft and chewy, with a caramel-like undertone.
- Granulated sugar
Balances the richness of the brown sugar and helps the crust achieve a light crispness around the edges.
- Vanilla extract
Lends a warm, aromatic sweetness that enhances both the apple layer and the caramel drizzle.
- All-purpose flour
Creates the structural backbone of the crust and topping, absorbing moisture while remaining tender.
- Baking soda
Acts as a gentle leavening agent, giving the crust a slight lift and preventing it from becoming too dense.
- Salt
Amplifies all the sweet flavors and ensures the bars never taste flat or one-dimensional.
- Old-fashioned oats
Add a heartiness and chew that contrasts beautifully with the tender apple filling.
- Ground cinnamon
Infuses a warm, spicy note that complements both the apples and caramel.
- Apples
Offer fresh, juicy texture and tang. Granny Smith or Honeycrisp are ideal for keeping a firm bite.
- Lemon juice
Prevents apple slices from browning and adds a subtle zesty brightness.
- Caramel sauce
Drizzled in and on top for lush, gooey pockets of sweetness that tie everything together.
- Sea salt flakes
Sprinkled at the end for a delightful crunch and a pop of savory contrast.
HOW TO MAKE SALTED CARAMEL APPLE BARS
Baking these bars feels like a friendly chat in the kitchen: straightforward steps, no complicated techniques, but plenty of delicious rewards. Let’s walk through each stage to ensure your bars come out perfectly every time.
1. Preheat your oven to 350°F (175°C). Line a 9×13-inch baking pan with parchment paper, leaving an overhang on the sides to help lift the finished bars out effortlessly.
2. In a large mixing bowl, combine the melted butter, brown sugar, and granulated sugar. Stir until the mixture is smooth and free of lumps. Whisk in the vanilla extract until fragrant.
3. In a separate bowl, whisk together the all-purpose flour, baking soda, and salt. Gradually fold these dry ingredients into the wet mixture, stirring just until incorporated to avoid overmixing.
4. Stir in the old-fashioned oats and ground cinnamon until the dough comes together. Reserve about 1 cup of this mixture for the crunchy topping.
5. Press the remaining dough evenly into the bottom of the prepared pan, ensuring it reaches all corners and forms a uniform layer.
6. In another bowl, toss the diced apples with the lemon juice to prevent browning. Spread the lemon-kissed apple pieces over the dough in an even layer.
7. Drizzle the caramel sauce over the apple layer, letting it cascade in sweet ribbons. Sprinkle the reserved oat mixture evenly on top to create a crumbly crust.
8. Bake for 30–35 minutes, or until the edges turn golden brown and the topping develops a slight crisp.
9. Remove from the oven and allow the bars to cool in the pan for about 10 minutes. Use the parchment overhang to lift the bars out gently. Drizzle with additional caramel sauce and sprinkle with sea salt flakes.
10. Let the bars cool completely before slicing into squares for serving.
SERVING SUGGESTIONS FOR SALTED CARAMEL APPLE BARS
There’s nothing quite like watching friends’ eyes light up when you bring out a platter of these bars. Whether you’re hosting a cozy get-together or enjoying a quiet evening in, here are a few ideas to elevate your serving experience:
- Serve each bar warm with a generous scoop of vanilla ice cream on top. The melting ice cream mingles with the caramel for an irresistible, gooey finish.
- Pair these bars with a steaming mug of spiced apple cider or pumpkin latte, letting the fruity and fall-inspired flavors complement the sweet-and-salty profile.
- Sprinkle a handful of toasted chopped nuts (walnuts or pecans) over the bars just before serving for an extra layer of crunch and nutty depth.
- Dust the cooled bars lightly with powdered sugar and arrange fresh berries (like raspberries or blackberries) on the side for a pop of color and tart contrast.
HOW TO STORE SALTED CARAMEL APPLE BARS
Keeping these bars tasting fresh and vibrant is simple, as long as you choose the right method for your timeline. Whether you’re saving leftovers for later in the week or planning ahead for a special event, the strategies below will keep your bars moist, tender, and bursting with flavor.
- Room Temperature Storage: Once cooled completely, place the bars in an airtight container at room temperature. They’ll stay fresh for up to 2 days, perfect for grabbing a quick snack without any fuss.
- Refrigeration: For longer storage, layer the bars between sheets of parchment paper in an airtight container and chill in the fridge for up to 3 days. Chilling firms up the caramel and makes slicing easier.
- Freezing: Wrap individual bars tightly in plastic wrap or aluminum foil, then store in a freezer-safe bag for up to 1 month. Thaw overnight in the refrigerator before enjoying.
- Reheating: Warm a single serving in the microwave for 10–15 seconds to regain that fresh-baked warmth, or pop the bars in a 300°F (150°C) oven for 5–7 minutes until heated through and crisp on top.
CONCLUSION
These Salted Caramel Apple Bars are the ultimate crowd-pleaser for any occasion—an easy beginner-friendly dessert that delivers on flavor, texture, and nostalgia. From the buttery oat crust to the tender apple layer and luscious caramel drizzle, each bite offers a harmonious dance of sweet, tart, and salty notes. With just 20 minutes of preparation, 35 minutes of baking, and a quick 10-minute rest, you can transform simple pantry staples into a decadent treat that feels like it came straight from a bakery. Don’t forget to jot down the prep time, cooking time, rest time, and even the calorie count (about 320 calories per bar) if you’re keeping track. Feel free to print this article and save it in your recipe binder for repeated fall festivities or spontaneous gatherings—everything you need is right here, from key ingredients to step-by-step instructions and handy storage tips. You’ll also find a helpful FAQ section below to troubleshoot any baking questions you might have.
I’d love to hear how your Salted Caramel Apple Bars turn out, or any twists you tried—maybe swapping in pears or adding chopped pecans? Please share your comments, ask questions, or let me know if you need any clarification as you bake. Your feedback not only helps me improve but also brings our cooking community closer together. Happy baking, and may every bite be as sweet and satisfying as the last!
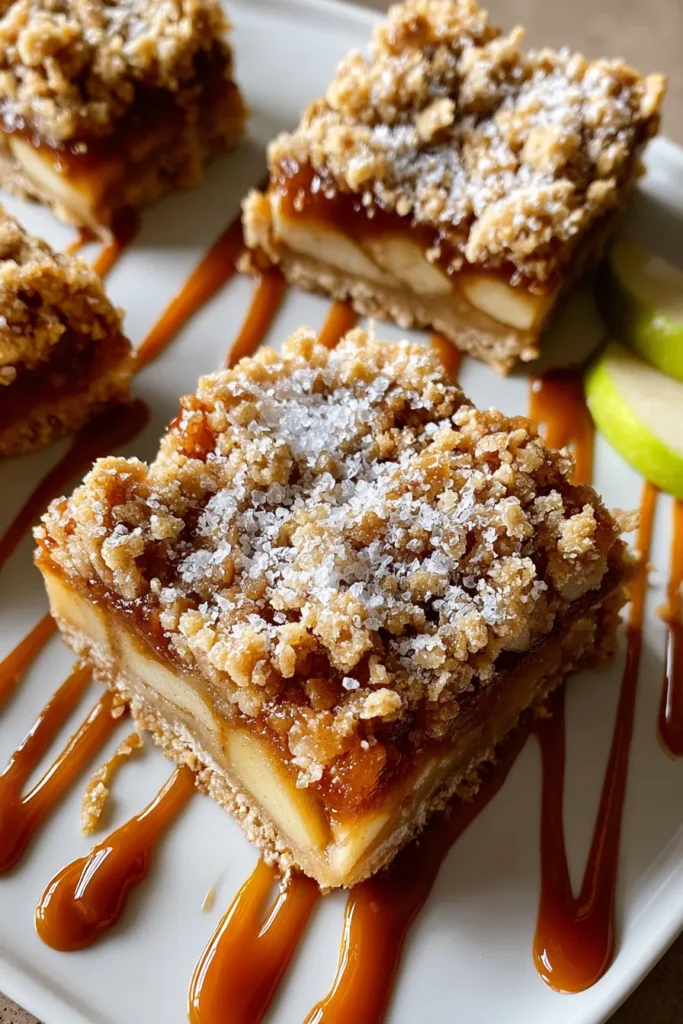

Salted Caramel Apple Bars
Description
These Salted Caramel Apple Bars combine juicy apples, rich caramel, and a crumbly oat topping for a delightful treat that balances sweetness with a hint of salt.
Ingredients
Instructions
-
Preheat your oven to 350°F (175°C). Line a 9x13-inch baking pan with parchment paper, allowing for some overhang on the sides.
-
In a large mixing bowl, combine the melted butter, brown sugar, and granulated sugar. Stir in the vanilla extract until the mixture is smooth.
-
In a separate bowl, whisk together the flour, baking soda, and salt. Gradually add the dry ingredients to the wet mixture until just combined.
-
Stir in the oats and cinnamon, mixing until the dough forms. Set aside about 1 cup of this mixture for the topping.
-
Press the remaining dough evenly into the prepared baking pan, ensuring it reaches all edges.
-
In another bowl, toss the diced apples with lemon juice to prevent browning. Spread the apples over the dough in an even layer.
-
Drizzle the caramel sauce over the apple layer, then sprinkle the reserved oat mixture on top.
-
Bake in the preheated oven for 30-35 minutes or until the edges are golden brown and the top is slightly crisp.
-
Remove from the oven and allow to cool in the pan for about 10 minutes. Then, use the parchment overhang to lift the bars out of the pan. Drizzle with additional caramel sauce and sprinkle with sea salt flakes.
-
Let cool completely before cutting into bars for serving.
Note
- Granny Smith or Honeycrisp apples work best for this recipe due to their tartness and firm texture.
- If you like your bars extra sweet, consider adding a drizzle of caramel sauce as well as a scoop of vanilla ice cream on top.
- For an added crunch, try mixing some chopped walnuts or pecans into the topping mixture.
- These bars can be stored in an airtight container for up to 3 days. To maintain freshness, keep them in the refrigerator.
- Experiment with different types of apples or even pears for a unique twist to the recipe.

