

There’s something enchanting about a dessert that combines simplicity with show-stopping flavor. When sweet and salty notes mingle just right, you get more than a treat – you get an experience. This salted caramel dessert brings together a buttery base and rich, homemade caramel that’s kissed with sea salt, creating a harmony of tastes that feels indulgent without being overly complicated. With just a handful of pantry staples and a few easy steps, you can go from mixing bowls to tasting spoon in under an hour, making this recipe a perfect weekend project or an impressive end to any dinner party. Even for home cooks who consider themselves beginners, the process feels rewarding at every turn, from stirring sugar until it reaches that perfect amber hue to watching the gooey caramel swirl over the golden crust.
Because the balance of textures is everything here, you’ll notice how the crisp edges of the buttery base give way to a luscious caramel layer that settles into your tastebuds with every bite. Even if you’ve never tackled candy-making at home, this recipe breaks it down so that each stage feels achievable and fun. And after you let it rest for about 30 minutes, the flavors mature and deepen, giving you those satisfyingly complex notes that make you pause, savor, and maybe even close your eyes in appreciation. Whether you slice it into neat little squares for a family gathering or serve it warm with ice cream for a solo treat, this dessert proves that easy baking can still feel luxurious, so let’s dive in and get started on a sweet adventure.
KEY INGREDIENTS IN SALTED CARAMEL DESSERT
Before you begin whisking, melting, or spreading layers of goodness, it helps to understand the key players in this recipe. Each ingredient brings its own unique magic, contributing to the overall texture, flavor, and structure of our salted caramel dessert. From the butter that provides a tender crumb to the sea salt that highlights the sweetness, here’s a snapshot of what you’ll need:
- Granulated sugar
Provides the foundation for the homemade caramel, caramelizing into a deep amber hue and delivering that classic toffee-like sweetness.
- Unsalted butter (room temperature)
Cubed and added to the hot sugar to create a rich, velvety caramel while ensuring full control over the salt content.
- Heavy cream
Adds creaminess and a silky texture to the caramel once whisked in, turning a solidified sugar mass into a smooth, pourable sauce.
- Sea salt
Balances the sweetness by introducing delicate briny bites, elevating the overall flavor profile with a hint of savory contrast.
- All-purpose flour
Forms the structure of the buttery base, giving the dessert its tender yet sturdy foundation that holds up under the weight of the caramel.
- Unsalted butter (melted and cooled)
Blends with brown sugar to create a moist, flavorful base that browns evenly and develops a satisfying crumb.
- Brown sugar
Contributes a deep molasses note to the base, intensifying both color and richness in the finished squares.
- Egg
Binds the base ingredients together, ensuring a cohesive dough that sets properly in the oven.
- Vanilla extract
Infuses the base with aromatic warmth and rounds out the deep caramel flavors with subtle floral and sweet undertones.
- Baking powder
Lightly leavens the base, preventing it from becoming too dense while keeping the texture tender and melt-in-your-mouth.
HOW TO MAKE SALTED CARAMEL DESSERT
Now that we’ve met our ingredients, it’s time to roll up our sleeves and transform them into something downright irresistible. The technique is straightforward, designed for both novice and seasoned bakers, and each step leads to that glorious moment when the caramel meets the buttery crust.
1. Begin by preparing the salted caramel. In a medium saucepan over medium heat, melt the granulated sugar, stirring constantly until it turns a deep amber color, at which point those rich, nutty notes begin to emerge.
2. Remove from heat and add the cubed butter, stirring until completely melted and seamlessly combined, creating a velvety toffee base.
3. Slowly drizzle in the heavy cream while whisking constantly until smooth and glossy. Be cautious, as the mixture will bubble vigorously and rise in the pan.
4. Stir in the sea salt to taste, then set the caramel aside on a heatproof surface to cool, giving it enough time to thicken slightly.
5. Preheat your oven to 350°F (175°C) and prepare an 8×8-inch baking dish by greasing it lightly.
6. In a mixing bowl, whisk together the all-purpose flour and baking powder until evenly distributed.
7. In another large bowl, combine the melted butter and brown sugar, stirring until well blended and smooth.
8. Add the egg and vanilla extract to the butter-sugar mixture, mixing thoroughly until the batter loosens and turns glossy.
9. Gradually add the flour mixture to the wet ingredients, stirring just until a cohesive dough forms without overworking it.
10. Press the dough evenly into the greased 8×8-inch baking dish, ensuring uniform thickness from edge to edge.
11. Pour the cooled salted caramel over the dough and spread evenly with a spatula so every corner is coated.
12. Bake in the preheated oven for 20-25 minutes or until the edges are slightly golden and the caramel peeks out around the crust.
13. Allow the dessert to cool completely before cutting into squares to serve, letting each piece set perfectly.
SERVING SUGGESTIONS FOR SALTED CARAMEL DESSERT
When it comes to serving this salted caramel dessert, presentation and pairing can elevate a simple square into a memorable finale. Whether you’re hosting a casual get-together or treating yourself to a luxurious afternoon snack, there are a variety of ways to boost the flavor, texture, and visual appeal. From temperature contrasts to added garnishes, these suggestions will help you serve each piece with style and heart.
- Warm with a scoop of vanilla ice cream
Serve the bars gently warmed so the caramel becomes gooey again, and top each square with a small scoop of premium vanilla ice cream for a delightful contrast of temperatures and textures.
- Drizzle of extra homemade caramel
Warm leftover caramel slightly and drizzle it artistically over cut bars, adding an extra layer of shine and that sweet-savory punch that caramel enthusiasts adore.
- Sprinkled with toasted nuts
Scatter toasted pecans or walnuts over the caramel layer before serving to introduce a crunchy element and an earthy, nutty accent that plays beautifully with the sweet base.
- Paired with coffee or tea
Offer the dessert alongside a freshly brewed espresso or a cup of black tea, where the slight bitterness of the drink highlights the dessert’s sweetness and creates a harmonious balance.
HOW TO STORE SALTED CARAMEL DESSERT
Preserving the vibrant flavors and textures of this salted caramel dessert is almost as important as making it. Whether you’re saving leftovers for tomorrow’s coffee break or prepping treats for a gathering later in the week, proper storage ensures each square remains as delightful as the day it was baked. Here are some methods to keep your dessert fresh and decadent:
- Airtight container at room temperature
Once completely cooled, place the bars in a single layer or separated by parchment paper in an airtight container. Store at room temperature for up to two days to maintain the soft, chewy texture of the caramel and crust.
- Refrigeration for extended freshness
For storage up to five days, line a container with parchment, arrange the cooled squares, and cover tightly. The cool environment will prolong shelf life and keep the caramel from becoming overly sticky.
- Freezing for long-term storage
Individually wrap each square in plastic wrap and place them in a freezer-safe bag, removing excess air. Freeze for up to one month, then thaw at room temperature before enjoying to restore that perfect chewy-yet-creamy consistency.
- Separate ingredient storage
If you anticipate serving within a day but want to simplify assembly, store the baked base and cooled caramel separately in airtight containers. Assemble and bake or warm before serving to deliver fresh flavors on demand.
CONCLUSION
This salted caramel dessert brings together the most irresistible elements of home baking: a tender buttery base, a gooey homemade caramel layer, and a perfect sprinkle of sea salt to tie it all together. With straightforward steps designed for a beginner level and a total timeline—including 20 minutes of prep, 25 minutes of bake time, and 30 minutes of rest—this recipe slots seamlessly into any weeknight or weekend schedule. Each square offers around 350 calories, making it a decadent treat that you can feel good about sharing at your next gathering or savoring as a special mid-day reward. The combination of textures—from the crisp edges to the soft, chewy center—ensures that every bite is an adventure, whether you’re just learning how to bake or you’re a seasoned pro looking for a crowd-pleasing dessert.
Feel free to print this article and tuck it into your recipe binder, or simply save it for whenever that sweet craving hits. You’ll also find a FAQ below to answer any questions you might have about ingredient swaps, storage tweaks, or troubleshooting the perfect caramel consistency. If you try this recipe or have any thoughts, questions, or feedback, please let me know in the comments. Your experiences and tips not only help refine this recipe but also create a warm community of home bakers eager to learn from one another. Happy baking!
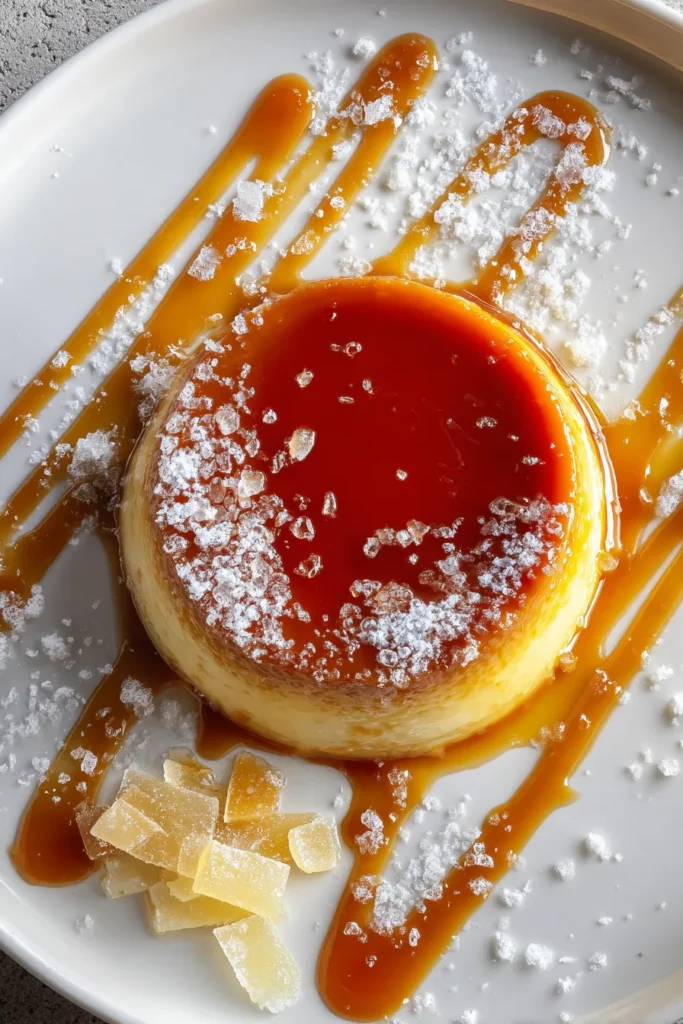

Salted Caramel Dessert
Description
This decadent salted caramel dessert features a rich, buttery base topped with luscious caramel and a hint of sea salt, creating a heavenly combination of flavors and textures.
Ingredients
Instructions
-
Begin by preparing the salted caramel. In a medium saucepan over medium heat, melt the granulated sugar. Stir constantly until it turns a deep amber color.
-
Remove the saucepan from heat and add the cubed butter. Stir until completely melted and combined.
-
Slowly drizzle in the heavy cream while whisking constantly until smooth. Be cautious as the mixture will bubble vigorously.
-
Stir in the sea salt and set the caramel aside to cool.
-
Preheat your oven to 350°F (175°C).
-
In a mixing bowl, whisk together flour and baking powder.
-
In another large bowl, combine melted butter and brown sugar until blended.
-
Add the egg and vanilla extract to the butter-sugar mixture and mix well.
-
Gradually add the flour mixture to the wet ingredients, stirring until a dough forms.
-
Press the dough evenly into a greased 8x8-inch baking dish.
-
Pour the cooled salted caramel over the dough and spread evenly.
-
Bake in the preheated oven for 20-25 minutes or until the edges are slightly golden.
-
Allow the dessert to cool completely before cutting into squares to serve.
Note
- You can adjust the amount of sea salt to suit your taste preference.
- Store any leftover dessert in an airtight container to keep it fresh.
- This dessert pairs wonderfully with vanilla ice cream for an extra indulgent treat.
- For a nutty variation, sprinkle chopped pecans or walnuts over the salted caramel before baking.

