

Stuffed Bell Peppers bring vibrant bell peppers packed with juicy beef, fluffy rice, and aromatic herbs topped with melted cheddar for a comforting, flavor-packed meal. Sweet skins give way to a hearty filling of golden rice, seasoned beef, and tangy tomato sauce, all crowned with bubbling cheddar that melts into every bite. You’ll love how easy this beginner-friendly recipe is and how it transforms simple ingredients into a family favorite, dig in and enjoy!
Key Ingredients
Before we get cooking, let's look at the star players in Stuffed Bell Peppers and why each one matters.
- 4 medium bell peppers: Sweet, sturdy vessels that hold the flavorful filling and soften to tender perfection when baked.
- 1 tablespoon olive oil: Light oil that helps sauté the onion and garlic without overpowering the other flavors.
- 1 small onion, diced: Adds a savory foundation with just the right amount of sweetness once softened.
- 2 cloves garlic, minced: Delivers aromatic depth and a touch of pungent warmth to each bite.
- 400 g ground beef: Provides juicy protein that browns beautifully and carries the seasonings.
- 1 cup cooked rice: Fluffy grain that bulks up the filling and soaks up the tomato juices.
- 400 g diced tomatoes: Brings bright acidity and moisture to keep the mixture juicy.
- 2 tablespoons tomato paste: Intensifies the tomato flavor and helps bind the filling.
- 1 teaspoon dried oregano: Infuses an earthy, slightly peppery undertone.
- 1 teaspoon dried basil: Offers a sweet, herbal note that complements the tomato.
- 1 teaspoon salt: Enhances all the natural flavors.
- 1/2 teaspoon black pepper: Adds a subtle heat to balance the dish.
- 1/2 cup shredded cheddar cheese: Melts into a golden, gooey topping.
- 2 tablespoons chopped fresh parsley: Brightens the final dish with a pop of freshness.
How To Make Stuffed Bell Peppers
Working through these instructions will have your oven doing most of the heavy lifting, while you prepare a savory filling that blends beef, rice, tomatoes, and herbs into every pepper. Start by preheating and prepping the peppers, then move on to sautéing aromatics and browning your meat. Combine everything with cooked rice and let it simmer before stuffing each shell. A quick bake under foil locks in moisture, and a final few minutes without foil gives you that perfect golden cheese finish.
1. Preheat your oven to 190 °C (375 °F), allowing it to reach the correct temperature so your peppers cook evenly.
2. Slice off the tops of the bell peppers and remove the seeds and membranes, creating a hollow shell for the filling.
3. Heat the olive oil in a skillet over medium heat, then add the onion and garlic and sauté until the onion becomes translucent and fragrant.
4. Add the ground beef and cook until browned, breaking it up with a spoon to ensure even cooking and no large chunks remain.
5. Stir in the cooked rice, diced tomatoes, tomato paste, oregano, basil, salt, and pepper; simmer for 5 minutes so the flavors meld and the mixture thickens slightly.
6. Spoon the filling evenly into each bell pepper and place them upright in a greased baking dish to keep them steady during baking.
7. Sprinkle the shredded cheese on top of each stuffed pepper, covering the filling completely for that gooey finish.
8. Cover the dish with foil and bake for 25 minutes to steam the peppers through, then remove the foil and bake for an additional 5 minutes to brown the cheese.
9. Remove from the oven and let cool for a few minutes before serving to allow the filling to set.
10. Garnish with chopped fresh parsley for a fresh burst of color and flavor before digging in.
Serving Suggestions
These Stuffed Bell Peppers are a meal in themselves, but pairing them thoughtfully can elevate the experience. Whether you want a light side, a fresh contrast, or extra comfort, consider these ideas to round out your plate. From crisp salads to warm dips, each suggestion adds balance and flair, making your dinner feel even more special and restaurant-worthy.
- Fresh Green Salad: Toss mixed greens with a simple vinaigrette of olive oil, lemon juice, salt, and pepper to cut through the richness.
- Garlic Bread Slices: Warm slices of crusty bread brushed with garlic butter and toasted until golden for a satisfying crunch.
- Zesty Yogurt Dip: Combine plain yogurt, a squeeze of lemon, chopped herbs, and a pinch of salt for a cooling side.
- Roasted Vegetable Medley: Oven-roast seasonal veggies like zucchini, carrots, and cherry tomatoes with olive oil and herbs to add colorful variety.
Tips For Perfect Stuffed Bell Peppers
With a few tricks up your sleeve, you’ll master these Stuffed Bell Peppers in no time. From swapping proteins to prepping ahead, these tips ensure you get the best texture and flavor every single bake. Whether you’re feeding a crowd or meal-prepping for the week, these suggestions make the process smoother and the end result even more delicious. Read on for practical ways to customize and streamline your cooking so you can impress your family and friends effortlessly.
- You can substitute ground beef with ground turkey or chicken for a lighter version—just watch the cook time since white meat can dry out faster.
- Bell peppers can be prepared a day ahead by slicing off the tops and removing seeds, then storing them in the refrigerator until you’re ready to fill and bake.
- For a vegetarian option, replace meat with cooked lentils or black beans and swap the cheddar for plant-based cheese to keep things satisfying.
- Leftovers can be stored in an airtight container in the refrigerator for up to 3 days, making these peppers perfect for quick lunches or dinners.
How To Store It
Preserving the flavor and texture of your Stuffed Bell Peppers ensures you can enjoy them throughout the week. Whether you’re refrigerating for tomorrow’s lunch or stashing extras in the freezer, the right storage method keeps everything fresh and tasty. Follow these guidelines to maintain that perfect balance of tender peppers and juicy filling, so you can reap the benefits of this hearty meal long after the oven cools.
- Store in an airtight container in the refrigerator for up to 3 days to maintain moisture without sogginess.
- Reheat in a preheated 175 °C (350 °F) oven, covered with foil for 10–15 minutes until warmed through, or microwave individual portions for 2–3 minutes.
- For longer storage, freeze assembled peppers (without baking) or leftover cooked peppers in freezer-safe containers for up to 2 months.
- Thaw overnight in the refrigerator before reheating in the oven as directed to preserve texture and flavor.
Frequently Asked Questions
Here are answers to make your pepper-stuffing journey even smoother:
- Q: How long does it take to prepare and cook the stuffed bell peppers?
A: It takes about 15 minutes to prepare the ingredients—washing and coring the peppers, chopping the onion and garlic, and gathering spices—and about 30 minutes to cook. That includes 5 minutes sautéing, 5 minutes simmering the filling, and 25 minutes covered baking plus 5 minutes uncovered to brown the cheese, for a total of around 45 minutes.
- Q: Can I prepare the peppers ahead of time?
A: Yes. After slicing off the tops and removing seeds and membranes, you can store the hollowed peppers in an airtight container or covered baking dish in the refrigerator for up to 24 hours before filling and baking.
- Q: What are some good substitutions for ground beef in this recipe?
A: You can substitute ground beef with an equal amount of ground turkey or ground chicken for a lighter version. For a vegetarian twist, replace the meat with cooked lentils or black beans, and use plant-based or extra-shredded cheese.
- Q: How should I store and reheat leftovers?
A: Store leftovers in an airtight container in the refrigerator for up to 3 days. To reheat, place peppers in a baking dish, cover lightly with foil, and bake in a preheated 175 °C (350 °F) oven for 10–15 minutes until heated through. You can also microwave individual portions for 2–3 minutes.
- Q: Can I freeze the stuffed bell peppers?
A: Yes. Assemble and fill the peppers, then wrap the baking dish tightly with plastic wrap and foil or transfer individual peppers to freezer-safe containers. Freeze for up to 2 months. Thaw overnight in the refrigerator before baking as directed.
- Q: How can I ensure the peppers cook evenly in the oven?
A: Choose bell peppers of similar size and shape so they stand upright evenly. Cut the bottoms flat if needed. Covering the dish with foil traps steam and helps cook the peppers through before browning the cheese on top.
- Q: What variations can I try to change up the flavor?
A: Stir in a teaspoon of chili powder or smoked paprika for heat, add a handful of chopped spinach or zucchini for extra veggies, or swap cheddar for mozzarella or pepper jack cheese. A splash of Worcestershire sauce or soy sauce in the filling can also boost umami.
What Makes This Special
Stuffed Bell Peppers work because of their perfect harmony of textures – the tender pepper shell, savory beef-rice filling, and ooey-gooey cheddar top all come together in a bite that’s comforting and bright at the same time. The blend of aromatic herbs and tangy tomatoes keeps each mouthful exciting, while the colorful presentation makes any weeknight feel like a celebration. Go ahead, print this recipe, bookmark it, or scribble notes in the margins and share your results and questions below. I can’t wait to hear how these little flavor boats sail into your dinner rotation!
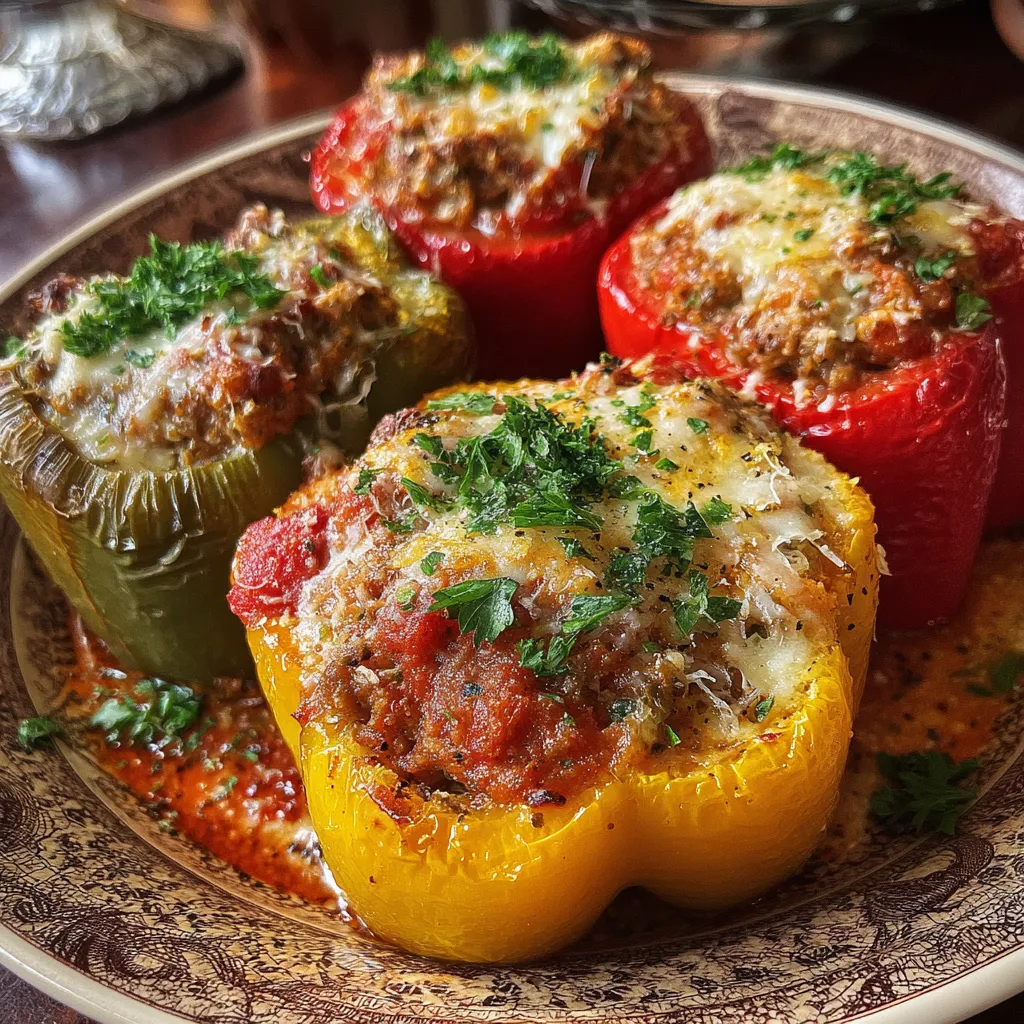

Stuffed Bell Peppers
Description
Sweet pepper skins give way to a hearty filling of golden rice, seasoned beef, and tangy tomato sauce, all crowned with bubbling cheddar that melts into every bite.
Ingredients
Instructions
-
Preheat oven to 190 °C (375 °F).
-
Slice off the tops of the bell peppers and remove the seeds and membranes.
-
Heat the olive oil in a skillet over medium heat, then add the onion and garlic and sauté until softened.
-
Add the ground beef and cook until browned, breaking it up with a spoon.
-
Stir in the cooked rice, diced tomatoes, tomato paste, oregano, basil, salt, and pepper; simmer for 5 minutes.
-
Spoon the filling evenly into each bell pepper and place them upright in a baking dish.
-
Sprinkle the shredded cheese on top of each stuffed pepper.
-
Cover the dish with foil and bake for 25 minutes, then remove the foil and bake for an additional 5 minutes to brown the cheese.
-
Remove from the oven and let cool for a few minutes before serving.
-
Garnish with chopped fresh parsley.
Note
- You can substitute ground beef with ground turkey or chicken for a lighter version
- Bell peppers can be prepared a day ahead and stored in the refrigerator before baking
- For a vegetarian option, replace meat with cooked lentils or black beans and use plant-based cheese
- Leftovers can be stored in an airtight container in the refrigerator for up to 3 days

