

Sweet & Tart Rhubarb Dream Bars are a delightful treat where tangy rhubarb shines through a buttery oat crust topped with crisp golden crumbs. This beginner-friendly dessert strikes the perfect balance of sweet and zesty, making it an ideal bake for sunny afternoons or cozy nights in. Grab your apron and prepare to fall in love with these lively fruit bars!
Key Ingredients
Before diving in, let’s meet the stars of this recipe and see how each one contributes to our Sweet & Tart Rhubarb Dream Bars:
- 1 1/2 cups all-purpose flour: Provides structure for the crumbly oat crust.
- 1 cup old-fashioned oats: Adds hearty texture and a rustic chew to the streusel.
- 1/2 cup granulated sugar: Sweetens the crust and balances the tart rhubarb.
- 1/2 cup packed brown sugar: Brings moist richness and a hint of caramel flavor.
- 1/2 teaspoon salt: Enhances all the flavors in the dough.
- 1/2 teaspoon baking powder: Gives a slight lift and lightness to the base.
- 1/2 cup unsalted butter, melted: Binds the crumbs and adds decadent richness.
- 3 cups chopped rhubarb: Delivers that signature tangy fruit filling.
- 3/4 cup granulated sugar: Sweetens the rhubarb and blends with the tartness.
- 2 tablespoons cornstarch: Thickens the fruit juices for a perfect set.
- 1 tablespoon fresh lemon juice: Brightens the filling with citrusy zing.
- 1 teaspoon vanilla extract: Rounds out the filling with warm, sweet notes.
- 1/4 teaspoon salt: Balances and deepens the rhubarb’s tangy flavor.
How To Make Sweet & Tart Rhubarb Dream Bars
These bars come together in two main parts: a buttery oat crust and a tangy rhubarb filling, all topped with golden crumbs that bake to crisp perfection. You’ll start by making a coarse streusel, baking a quick crust, whipping up the zesty filling, then layering everything and baking again until bubbly and beautifully golden.
1. Preheat and prepare: Preheat the oven to 350°F (175°C) and line a 9×13-inch baking pan with parchment paper, letting the excess hang over the edges for easy removal.
2. Combine dry crust ingredients: In a large bowl, whisk together the flour, oats, 1/2 cup granulated sugar, brown sugar, salt, and baking powder until evenly distributed.
3. Incorporate butter: Pour the melted butter over the dry mix and stir until the mixture forms coarse crumbs that hold together when pressed.
4. Divide crumb mixture: Scoop out one-third of the crumb blend and set aside for the topping. Firmly press the remaining crumbs into the bottom of the prepared pan to create an even crust.
5. Par-bake the crust: Bake the crust for 12 minutes, or until it’s lightly golden along the edges.
6. Mix the filling: While the crust bakes, toss together the chopped rhubarb, 3/4 cup granulated sugar, cornstarch, lemon juice, vanilla extract, and 1/4 teaspoon salt in a separate bowl until well coated.
7. Layer the filling: Spread the rhubarb mixture in an even layer over the hot crust, using a spatula to distribute it smoothly.
8. Add the topping: Sprinkle the reserved crumbs evenly over the rhubarb layer, covering the fruit completely.
9. Final bake: Return the pan to the oven and bake for 25 to 30 minutes, or until the topping is deep golden and the filling is bubbling at the edges.
10. Cool and slice: Let the bars cool completely in the pan. Use the parchment paper overhang to lift them out, then slice into squares once firm.
Serving Suggestions
These bars are as versatile as they are delicious. Whether you’re entertaining or indulging solo, here are four fun ways to serve them perfectly:
- Warm with whipped cream: Gently reheat individual bars and top with a cloud of fresh whipped cream for an extra-indulgent treat.
- A la mode: Serve slightly cooled bars alongside a scoop of vanilla ice cream, letting the cream melt into the tangy rhubarb.
- Drizzled honey glaze: Whisk a spoonful of honey with a splash of lemon juice and drizzle it over each bar for added shine and sweetness.
- Mint garnish: Add a sprig of fresh mint for a pop of color and a refreshing contrast to the sweet-tart flavors.
Tips For Perfect Sweet & Tart Rhubarb Dream Bars
Mastering these Dream Bars is all about balancing textures and flavors. With a few simple tweaks, you’ll take each batch from great to unforgettable—let’s dive into some pro pointers!
- Use fresh or frozen rhubarb; if using frozen, thaw and drain any excess liquid.
- For extra crunch, stir 1/4 cup of chopped nuts such as almonds or pecans into the topping.
- Store the bars in an airtight container at room temperature for up to 3 days.
- These bars pair perfectly with a dollop of whipped cream or a scoop of vanilla ice cream.
How To Store It
Keeping your Sweet & Tart Rhubarb Dream Bars fresh is easy—just choose the method that suits your timeline and enjoy later without sacrificing flavor or texture.
- Room temperature: Place cooled bars in an airtight container for up to 3 days; the crust stays tender and the filling remains juicy.
- Refrigeration: Store in the fridge for up to 5 days; let bars come to room temperature or warm briefly before serving.
- Freeze unbaked: Wrap the assembled pan in plastic and foil, freeze up to 1 month, then bake straight from frozen (add 5–10 minutes).
- Freeze baked: Cool and cut bars, layer with parchment in a freezer-safe container, and freeze for up to 2 months; thaw at room temperature.
Frequently Asked Questions
Here are answers to the questions home bakers often ask about these tart-and-sweet rhubarb bars:
- How long does it take to prepare and bake the Sweet & Tart Rhubarb Dream Bars?
From start to finish, you should allow about 15 minutes for preparation and 37 to 42 minutes for baking. Preparation includes chopping rhubarb, measuring ingredients, lining the pan, and making the crumb mixture. The crust bakes for 12 minutes, then after adding the filling and topping, you bake another 25 to 30 minutes. Allow additional cooling time of at least 30 minutes before slicing.
- Can I use frozen rhubarb instead of fresh, and how should I prepare it?
Yes, you can use frozen rhubarb. Thaw it completely and drain off any excess liquid by pressing or patting it dry with paper towels. This step prevents a soggy filling. Once drained, proceed with combining the rhubarb with sugar, cornstarch, lemon juice, vanilla, and salt as instructed.
- How can I achieve an extra crunchy topping on these bars?
For extra crunch, stir 1/4 cup of chopped nuts such as almonds or pecans into the reserved crumb mixture before sprinkling it over the filling. You can also add a tablespoon of coarse sugar on top of the crumbs just before baking. This will add a sweet, crunchy finish that complements the tart rhubarb.
- How do I know when the bars are perfectly baked and ready to come out of the oven?
The bars are done when the topping is a deep golden color and the rhubarb filling is visibly bubbling around the edges and through the crumbs. The bubbling indicates that the cornstarch has thickened the juices. If the topping is browning too quickly, tent the pan loosely with foil for the remaining bake time.
- Can I reduce the sugar in the rhubarb filling without affecting the texture?
You can reduce the 3/4 cup of granulated sugar in the filling by up to 2 tablespoons if you prefer a less sweet bar. Keep the full 2 tablespoons of cornstarch to ensure proper thickening. If you reduce more sugar, the filling may be more tart and less set, so avoid cutting more than suggested.
- What is the best way to store these bars, and how long will they keep?
Once cooled completely, transfer the bars to an airtight container and store them at room temperature for up to 3 days. If you prefer refrigeration, they will keep for up to 5 days. Before serving leftover bars, let them come to room temperature or warm them briefly in the oven at 300°F for 5 to 7 minutes.
- Can I freeze the Sweet & Tart Rhubarb Dream Bars for later baking or storage?
Yes, you can freeze both unbaked and fully baked bars. For unbaked bars, assemble in the pan, wrap tightly in plastic wrap and foil, and freeze for up to 1 month; bake from frozen, adding 5 to 10 minutes to the baking time. For baked bars, cool completely, cut into squares, place in a single layer in a freezer-safe container with parchment between layers, and freeze for up to 2 months. Thaw at room temperature before serving.
What Makes This Special
These Sweet & Tart Rhubarb Dream Bars are a total crowd-pleaser because they marry a buttery oat crumb with a punchy, tangy filling that’s bubbling with flavor. The contrast between the crisp streusel and tender fruit makes each bite an irresistible adventure. Best of all, they’re simple enough for beginners yet impressive enough for get-togethers—feel free to print this page, save it for later, and come back whenever you need a bright, delicious pick-me-up. Drop a comment or question below if you give them a whirl or need a hand troubleshooting your bake!
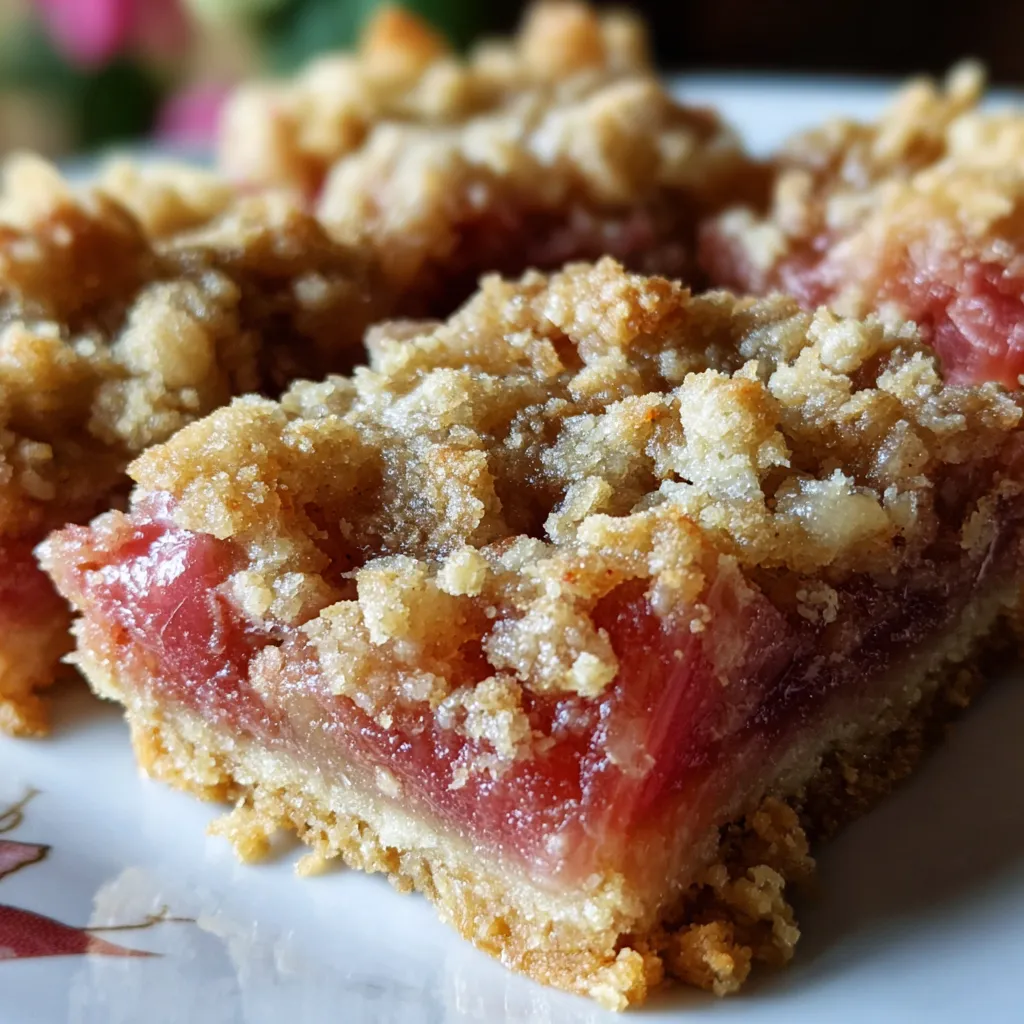

Sweet & Tart Rhubarb Dream Bars
Description
Buttery oat crumb crust gives way to a bubbling tangy rhubarb filling, finished with crisp golden streusel. These bars offer a lively contrast of textures and flavors in every bite.
Ingredients
Instructions
-
Preheat the oven to 350°F (175°C) and line a 9x13-inch baking pan with parchment paper.
-
In a large bowl combine the flour, oats, 1/2 cup granulated sugar, brown sugar, salt, and baking powder.
-
Stir in the melted butter until the mixture forms coarse crumbs.
-
Reserve one-third of the crumb mixture for the topping and press the remaining mixture firmly into the bottom of the prepared pan.
-
Bake the crust for 12 minutes, or until lightly golden.
-
While the crust bakes, combine the chopped rhubarb, 3/4 cup granulated sugar, cornstarch, lemon juice, vanilla extract, and 1/4 teaspoon salt in a separate bowl.
-
Spread the rhubarb filling evenly over the hot crust.
-
Sprinkle the reserved crumb mixture over the filling.
-
Return the pan to the oven and bake for an additional 25 to 30 minutes, or until the topping is golden and the filling is bubbly.
-
Allow the bars to cool completely in the pan before lifting them out using the parchment paper and slicing into squares.
Note
- Use fresh or frozen rhubarb; if using frozen, thaw and drain any excess liquid.
- For extra crunch, stir 1/4 cup of chopped nuts such as almonds or pecans into the topping.
- Store the bars in an airtight container at room temperature for up to 3 days.
- These bars pair perfectly with a dollop of whipped cream or a scoop of vanilla ice cream.

