

Cradling a slice of these Rustic Apple Tarts feels like stepping into a cozy countryside kitchen where the comforting warmth of homemade pastries fills every corner. Savor the comforting warmth of homemade Rustic Apple Tarts, perfect for sharing with loved ones! Each layer of flaky, buttery puff pastry gives way to sweet, cinnamon-spiced apples, offering a delightful contrast of textures and flavors in every bite. As a beginner-friendly dessert, this recipe guides you through easy steps to create something truly special in about 30 minutes of prep, 30 minutes of baking, and a 20-minute rest. With each tart clocking in at roughly 220 calories and serving four, it’s the ideal treat to enjoy after dinner, during a coffee break, or as a charming centerpiece for holiday gatherings.
Experience flaky, buttery pastry filled with sweet and spiced apple goodness. These Rustic Apple Tarts bring the charm of a country kitchen right to your table, infusing your home with nostalgic aromas and cozy memories. Whether you’re drawn to the tart brightness of Granny Smiths or the honeyed sweetness of Honeycrisps, you’ll find that experimenting with apple varieties is half the fun. As the filling rests and melds, you’ll notice the gentle interplay of lemon juice and warm spices. And when that puff pastry puffs and browns in the oven, you’ll know you’ve created something as delightful to look at as it is to taste. Gather your ingredients, roll out that pastry, and get ready to bake a dessert that feels like a warm hug.
KEY INGREDIENTS IN RUSTIC APPLE TARTS
Every delicious Rustic Apple Tart builds on a handful of simple, high-quality ingredients that come together for maximum flavor. Here’s what you’ll need and why each element plays such an important role:
- Apples
These provide the sweet-tart foundation. Granny Smith apples lend a crisp tang, while Honeycrisps offer a more honeyed sweetness. Thin slicing ensures even cooking.
- Lemon Juice
A splash of acidity brightens the fruit flavors, preventing browning and adding a subtle zing that lifts the sweetness.
- Granulated Sugar
Used in two stages, sugar balances the tartness of the apples and creates a caramelized glaze as it bakes.
- Ground Cinnamon
This warm spice infuses the filling with cozy, aromatic notes that pair perfectly with baked fruit.
- Ground Nutmeg
Just a pinch adds depth and a hint of nutty warmth, rounding out the spice blend.
- Salt
A small amount sharpens the overall flavor and enhances the sweetness in the filling.
- All-Purpose Flour
Helps thicken the apple juices as they bake, ensuring the tart filling holds together beautifully.
- Unsalted Butter
Dotted on top of the filling, butter melts into rich pockets of flavor that make every bite indulgent.
- Puff Pastry Sheet
Provides a golden, flaky base and border for the apple filling, delivering that irresistible crispness.
- Egg (Egg Wash)
Brushed on the pastry edges for a glossy, golden finish that elevates the presentation.
- Powdered Sugar (Optional)
A light dusting adds a touch of elegance and extra sweetness just before serving.
HOW TO MAKE RUSTIC APPLE TARTS
Let’s walk through the straightforward steps that transform those simple ingredients into a rustic masterpiece. Each step is designed for beginner bakers, so you can bake with confidence and enjoy a stunning dessert that looks as impressive as it tastes.
1. Preheat your oven to 400°F (200°C). Line a baking sheet with parchment paper to ensure the tarts don’t stick and facilitate easy cleanup.
2. In a large mixing bowl, combine the thinly sliced apples with lemon juice, half of the granulated sugar, cinnamon, nutmeg, salt, and flour. Toss everything gently until the apples are evenly coated. Let the mixture sit for 15–20 minutes so the flavors can meld and the sugar begins to draw out natural juices.
3. On a lightly floured surface, roll out the puff pastry sheet to smooth out creases, aiming for about 1/8-inch thickness. Using a sharp knife, cut the pastry into four equal squares or rectangles.
4. Transfer each pastry piece onto the prepared baking sheet. With a sharp knife, carefully score a 1/2-inch border around the edges of each square—don’t cut all the way through; this border will become the tart’s crust.
5. Spoon the apple mixture into the center of each pastry, keeping the filling within the scored border. Distribute small pieces of diced butter over the top for extra richness.
6. Brush the exposed pastry edges with the beaten egg to achieve a glossy, golden finish during baking.
7. Sprinkle the remaining granulated sugar over the apples to encourage caramelization and an irresistible sweet crust.
8. Bake the tarts in the preheated oven for 25–30 minutes, or until the pastry is puffed and deep golden, and the apples have softened.
9. Remove the tarts and let them cool slightly on a wire rack—this helps the filling set and keeps the pastry crisp.
10. If you like, dust with powdered sugar just before serving for a delicate finishing touch.
SERVING SUGGESTIONS FOR RUSTIC APPLE TARTS
When these tarts emerge from the oven, the real fun begins—deciding how to serve them. Whether you’re hosting a casual brunch or a festive holiday table, these ideas will elevate your presentation and delight every palate:
- Warm with Vanilla Ice Cream
Serve a slice while it’s still slightly warm and top it with a generous scoop of vanilla ice cream. The melting cream complements the cinnamon-spiced apples and adds a luxurious creaminess.
- Drizzle of Caramel Sauce
Enhance the caramelization by drizzling a bit of homemade or store-bought caramel sauce over each tart. It adds a buttery depth and looks stunning against the golden pastry.
- Whipped Cream and Fresh Berries
A dollop of lightly sweetened whipped cream paired with fresh raspberries or blueberries brings a bright, fruity counterpoint to the rich apples and pastry.
- Maple Syrup Glaze
Brush a thin layer of maple syrup over the warm tarts immediately after baking. This glossy finish adds a touch of sweetness and a hint of maple flavor that’s perfect for autumn gatherings.
HOW TO STORE RUSTIC APPLE TARTS
Keeping these tarts fresh and delicious is easier than you might think, so you can enjoy them for days after baking. Whether you have leftovers or want to prepare ahead for a big event, here are the best practices to preserve texture and flavor:
For short-term storage (up to two days), let the tarts cool completely and then keep them in an airtight container at room temperature. This prevents the pastry from becoming soggy while maintaining its flaky structure.
If you’d like to store them in the refrigerator, wrap each tart loosely in plastic wrap, then place them in a sealed container. Chilled tarts can last up to four days, but you may need to reheat them briefly in a 350°F oven to restore crispiness.
For longer-term storage, freeze individual tarts on a baking sheet until firm, then transfer them to a freezer-safe bag with parchment paper between layers. Frozen tarts can stay fresh for up to one month. Reheat straight from the freezer at 350°F for 10–12 minutes.
To revive the pastry’s flaky texture, always use an oven or toaster oven rather than a microwave. The dry heat helps crisp the layers without making them chewy.
CONCLUSION
This Rustic Apple Tarts recipe is your gateway to a delightful homemade dessert that’s as comforting as it is impressive. We’ve walked through everything from selecting the perfect apples to mastering the golden, flaky puff pastry border, covering the beginner-friendly steps and times—30 minutes of hands-on prep, 30 minutes in the oven, and a 20-minute rest. You’ve learned how to spice your filling with cinnamon and nutmeg, how to thicken it with flour, and how to finish with an egg wash for that irresistible glow. We’ve also explored creative serving suggestions, from pairing with vanilla ice cream to drizzling with caramel sauce, ensuring each slice becomes a moment to savor. Plus, the storage tips will help you keep these tarts fresh, whether you’re enjoying leftovers or planning ahead for a special occasion.
Feel free to print this article and save it for future baking sessions; it’s designed as a standalone guide that you can reference whenever the craving for a homey, rustic dessert strikes. Below, you’ll find a handy FAQ section to answer any lingering questions about ingredient swaps, troubleshooting, or flavor variations. If you decide to bake these Rustic Apple Tarts, please share your experiences—comments, questions, or feedback are always welcome. Whether you’re a seasoned baker or just starting out, I’m here to help you create a dessert that brings warmth and joy to your table.
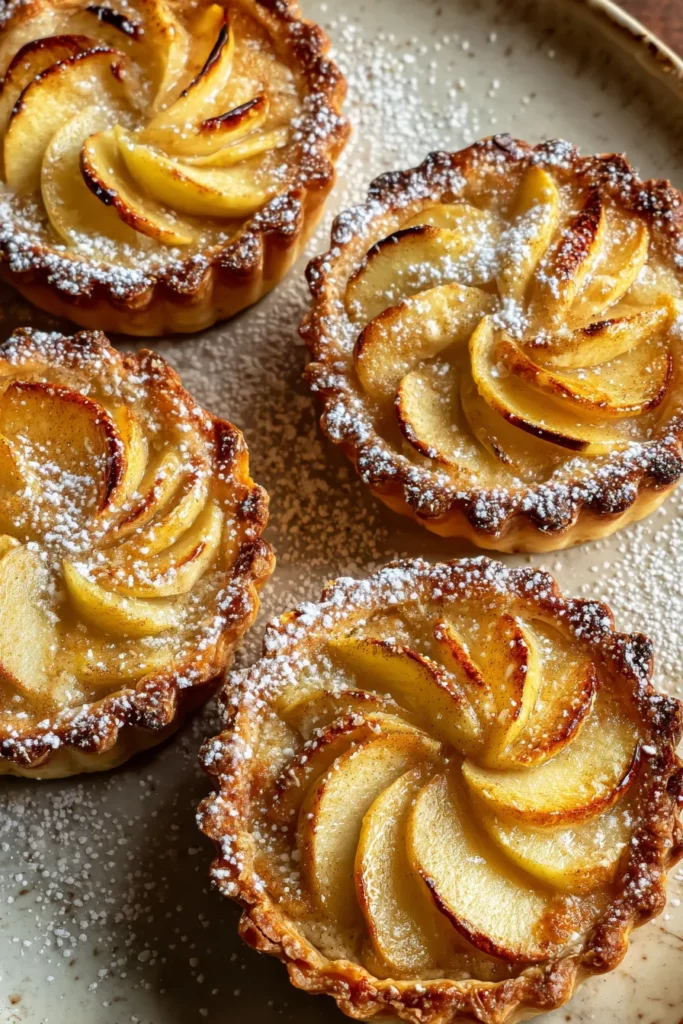

Rustic Apple Tarts
Description
Experience flaky, buttery pastry filled with sweet and spiced apple goodness. These Rustic Apple Tarts bring the charm of a country kitchen right to your table.
Ingredients
Instructions
-
Preheat your oven to 400°F (200°C). Line a baking sheet with parchment paper to prevent sticking.
-
In a large mixing bowl, combine the thinly sliced apples with lemon juice, 1/4 cup of granulated sugar, cinnamon, nutmeg, salt, and flour. Toss to coat the apples evenly. Let the mixture sit for about 15-20 minutes to allow the flavors to meld.
-
On a lightly floured surface, roll out the puff pastry sheet to smooth out any creases and ensure it is about 1/8 inch thick. Cut the pastry into four equal squares or rectangles, depending on your preference for the tart shape.
-
Transfer the pastry squares onto the prepared baking sheet. Using a sharp knife, carefully score a 1/2-inch border around the edges of each pastry, being careful not to cut all the way through.
-
Spoon the apple mixture into the center of each pastry, ensuring that it remains within the scored border. Dot the filling with small pieces of diced butter.
-
Brush the edges of the pastry with the beaten egg to give it a golden color when baked.
-
Sprinkle the remaining 1/4 cup of sugar over the apples for added sweetness and caramelization during baking.
-
Bake in the preheated oven for 25-30 minutes, or until the pastry is puffed and golden brown, and the apples are tender.
-
Once baked, remove the tarts from the oven and allow them to cool slightly on a wire rack.
-
If desired, dust with powdered sugar before serving for an added touch of sweetness and presentation.
Note
- Experiment with different varieties of apples for unique flavor combinations.
- For an extra layer of flavor, consider adding a tablespoon of vanilla extract to the apple mixture.
- These tarts are perfect served warm with a scoop of vanilla ice cream or a dollop of whipped cream.
- Store any leftovers in an airtight container at room temperature for up to two days.

