

Crisp autumn evenings bring out my favorite baking mood, and nothing feels more festive than whipping up a batch of Spooky Spiced Halloween Cookies with Creamy Frosting. These treats are my go-to when I want that perfect blend of cozy warmth and playful Halloween fun. The blend of cinnamon, ginger, subtle notes of nutmeg, and aromatic allspice swirling through the oven smells like a haunted kitchen in the best possible way. Toss in a drizzle of molasses for deep, caramel-like sweetness and just the right chew, and you’ve got a cookie that practically dances from the baking sheet to your taste buds. The silken swirls of frosting on top aren’t just icing—they’re a sugary canvas waiting for your spooky artistry, whether you choose to pipe little ghost faces or splash on vibrant colors. I still remember the first time I saw my nephew’s eyes light up when I handed him a pumpkin-shaped cookie dressed in neon green frosting—it’s moments like that which make all the stirring, scooping, and decorating so priceless.
Every Halloween get-together I host is elevated by these spiced wonders, and the best part? You don’t need to be an expert baker to nail this recipe. As a beginner-friendly dessert, it only requires about 20 minutes of hands-on prep, a quick 12-minute stint in the oven, and a brief 5-minute cooling period before adding that dreamy creamy frosting. With about 150 calories per cookie and yielding 24 perfectly portioned treats, it’s a guilt-manageable indulgence everyone will adore. Whether you’re looking to impress trick-or-treaters, deck out a spooky dessert table, or just savor the flavors of fall with a cup of cider, these cookies deliver cozy nostalgia and festive flair in every bite.
KEY INGREDIENTS IN SPOOKY SPICED HALLOWEEN COOKIES WITH CREAMY FROSTING
Every great recipe starts with quality ingredients that work together like a well-rehearsed ghost choir. Below are the stars that bring warmth, sweetness, and spooktacular charm to these Halloween cookies and their creamy frosting.
- All-purpose flour
Provides the structure and foundation for the cookies, ensuring they hold their shape while remaining tender.
- Baking soda
Acts as a leavening agent to give the cookies a subtle lift and light texture.
- Baking powder
Adds extra rise and a gentle crumb, balancing the chewiness from the molasses.
- Salt
Enhances all the sweet and spicy flavors, ensuring the cookies aren’t one-note.
- Ground cinnamon
Infuses a warm, sweet-spicy depth that’s synonymous with fall.
- Ground ginger
Brings a zesty, slightly peppery kick to every bite.
- Ground nutmeg
Offers a mellow, nutty nuance that complements the other spices.
- Ground allspice
Marries cinnamon, cloves, and nutmeg flavors into a singular aromatic punch.
- Unsalted butter
Adds richness, moisture, and that perfect melt-in-your-mouth texture.
- Granulated sugar
Sweetens and helps create a tender, golden cookie edge.
- Brown sugar
Contributes molasses undertones and extra chewiness.
- Large egg
Binds the dough, adding moisture and structure.
- Vanilla extract
Rounds out the spice blend with sweet, floral notes.
- Molasses
Lends deep color, robust flavor, and that signature soft chew.
- Powdered sugar
Forms the silky-smooth base of the frosting, giving it body and sweetness.
- Unsalted butter (for frosting)
Ensures the frosting is creamy and rich without overwhelming sweetness.
- Milk
Thins the frosting to the perfect spreading consistency.
- Vanilla extract (for frosting)
Adds a fragrant finish to the creamy topping.
- Food coloring (optional)
Transforms plain frosting into spooky hues like ghostly white, wicked green, or ghastly orange.
HOW TO MAKE SPOOKY SPICED HALLOWEEN COOKIES WITH CREAMY FROSTING
Let’s roll up our sleeves and turn these ingredients into delicious, spooky treats! Follow each detailed step to ensure your cookies come out tender, perfectly spiced, and topped with the creamiest frosting.
1. Preheat your oven to 350°F (175°C) and line two baking sheets with parchment paper. This prevents sticking and makes cleanup a breeze, so your cookies slide right off once baked.
2. In a medium bowl, whisk together the flour, baking soda, baking powder, salt, cinnamon, ginger, nutmeg, and allspice. This ensures every spice is evenly distributed, creating balanced flavor in each cookie.
3. In a large mixing bowl, cream together the softened butter, granulated sugar, and brown sugar until light and fluffy—about 3 to 5 minutes with an electric mixer. This aeration creates a tender, melt-in-your-mouth texture.
4. Beat in the egg, vanilla extract, and molasses until fully combined. The dough will be glossy and fragrant, hinting at the rich fall flavors to come.
5. Gradually add the dry ingredient mixture to the wet ingredients, mixing until just combined. Be careful not to overmix, or you’ll develop gluten and risk a tougher cookie. The dough should remain soft and slightly sticky.
6. Using a tablespoon or cookie scoop, drop rounded balls of dough onto the prepared baking sheets, spacing each about 2 inches apart. This gives them room to spread without merging into one another.
7. Bake in the preheated oven for 10 to 12 minutes, or until the edges are lightly browned and the centers just set. Remove from the oven and let the cookies cool on the baking sheet for about 5 minutes before transferring them to a wire rack to cool completely.
8. While the cookies are cooling, prepare the creamy frosting. In a medium bowl, beat together the powdered sugar, softened butter, milk, and vanilla extract until smooth and creamy. If you want extra Halloween flair, add a few drops of food coloring to tint your frosting a spooky shade.
9. Once the cookies are completely cooled, spread or pipe the creamy frosting on top of each cookie. Finish with sprinkles or other edible decorations to amp up the festive vibe.
SERVING SUGGESTIONS FOR SPOOKY SPICED HALLOWEEN COOKIES WITH CREAMY FROSTING
Now that your cookies are baked and beautifully frosted, it’s time to think about presentation. Whether you’re hosting a haunted party, surprising neighbors, or simply indulging in a cozy night in, creative serving ideas will make these treats shine.
- Themed Dessert Platter
Arrange cookies on a rustic wooden board or black slate, then accent with mini pumpkins, dried leaves, and candy corn. This contrast of textures makes each cookie pop and invites guests to sample.
- Frighteningly Fun Cookie Tower
Stack your frosted cookies on a tiered cake stand, alternating colors of frosting for a dramatic effect. Top the tower with a small faux spider or festive sign that reads “Trick or Treat.”
- Spice-Infused Beverage Pairing
Serve alongside hot apple cider, spiced chai tea, or even a steaming mug of cocoa. Encourage guests to dunk a cookie for an extra gooey, cozy bite.
- Takeaway Treat Bags
Package two to three cookies in cellophane bags tied with orange and black ribbon. Add a personalized name tag or spooky sticker for a charming party favor or neighbor gift.
HOW TO STORE SPOOKY SPICED HALLOWEEN COOKIES WITH CREAMY FROSTING
Freshness is key to enjoying these spiced cookies at their best. Proper storage will keep them soft, flavorful, and festively frosted for days after Halloween night.
- Airtight Container at Room Temperature
Layer cookies in a container separated by parchment paper to prevent sticking. Store on the counter for up to 3 days, making sure frosting isn’t too thick to avoid smudging.
- Refrigeration for Extended Freshness
If your kitchen is warm or you need to keep cookies longer, place them in an airtight container in the fridge. They’ll stay fresh for up to a week, though the frosting may become slightly firmer—just let them sit at room temperature for 10 minutes before serving.
- Freezing Cookie Dough
Scoop dough balls and freeze them on a baking sheet until solid, then transfer to a freezer bag. Bake from frozen, adding a couple of extra minutes to the bake time. Frost freshly baked cookies as usual.
- Freezing Fully Baked Cookies
You can freeze completely cooled, unfrosted cookies in a single layer on a tray. Once solid, transfer to a freezer-safe bag. Thaw at room temperature and frost just before serving to maintain that creamy finish.
CONCLUSION
I hope this recipe for Spooky Spiced Halloween Cookies with Creamy Frosting inspires you to embrace all the warm, festive flavors of fall and unleash your inner cookie decorator. From whisking together fragrant spices to spreading those creamy frosting swirls, each step is an opportunity to create a memorable treat that’s both beginner-friendly and crowd-pleasing. Whether you’re baking for school parties, hosting a haunted gathering, or simply enjoying a quiet evening curled up with a mug of cider, these cookies bring that perfect balance of spice, sweetness, and spooky spirit.
Feel free to print this article and save it for later use—you’ll want to refer back when Halloween night rolls around again! You can also find a FAQ below if you have any questions about ingredient swaps, decorating tips, or baking times. If you try this recipe or need help along the way, I’d love to hear from you. Leave a comment with your feedback, questions, or even your own frosting designs. Happy haunting and happy baking!
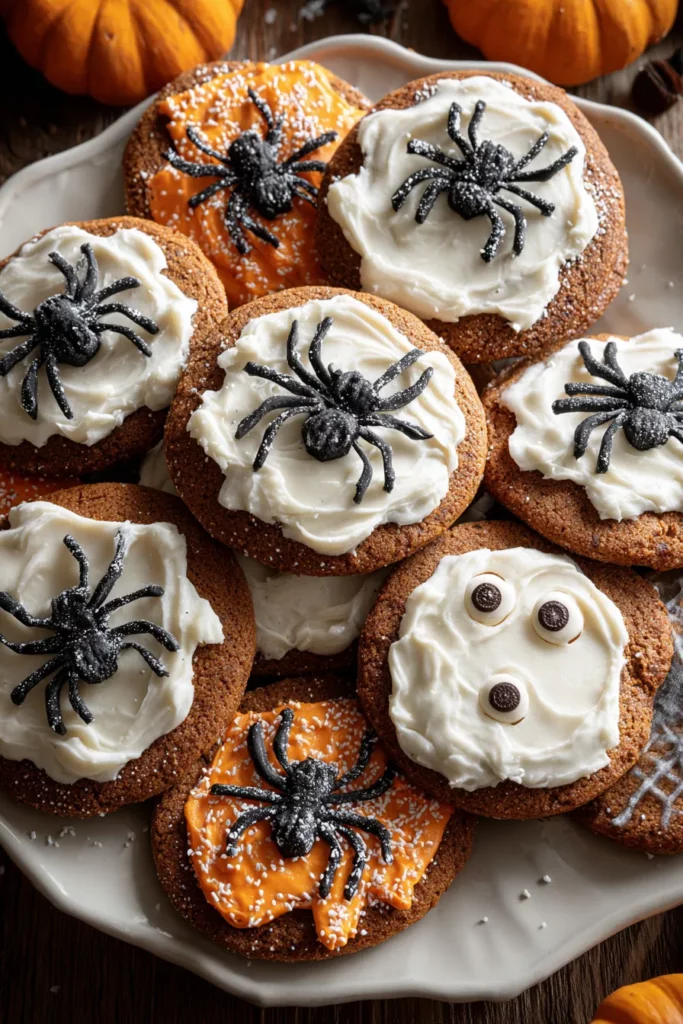

Spooky Spiced Halloween Cookies with Creamy Frosting
Description
These cookies combine warm spices like cinnamon, ginger, and nutmeg for a festive flavor, all crowned with a smooth, creamy frosting perfect for Halloween fun!
Ingredients
Instructions
-
Preheat your oven to 350°F (175°C) and line two baking sheets with parchment paper.
-
In a medium bowl, whisk together the flour, baking soda, baking powder, salt, cinnamon, ginger, nutmeg, and allspice. Set aside.
-
In a large mixing bowl, cream together the softened butter, granulated sugar, and brown sugar until light and fluffy, about 3 to 5 minutes.
-
Beat in the egg, vanilla extract, and molasses until fully combined.
-
Gradually add the dry ingredient mixture to the wet ingredients, mixing until just combined. Do not overmix. The dough will be soft.
-
Using a tablespoon or cookie scoop, drop rounded balls of dough onto the prepared baking sheets, leaving about 2 inches of space between each cookie.
-
Bake in the preheated oven for 10 to 12 minutes, or until the edges are lightly browned. Remove from the oven and allow cooling on the baking sheet for about 5 minutes before transferring them to a wire rack to cool completely.
-
While the cookies are cooling, prepare the creamy frosting. In a medium bowl, beat together the powdered sugar, softened butter, milk, and vanilla extract until smooth and creamy. If desired, add a few drops of food coloring to create spooky colors.
-
Once the cookies are completely cooled, spread or pipe the creamy frosting on top of each cookie, decorating with sprinkles or edible decorations to enhance the Halloween theme.
Note
- These cookies can be stored in an airtight container for up to a week.
- Feel free to modify the spices according to your taste preferences.
- Using cookie cutters in fun Halloween shapes before baking can add an extra spooky touch.
- The frosting can be flavored with cinnamon or pumpkin spice to complement the cookies.

