

There’s nothing quite like the joyful anticipation that bubbles up when you know fresh sourdough cheesy breadsticks are on the horizon. These golden, twisty delights marry the tangy complexity of a well-fed sourdough starter with oodles of molten cheese and fragrant Italian herbs. Each bite offers that satisfying pull of mozzarella strings, a whisper of garlic, and a hint of red pepper heat dancing on your palate. Over the years, I’ve found myself sneaking into the kitchen as they bake—just to catch a glimpse of the cheese, bubbling and browning at the edges. It’s that comforting, homemade vibe that instantly warms both heart and home.
My very first batch came about when I realized my sourdough starter needed a purpose beyond lazy weekend pancakes. Armed with shredded mozzarella, a handful of Parmesan, and my grandmother’s secret stash of dried herbs, I rolled out the dough in my tiny city apartment and prayed it would rise. Rise it did—and oh, did it smell heavenly! The house filled with an irresistible hum of savory promise. Friends gathered around, fingers greasy from melted cheese, swapping stories between bites. That’s the magic of these breadsticks: they bring people together, spark conversation, and turn any ordinary day into a celebration of simple, soulful baking.
KEY INGREDIENTS IN SOURDOUGH CHEESY BREADSTICKS
Every one of these ingredients plays a starring role in creating the perfect balance of tang, texture, and cheesy goodness. Read on to discover how each component contributes to the overall taste and structure of our irresistible breadsticks.
- Active sourdough starter
This bubbly, fermented culture provides the signature tang and airy structure. It’s responsible for a gentle rise, deep flavor, and those delightful nooks and crannies in the dough.
- All-purpose flour
The backbone of the dough, all-purpose flour offers a neutral protein content that strikes a balance between chewiness and tenderness. It builds gluten, giving the breadstick its satisfying bite.
- Salt
A crucial flavor amplifier, salt sharpens the dough’s taste and helps control fermentation. It ensures your breadsticks are never bland.
- Garlic powder
This pantry staple infuses the dough with a mellow garlic note. It melds seamlessly with the sourdough tang and cheese.
- Red pepper flakes (optional)
For those seeking a subtle kick, red pepper flakes bring a warm, lingering heat that cuts through the richness of the cheese.
- Shredded cheese (mozzarella, cheddar, or a mix)
The star of the show, shredded cheese melts into gooey pockets. Mozzarella lends stretchiness while cheddar contributes sharp depth.
- Grated Parmesan cheese
Adding nuttiness and salty umami, Parmesan forms a savory crust when toasted and elevates every bite.
- Olive oil
Brushed on before baking, olive oil creates a golden, crispy exterior and helps herbs adhere. It also adds a fruity, peppery layer of flavor.
- Dried Italian herbs
A blend of oregano, basil, or your favorite mix adds fragrance and herbaceous undertones that complement the cheese beautifully.
- Cornmeal (for dusting)
Sprinkled on the baking sheet, cornmeal prevents sticking and adds a rustic crunch to the breadstick base.
- Extra cheese for topping (if desired)
A final shower of cheese ensures ooey-gooey peak moments and an extra layer of golden, bubbly goodness.
HOW TO MAKE SOURDOUGH CHEESY BREADSTICKS
Let’s roll up our sleeves and dive into the step-by-step process of transforming simple ingredients into warm, cheesy breadsticks. Each stage, from mixing to baking, is an opportunity to infuse love and flavor into your snack.
1. In a large mixing bowl, combine the active sourdough starter, all-purpose flour, salt, garlic powder, and red pepper flakes (if using). Stir until a rough dough begins to form, ensuring all components are evenly incorporated.
2. Transfer the dough to a lightly floured surface and knead for about 5 to 7 minutes. Work the dough until it becomes smooth and elastic, adding a dusting of flour if it feels sticky.
3. Shape the dough into a ball and place it in a greased bowl. Cover with a clean kitchen towel or plastic wrap and let it rise at room temperature for 2 to 3 hours, or until doubled in size.
4. Preheat your oven to 425°F (220°C). Line a baking sheet with parchment paper and sprinkle it generously with cornmeal to prevent sticking.
5. Once the dough has risen, punch it down gently to release excess air. Transfer to a floured surface and roll it out into a rectangle roughly 1/4 inch thick.
6. Brush the surface of the rolled-out dough with olive oil. Evenly sprinkle the shredded cheese, grated Parmesan, and dried Italian herbs over the top. Fold the dough in half and press gently along the edges to seal the filling.
7. Using a sharp knife or pizza cutter, cut the dough into long strips about 1 inch wide. Twist each strip a few times to create a dynamic shape and place them on the prepared baking sheet.
8. If you’re feeling extra cheesy, sprinkle a little extra cheese on top of each twisted strip for a decadent finish.
9. Bake in the preheated oven for 12 to 15 minutes, or until the breadsticks turn golden brown and the cheese is bubbling.
10. Remove from the oven and let cool slightly on a wire rack. Serve warm and enjoy the stretchy, savory delights!
SERVING SUGGESTIONS FOR SOURDOUGH CHEESY BREADSTICKS
These breadsticks shine as a snack, appetizer, or side dish. Here are some mouthwatering ways to present and pair them for maximum enjoyment:
- Classic Marinara Dip
Serve with a warm bowl of homemade marinara sauce or your favorite store-bought variety. The tangy tomato base is the perfect counterpoint to cheesy richness.
- Herb-Infused Olive Oil
Mix extra-virgin olive oil with minced garlic, a pinch of red pepper flakes, and chopped fresh parsley. Drizzle over or dip the breadsticks for a bright, aromatic twist.
- Charcuterie Board Accent
Arrange the breadsticks alongside cured meats, olives, and cheese cubes. Their crisp-chewy texture adds wonderful variety to any grazing spread.
- Soup Companion
Pair with a bowl of creamy tomato bisque or minestrone. The hearty chew and cheesy pockets make every spoonful even more comforting.
HOW TO STORE SOURDOUGH CHEESY BREADSTICKS
To keep your breadsticks tasting fresh and delightful, proper storage is key. Whether you’re saving leftovers for tomorrow’s snack or prepping in advance, these methods will help maintain their texture and flavor.
- Refrigeration in Airtight Container
Once fully cooled, place breadsticks in an airtight container or heavy-duty resealable bag. Store in the refrigerator for up to 2 days. Reheat in a warm oven to restore crispness.
- Freezing for Longer Storage
Freeze cooled breadsticks on a baking sheet until firm, then transfer to a freezer bag. Store for up to 1 month. Reheat from frozen in a 350°F oven for about 10 minutes, or until heated through.
- Reviving Crunch with a Toaster Oven
For day-old breadsticks, pop them into a toaster oven preheated to 375°F for 3–5 minutes. This brings back the golden exterior and melty interior.
- Sealing in Freshness with Parchment Wrap
Wrap individual breadsticks in parchment paper before placing in a container. This prevents moisture buildup and keeps each twist intact and crisp.
CONCLUSION
Baking these sourdough cheesy breadsticks is more than just following a recipe—it’s an experience that fills your kitchen with warmth, friendship, and the irresistible pull of melted cheese. From mixing the dough and watching it rise to twisting each strip and broiling it to golden perfection, every step invites you to slow down, savor the process, and share the results with loved ones. These breadsticks are the kind of easy-to-make treat that transforms a quiet evening into a memorable gathering, or brightens up an ordinary day with unexpected delight.
Feel free to print this article and save it in your recipe binder for those days when you need a quick snack or a show-stopping appetizer. You can also find a FAQ below to help troubleshoot any baking questions. If you try this recipe, I’d love to hear how it turns out! Drop a comment, share your tips, or ask any questions if you need a hand perfecting your twists. Happy baking and cheese-filled snacking!
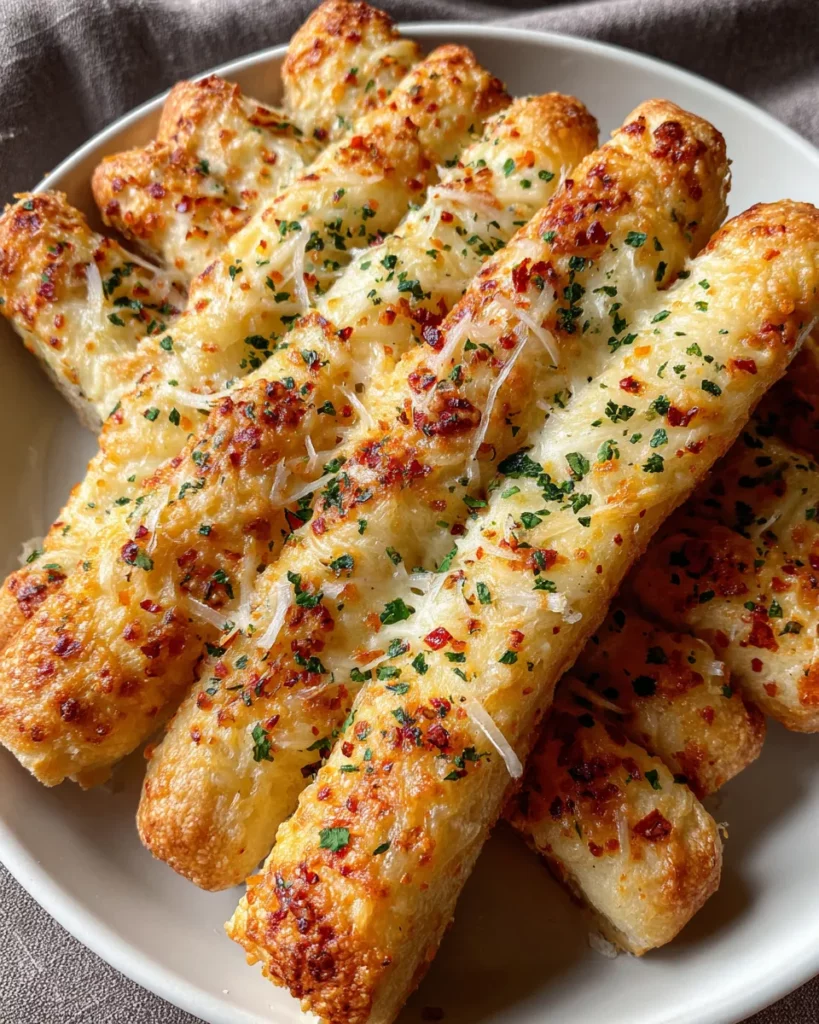

Sourdough Cheesy Breadsticks
Description
These scrumptious sourdough cheesy breadsticks combine tangy sourdough with gooey cheese and aromatic herbs, creating a delightful treat perfect for any occasion.
Ingredients
Instructions
-
In a large mixing bowl, combine the active sourdough starter, all-purpose flour, salt, garlic powder, and red pepper flakes (if using). Mix until a rough dough begins to form.
-
Knead the dough on a lightly floured surface for about 5 to 7 minutes, until it becomes smooth and elastic. You can add a little more flour if the dough is too sticky.
-
Form the dough into a ball and place it in a greased bowl, covering it with a clean kitchen towel or plastic wrap. Let it rise at room temperature for 2 to 3 hours, or until it has doubled in size.
-
Preheat your oven to 425°F (220°C) and line a baking sheet with parchment paper, then sprinkle it with cornmeal.
-
Once the dough has risen, punch it down gently and transfer it to a floured surface. Roll it out into a rectangular shape, about 1/4 inch thick.
-
Brush the rolled-out dough with olive oil, then sprinkle with the shredded cheese, grated Parmesan, and dried Italian herbs. Fold the dough in half and gently press to seal the filling inside.
-
Cut the dough into long strips, about 1 inch wide, using a sharp knife or pizza cutter. Twist each strip a few times to create a fun shape and place them on the prepared baking sheet.
-
If desired, sprinkle a little extra cheese on top of the twisted strips.
-
Bake in the preheated oven for 12 to 15 minutes or until golden brown and cheese is bubbling.
-
Remove from the oven and let cool slightly before serving. Enjoy while warm!
Note
- These breadsticks can be easily customized with different cheeses and spices to suit your taste.
- Leftovers can be stored in an airtight container for up to 2 days.
- For a more flavorful dough, consider adding herbs directly into the dough during the initial mixing stage.
- Pair them with marinara sauce or your favorite dip for a delicious appetizer or snack.
- Experiment by adding cooked bacon bits or olives for a twist on flavor.

